OpenAI’s Apps SDK represents a significant shift in how developers can create interactive applications that run directly inside ChatGPT. Announced at OpenAI’s Dev Days in October ’25, this SDK allows you to build applications that let users accomplish tasks without ever leaving the ChatGPT interface. Think of it as custom GPTs with a user interface, combining the power of Model Context Protocol (MCP) servers with embedded HTML widgets that create seamless, conversation-driven experiences.
This tutorial walks you through everything you need to know about building ChatGPT Apps, from understanding the fundamentals to creating your own custom applications and preparing them for submission to OpenAI’s app ecosystem. Feel free to follow along with the video or read the written version below.
Apps SDK Fundamentals
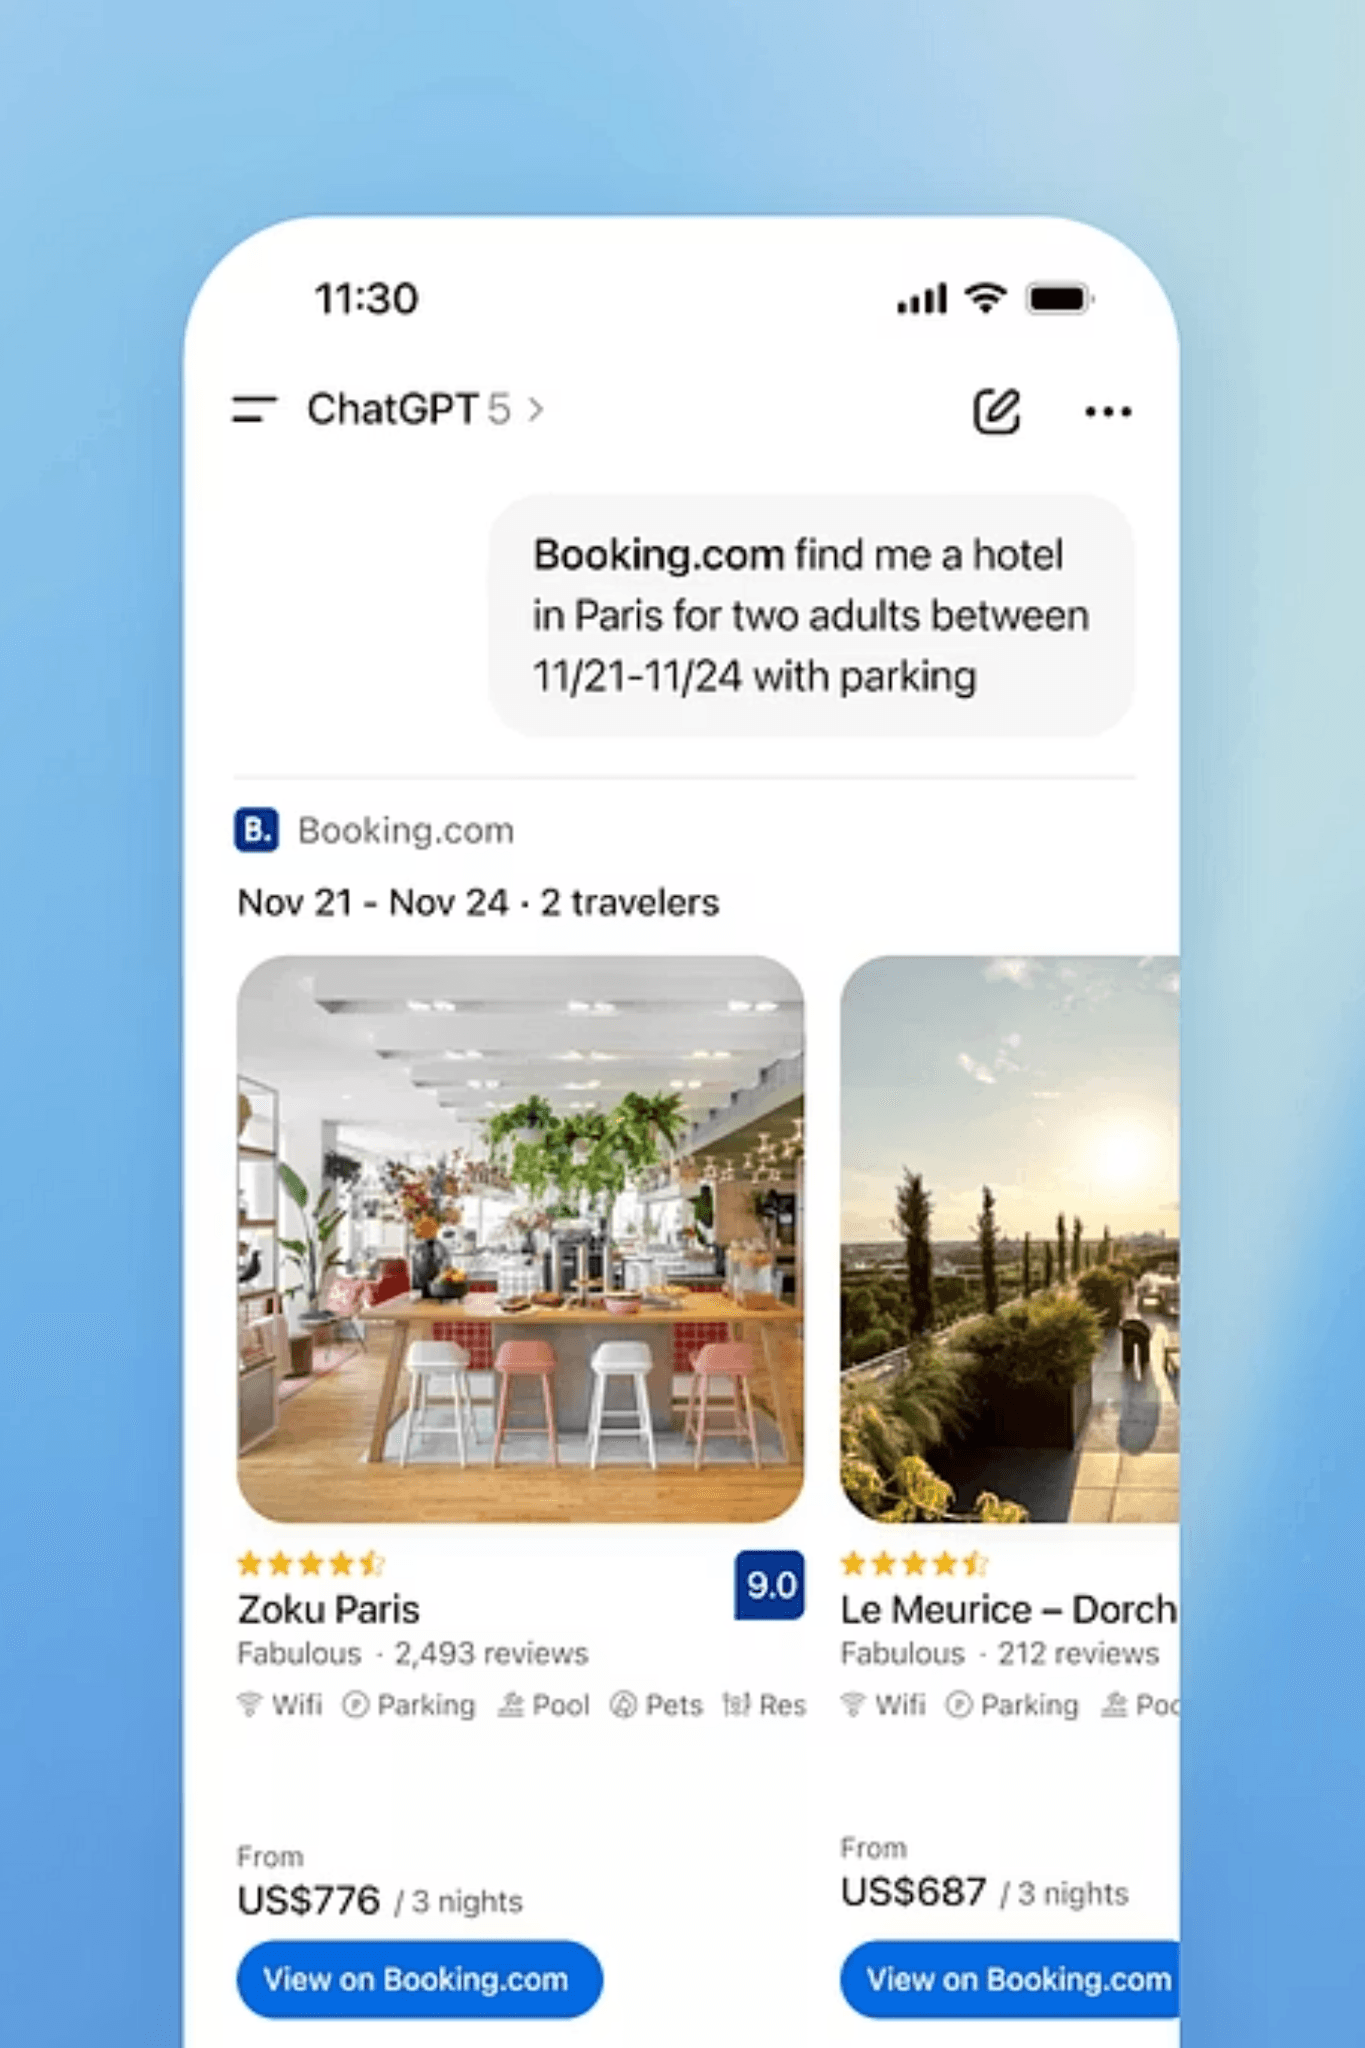
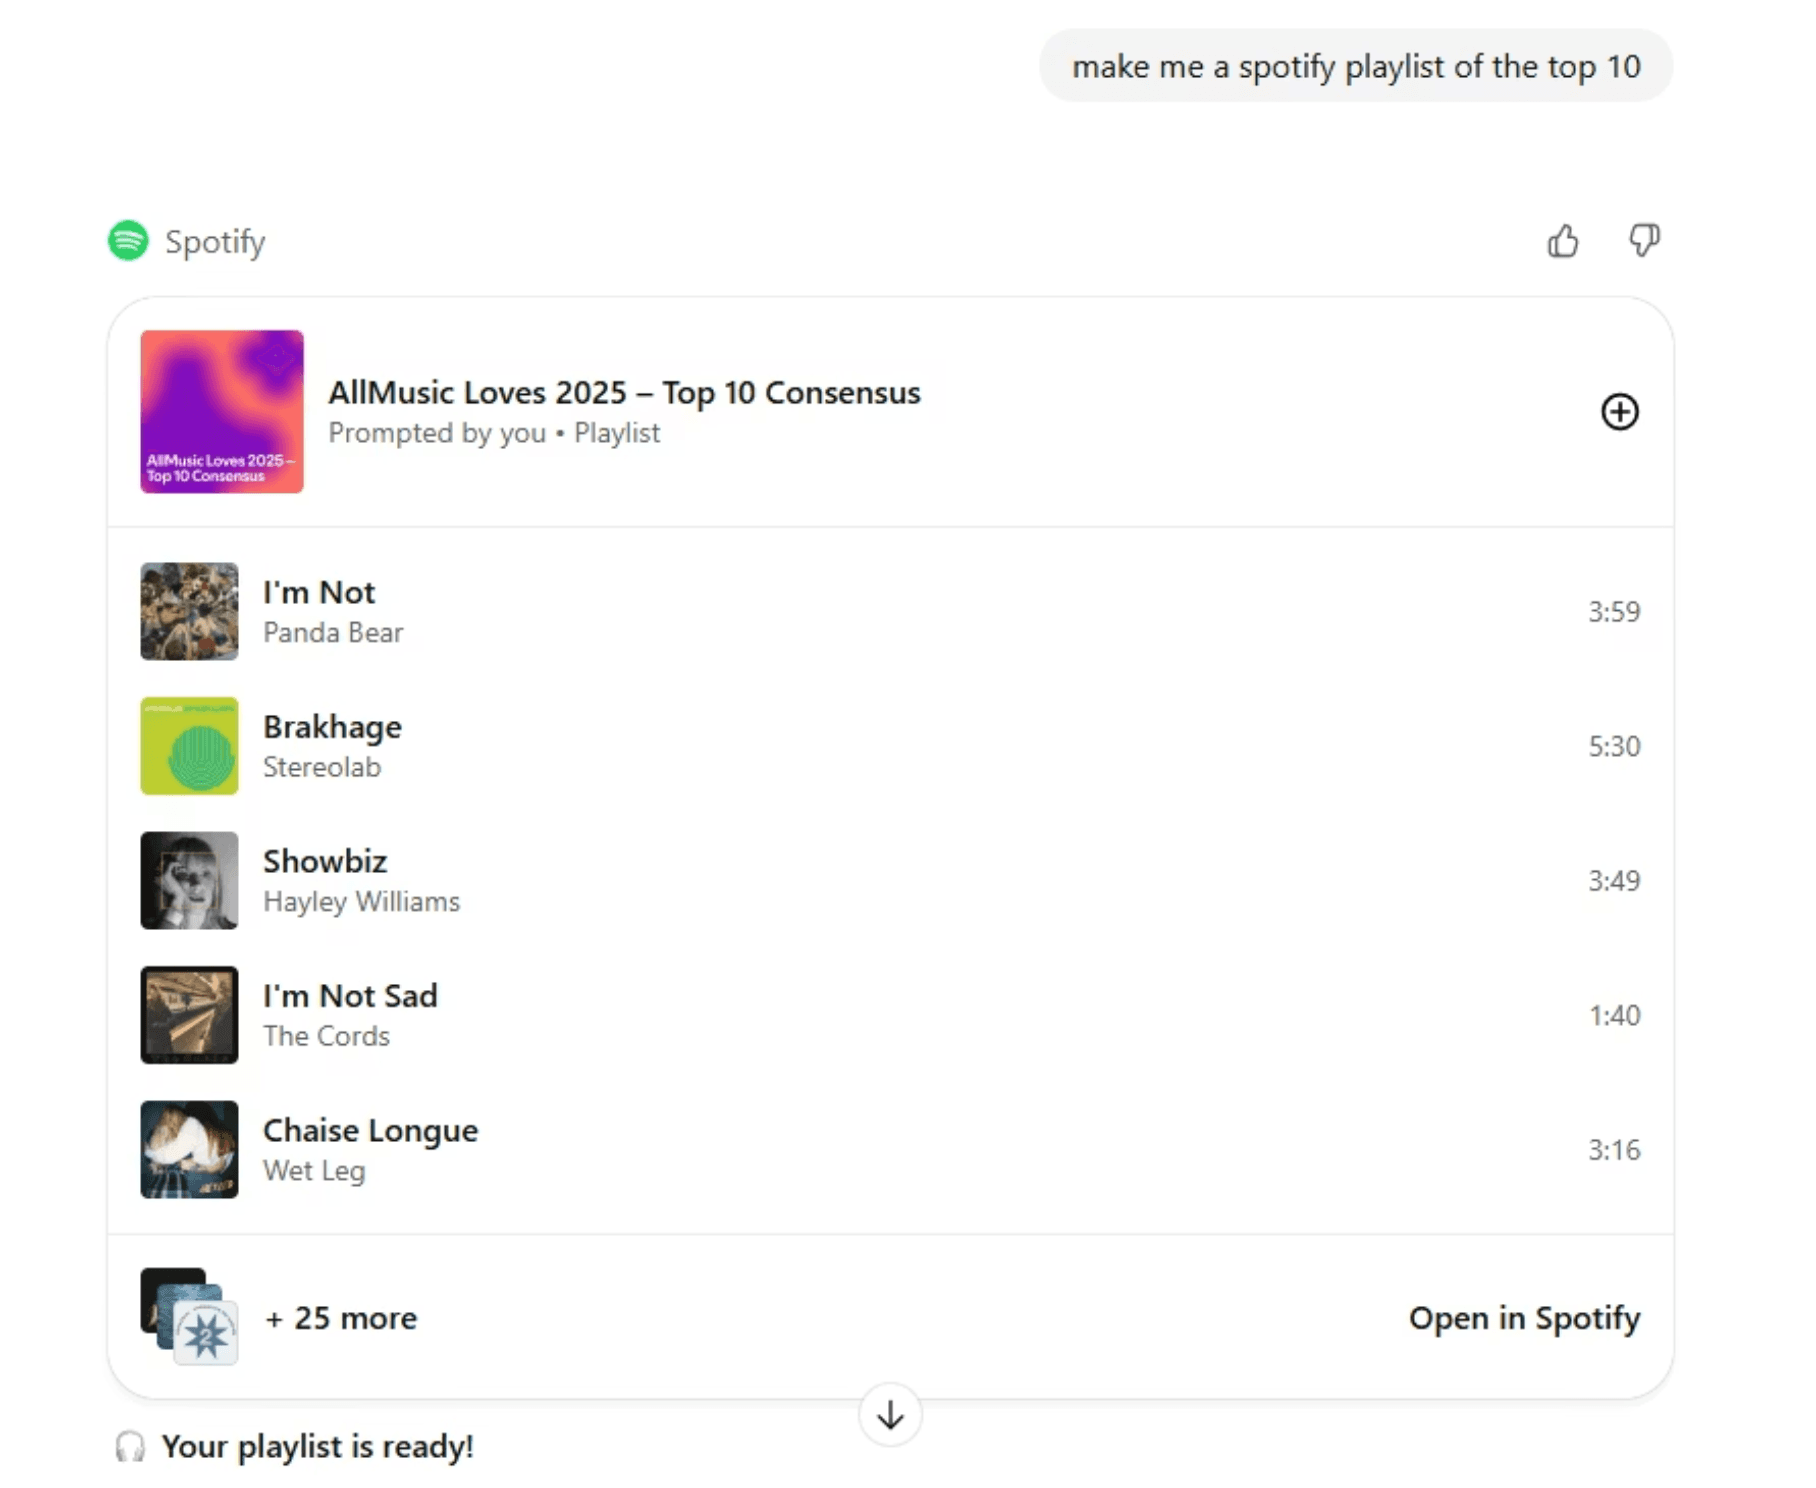
The Apps SDK fundamentally changes how users interact with external services through ChatGPT. Currently, when you ask ChatGPT to perform tasks involving external services like Spotify or Booking.com, you typically receive instructions that require leaving the interface. With the Apps SDK, those interactions happen directly within ChatGPT through embedded user interfaces.
Major companies like Salesforce, Slack, Instacart, and OpenTable have already built apps using this framework. The exciting part is that any developer can now create their own apps to connect custom services directly to ChatGPT. This opens up possibilities for exposing your own software-as-a-service applications to ChatGPT users, creating a potential new revenue channel for your products.
Real World Examples
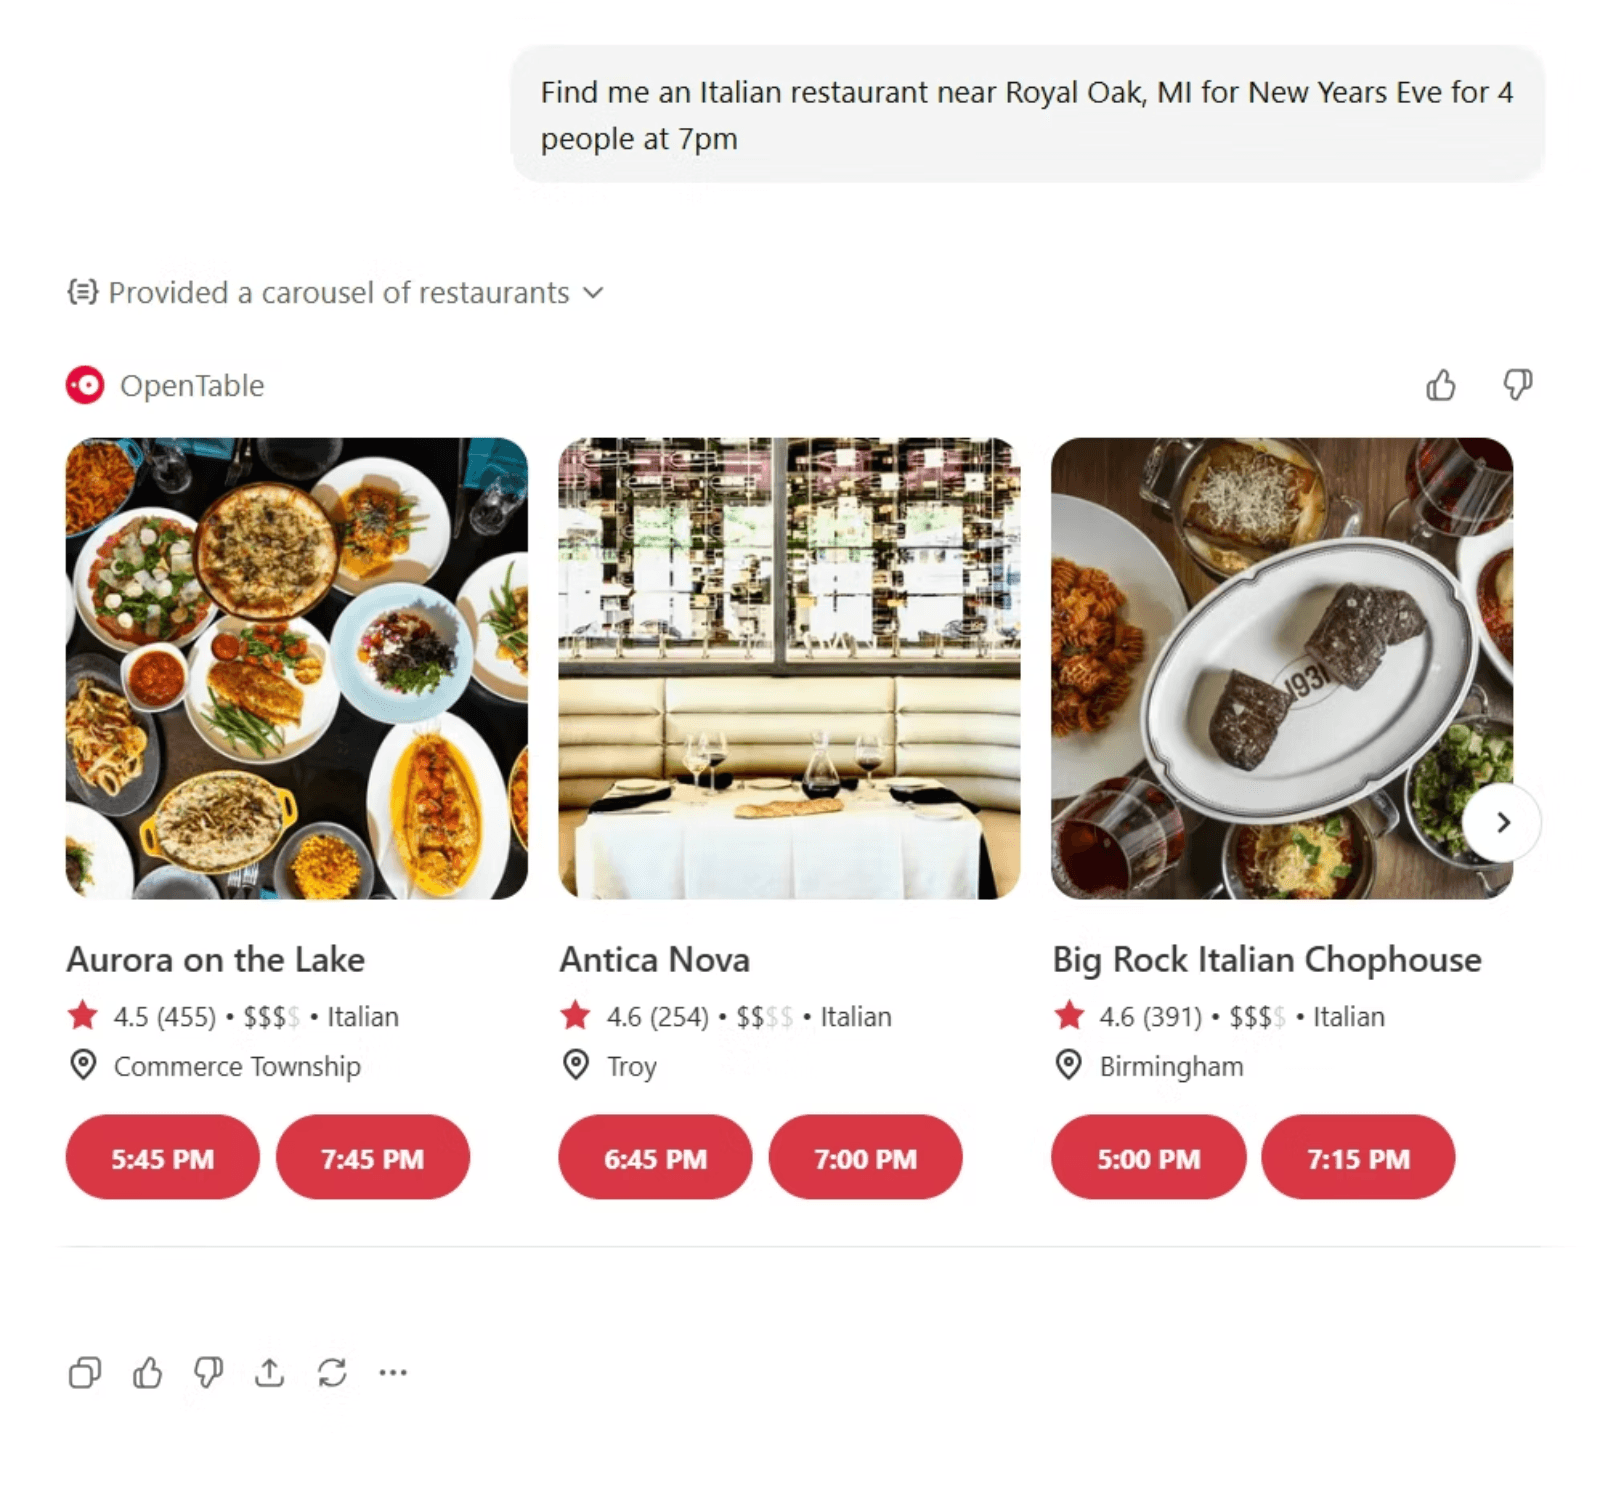
To understand what these apps look like in practice, consider how OpenTable integration works within ChatGPT. When you tell ChatGPT to use OpenTable to find an Italian restaurant for four people at 7 PM on New Year’s Eve, the app pulls up a mini user interface directly in your chat. You can browse available restaurants, view details, and complete your reservation without opening a separate browser tab.
The Instacart integration demonstrates similar capabilities for grocery shopping. After connecting your account, you can ask ChatGPT to help you order items, and the app displays a familiar shopping interface within the chat window. You can add items to your cart, modify quantities, and proceed to checkout all while continuing your conversation with ChatGPT.
Understanding the Architecture
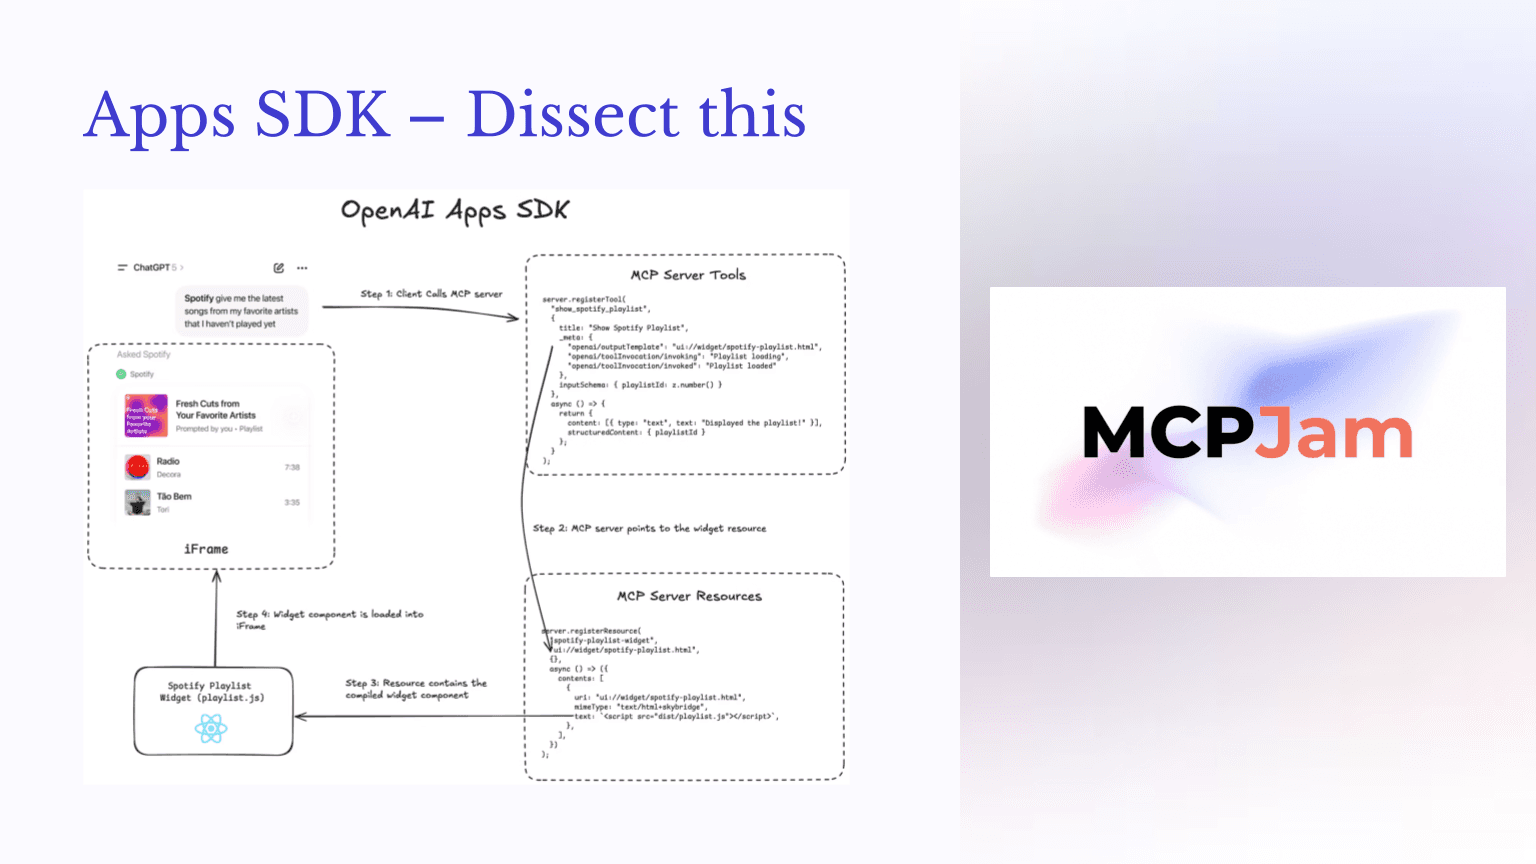
Courtesy of MCPJam
The architecture of ChatGPT Apps follows a specific flow that connects your conversational prompts to backend services through a widget-enabled MCP server. Everything starts in ChatGPT when you reference an app by name, using phrases like “use Spotify” or “@OpenTable.”
When ChatGPT recognizes your intent to use an external app, it performs a tool call to the MCP server you’ve built. The server determines which tool satisfies your request and processes it accordingly. What makes Apps SDK unique is the output template mechanism, which points to a widget resource containing your HTML interface.
The key component that ties everything together is the window.openai object. This JavaScript bridge connects your front-end widget to ChatGPT’s infrastructure. When ChatGPT loads your iframe, it injects the latest tool response into window.openai.toolOutput, which your widget code can then render appropriately. Subsequent interactions continue using this same mechanism, keeping your UI synchronized with the ongoing conversation.
Setting Up Your Development Environment
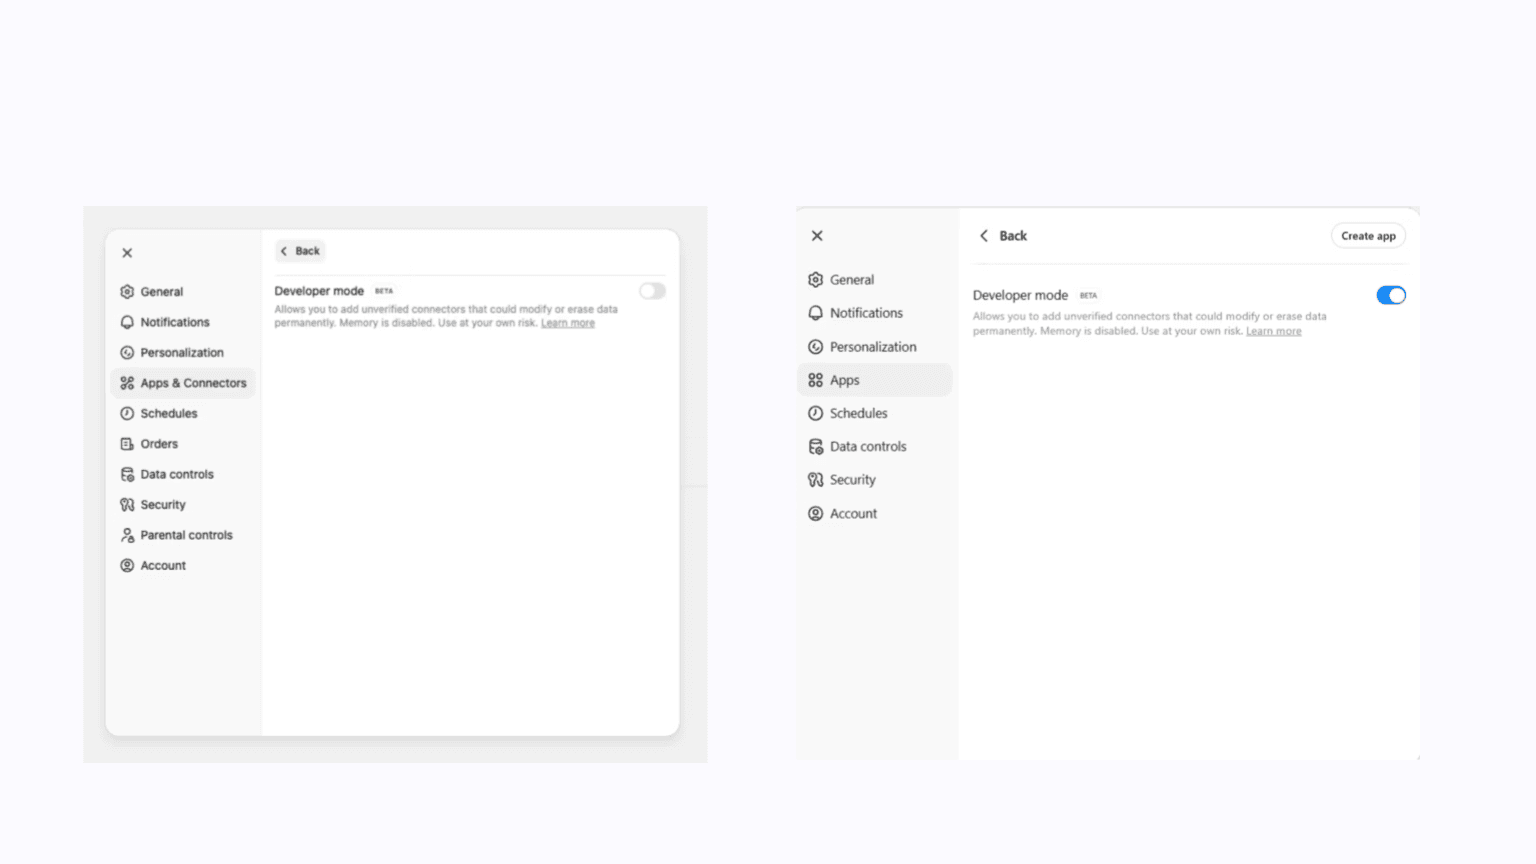
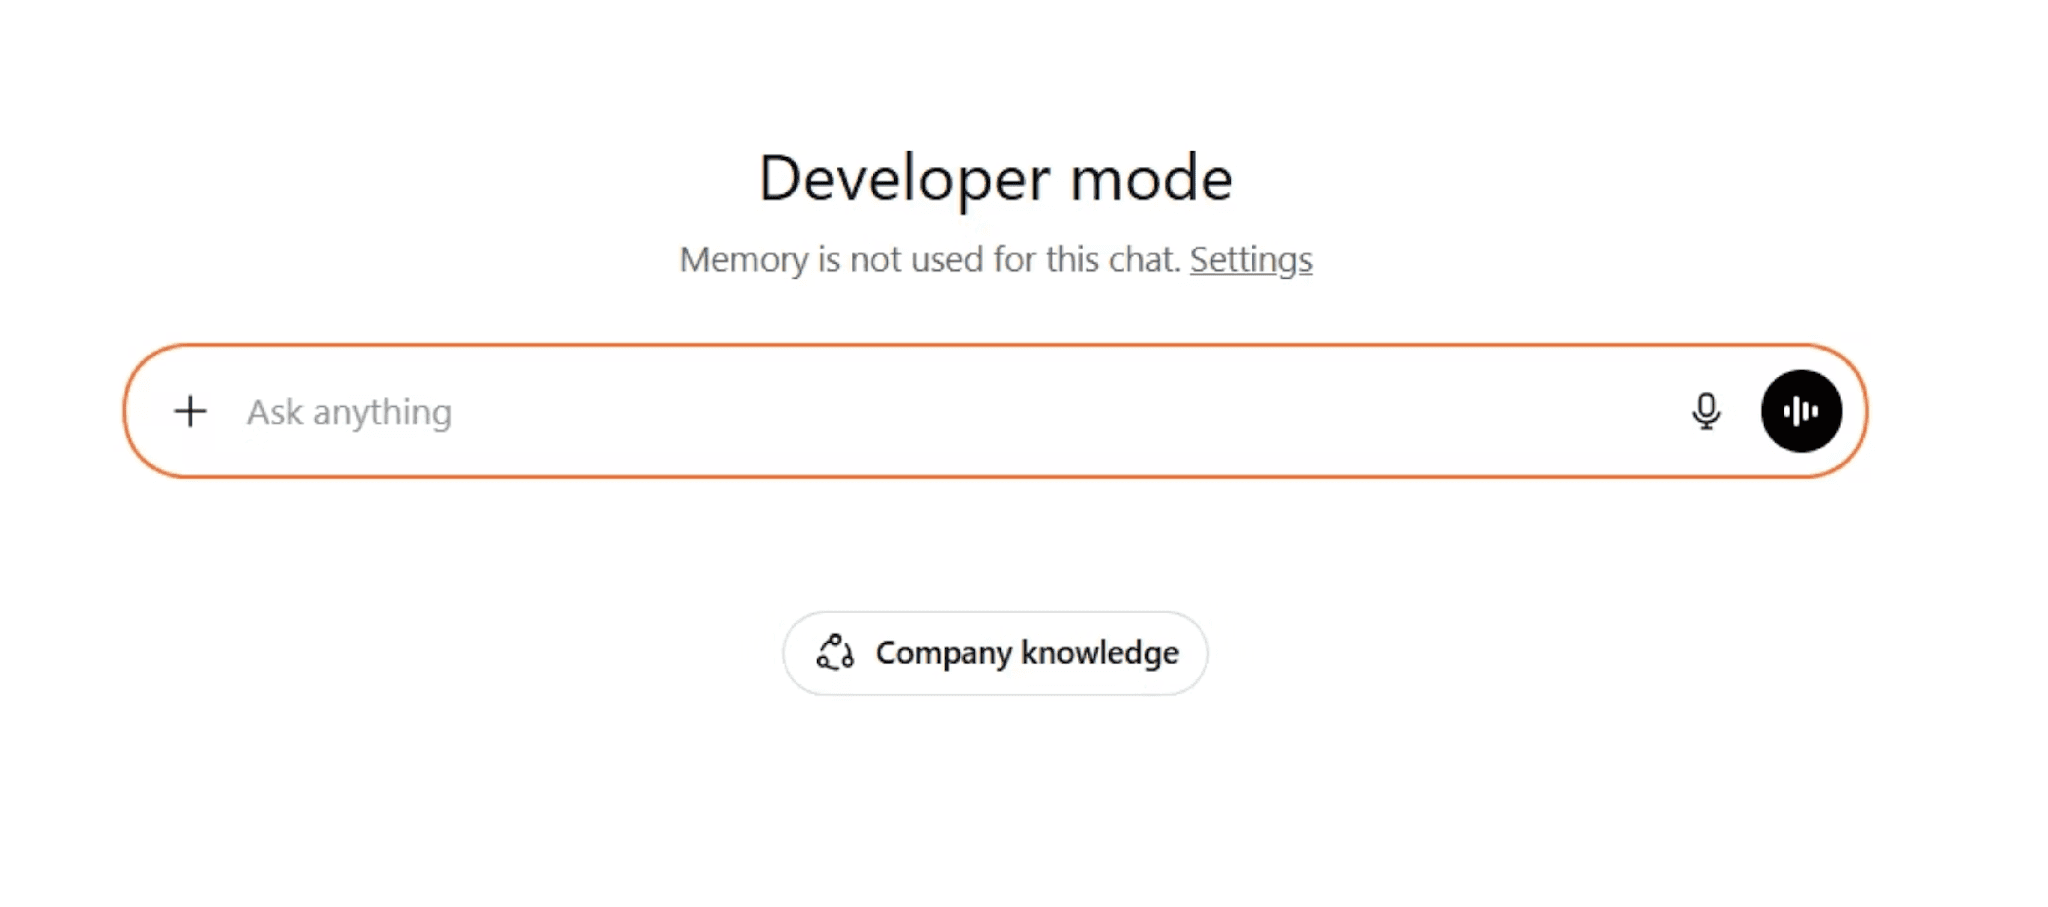
Before building apps, you need to enable developer mode in ChatGPT. Navigate to Settings, then Apps, scroll down to Advanced Settings, and toggle on developer mode. You’ll know it’s active when your chat interface displays an orange border and shows “developer mode” indicators throughout the interface.
You’ll also need ngrok or a similar tunneling service to expose your local development server to the internet. ChatGPT needs to reach your MCP server from its infrastructure, so your localhost won’t work directly.
Go onto the Windows App store and install ngrok. After installing ngrok and creating an account, run the configuration command to authenticate your installation.
Building Your First MCP Server
Let’s start with the simplest possible example to understand how the pieces fit together. This multiplication server demonstrates the basic MCP structure without any HTML widget complexity.
This code creates an MCP server using the FastMCP library, which handles all the complexity of the MCP protocol. The @mcp.tool() decorator registers your function as an available tool that ChatGPT can discover and invoke. The docstring serves as the tool description, helping ChatGPT understand when to use this particular function.
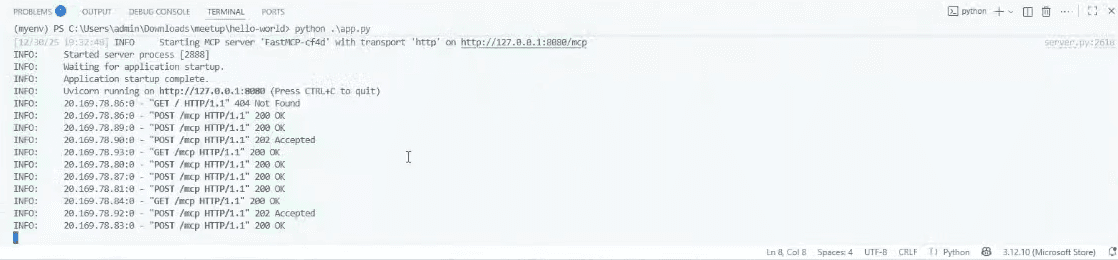
The server runs over HTTP on port 8080. When you start this script, FastMCP handles all incoming requests, parses tool calls, and returns results in the format ChatGPT expects.
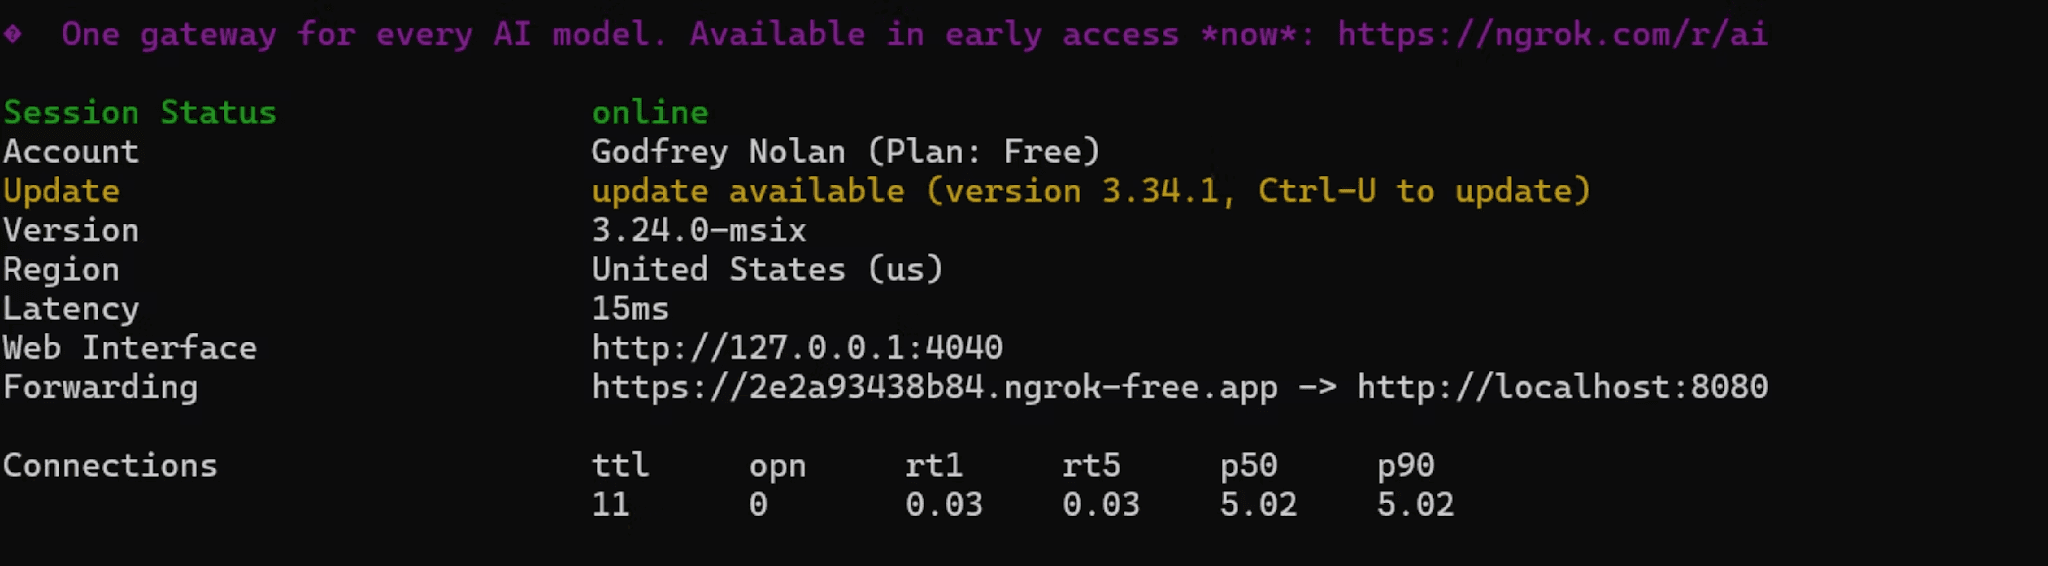
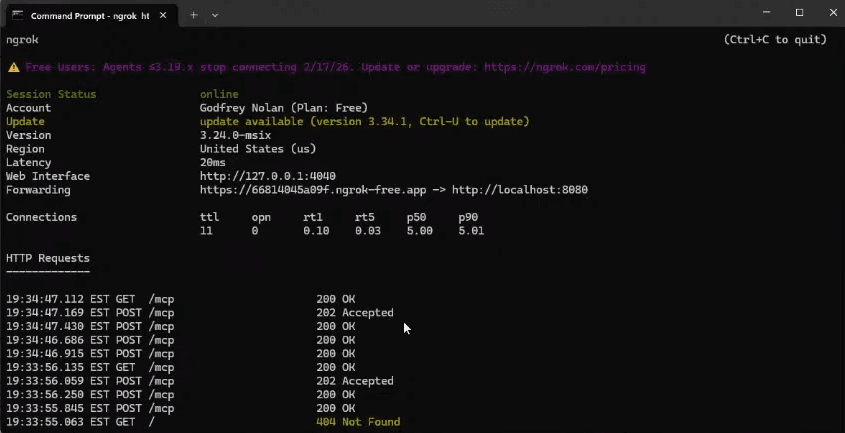
To connect this to ChatGPT, first start your server, then run ngrok to create a public URL:
ngrok http 8080
ngrok http 8080
ngrok http 8080
Copy the generated URL and add your app in ChatGPT by going to Settings, Apps, then Create App. Provide a name like “Multiply Python,” paste your ngrok URL with /mcp appended to the path, and disable authentication for testing purposes. If the connection succeeds, you’ll see your multiply tool listed when you inspect the app details.
Start a new chat and type something like “use Multiply Python to multiply 12 times 34.” ChatGPT will request permission to use the tool, call your server, and display the result directly in the conversation. You can check the calls in the terminal to verify everything has gone as planned.
You can also verify in ngrok. If you need to troubleshoot, the three recommended places to check are VSCode, ngrok, and then finally the MCP inspector.
Let’s Make a Simple Pizza App with a Widget Interface
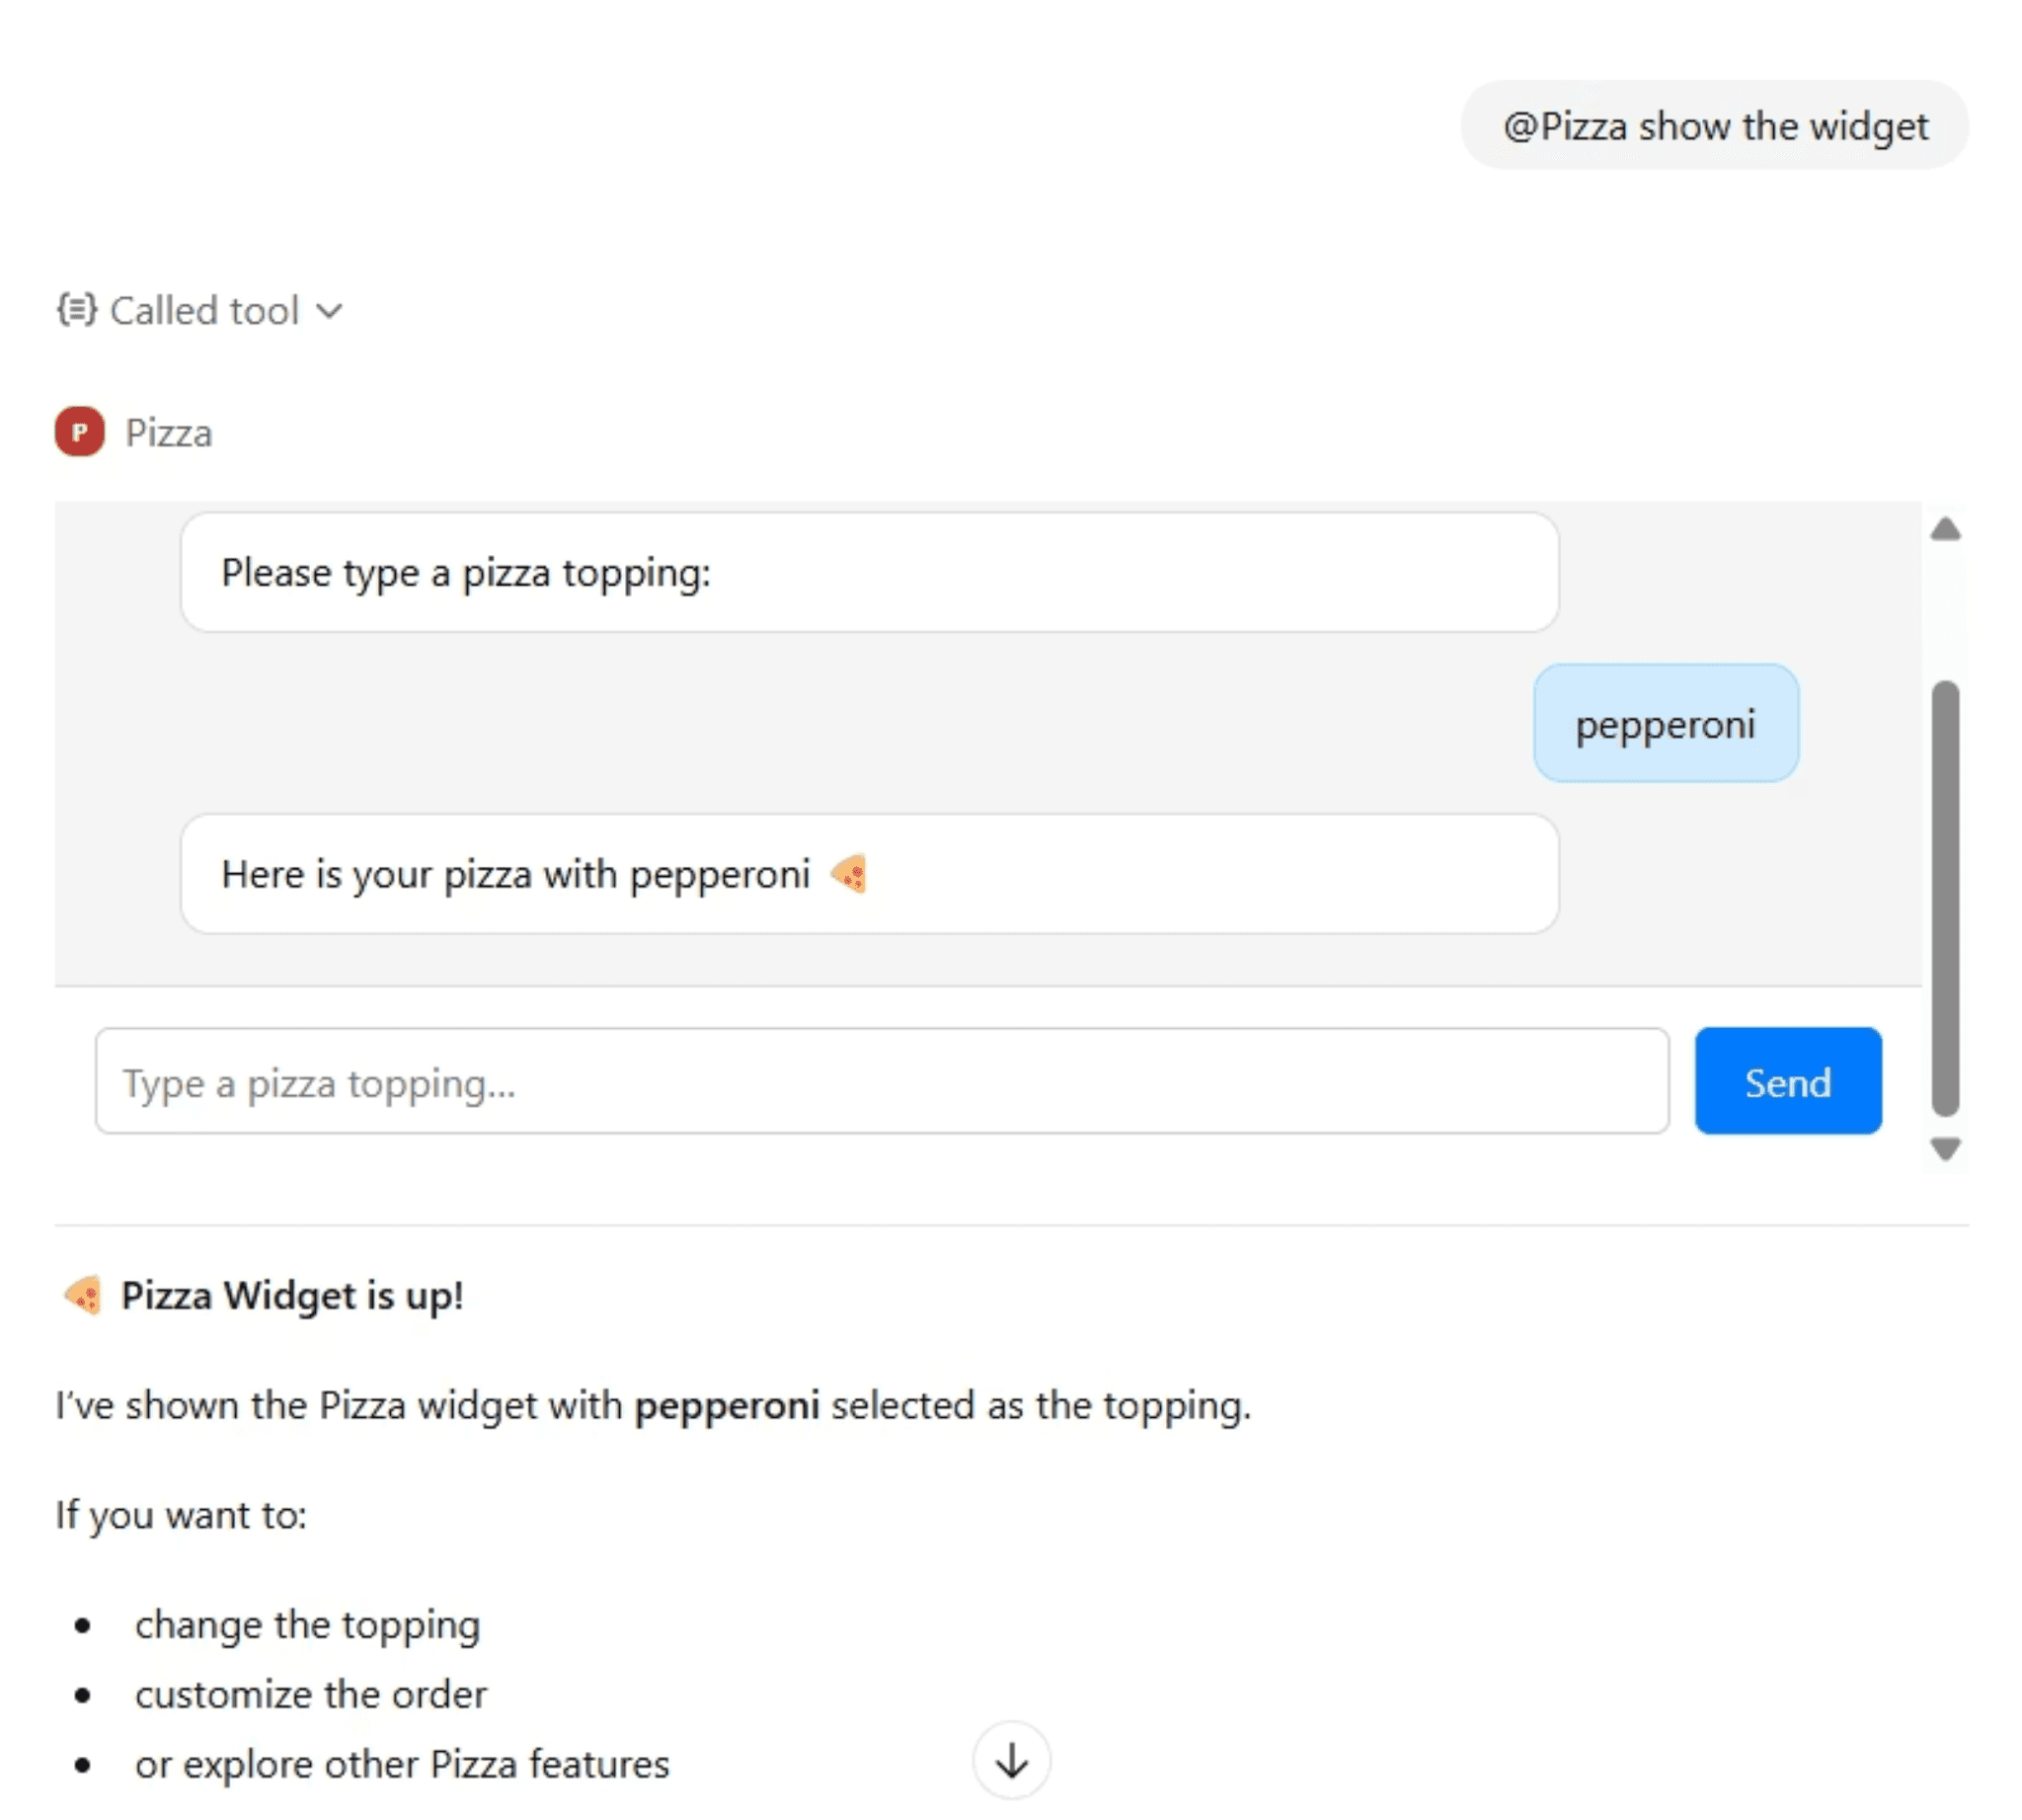
The real power of Apps SDK emerges when you add HTML widgets to your MCP server. This example creates a simple pizza topping selector that demonstrates the complete architecture.
First, create your HTML widget file that will be injected into ChatGPT:
<!DOCTYPE html>
<html><head><metacharset="utf-8"/><style>body{font-family:sans-serif;background:#f5f5f5;margin:0;}
.chat-container {max-width:650px;margin:0auto;padding:20px;display:flex;flex-direction:column;gap:12px;}
.bubble {padding:12px16px;border-radius:12px;max-width:80%;line-height:1.4;}
.bot {background:#fff;border:1pxsolid#ddd;}
.user {background:#d0ebff;border:1pxsolid#a5d8ff;align-self:flex-end;}form{background:#fff;border-top:1pxsolid#ddd;padding:16px;display:flex;gap:10px;position:sticky;bottom:0;}input{flex:1;font-size:16px;padding:10px;border-radius:6px;border:1pxsolid#ccc;}button{padding:10px20px;font-size:16px;background:#007bff;color:#fff;border:none;border-radius:6px;cursor:pointer;}button:hover {background:#0069d9;}</style></head><body><divid="chat"class="chat-container"></div><formid="form"><inputid="input"type="text"placeholder="Type a pizza topping…"required/><buttontype="submit">Send</button></form><script>constchat = document.getElementById("chat");constform = document.getElementById("form");constinput = document.getElementById("input");functionbot(text){constdiv = document.createElement("div");div.className = "bubble bot";div.textContent = text;chat.appendChild(div);}functionuser(text){constdiv = document.createElement("div");div.className = "bubble user";div.textContent = text;chat.appendChild(div);}constoutput = window.openai?.toolOutput;constmeta = window.openai?.toolResponseMetadata;bot("Hello! 👋 Welcome to the Pizza Widget.");bot("Please type a pizza topping:");if(output && typeofoutput === "object"){bot("Received from server (structuredContent):");bot(JSON.stringify(output,null,2));if(output.pizzaTopping){bot("🍕 Your topping from the server is: " + output.pizzaTopping);}}form.addEventListener("submit",(e)=>{e.preventDefault();consttopping = input.value.trim();if(!topping)return;user(topping);bot("Here is your pizza with " + topping + " 🍕");input.value = "";});</script></body></html>
This establishes the styling for a chat-like interface within your widget. The contained dimensions work well within ChatGPT’s iframe constraints. The form captures user input for pizza toppings, and when submitted, the data flows back through your MCP server and updates the ChatGPT conversation context.
The critical piece is accessing window.openai.toolOutput, which contains the structured content returned by your MCP server. This is how ChatGPT communicates with your widget, passing data from tool calls into your HTML interface. The widget also has access to window.openai.toolResponseMetadata for additional response information.
Creating the Widget-Enabled MCP Server
The server code requires additional setup to handle widget resources alongside tools:
We’re setting up two tools, a show-widget tool and and example-widget tool. Both feature title and description fields, but diverge from there.
In the show-widget tool, you will have to define the inputSchema . Then the _meta dictionary contains ChatGPT-specific settings. The outputTemplate points to your widget URI, telling ChatGPT to render this widget when the tool is called. Setting widgetAccessible to True enables the bidirectional communication between your widget and ChatGPT, and resultCanProduceWidget indicates the tool can produce widget output.
In the example-widget tool we set the MIME type to text/html+skybridge which signals to ChatGPT that this response should be rendered as an embedded widget. The URI provides a unique identifier for your widget resource.
The server also registers resource handlers for serving the HTML content and tool handlers that return both text content and structured content. The structuredContent in the CallToolResult is what gets passed to window.openai.toolOutput in your widget.
Run your server on port 8787, create a new ngrok tunnel, and register this app in ChatGPT with the /mcp path appended. When you invoke the app with a topping request, you’ll see your custom pizza widget appear directly in the chat interface.
Debugging Your Apps
For deeper investigation, use the MCP Inspector tool to interact with your server directly, bypassing ChatGPT entirely. This lets you verify that your tools are registered correctly and returning the expected output format before troubleshooting the ChatGPT integration layer.
A common issue is the output template not appearing in the app details when you inspect it in ChatGPT. If this happens, double-check your _meta configuration and ensure the widget URI matches exactly between your tool definition and resource handler.
Preparing for App Submission
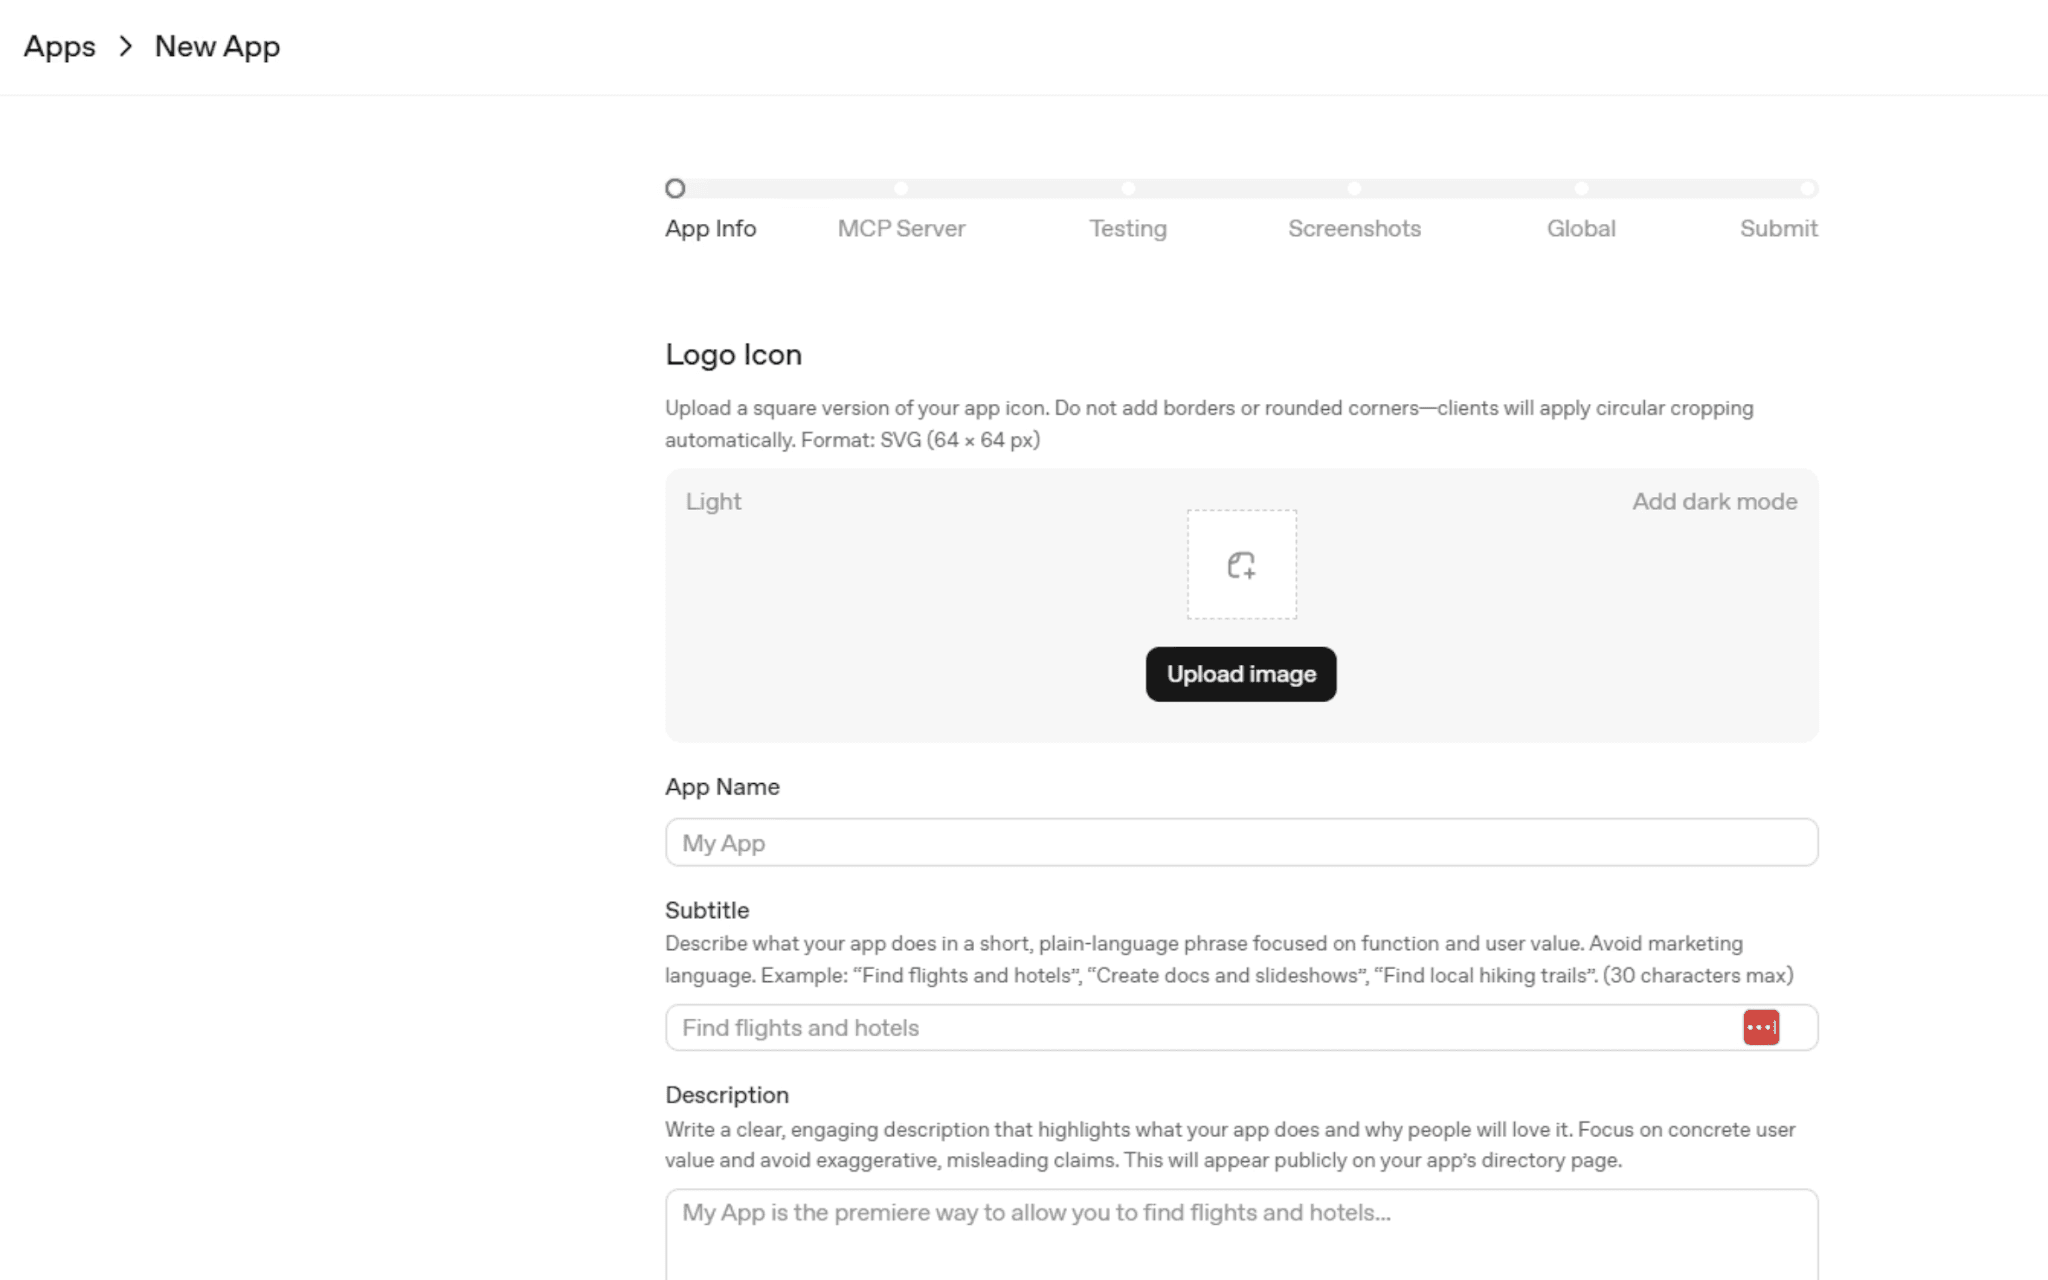
Once your app works in developer mode, you can submit it for public availability through the OpenAI Playground. Navigate to the ChatGPT Apps section and create a new submission with all required assets.
Be meticulous about submission requirements. Your logo must be exactly 64 by 64 pixels. Screenshots must be exactly 706 pixels wide, with height between 400 and 800 pixels. Test everything in both light and dark modes, as inconsistencies can lead to rejection without explanation.
Tool permissions require careful consideration. If your app only reads data, mark it as read-only. Any tools that modify or delete data need justification during the review process. Authentication cannot be skipped for production apps, so you’ll need proper OAuth or API key mechanisms in place.
You must verify domain ownership by adding a token to your DNS records, provide privacy policy and terms of service documents, include test cases demonstrating your app’s functionality, and maintain a verified OpenAI developer account throughout the review process.
The Future of ChatGPT Apps
This technology represents what could become a new operating system paradigm. Combined with ChatGPT’s browser capabilities, users may eventually handle their entire digital workflow without leaving the ChatGPT interface. The implications for software distribution and user engagement are significant.
Currently, monetization requires bouncing users to external websites for payment processing. This will likely evolve as the platform matures, potentially enabling direct in-app purchases similar to mobile app stores.
For organizations with internal tools, you can already connect private MCP servers to your team’s ChatGPT instances, enabling natural language access to databases and internal systems. While public sharing of internal apps isn’t yet available, expect this capability to follow soon based on existing chat sharing features.
Conclusion
Throughout this tutorial, you've learned how the Apps SDK transforms ChatGPT from a conversational AI into a full application platform by combining MCP servers with embedded HTML widgets to create native-feeling interactive experiences. With the foundational architecture, simple examples, and templates like the JavaScript to-do list and Python pizza and shopping cart apps covered here, you're now equipped to explore OpenAI's GitHub repository for more advanced patterns and start building your own productivity tools, lifestyle apps, or enterprise integrations for ChatGPT's massive user base.