
Mar 26, 2026
ArduPilot is one of the most capable open-source autopilot platforms available, powering everything from racing drones to autonomous submarines. Whether you're building a custom UAV, automating a ground rover, or experimenting with aerial robotics, ArduPilot gives you a complete stack: firmware, simulation, scripting, and a thriving developer community.
This tutorial walks you through the entire development loop from installing the toolchain and running a simulated drone in Software-in-the-Loop (SITL) to writing your first autonomous behaviors in both Python and Lua. By the end, you will have a fully functional ArduPilot development environment and the foundational skills to build, test, and iterate on custom drone logic without ever risking real hardware.
As usual, you can follow along with the written tutorial or the video from the official livestream.
ArduPilot vs PX4: Choosing Your Platform
Both ArduPilot and PX4 are open-source autopilot firmware platforms, and choosing between them depends on the vehicle type you need to support, the license terms your project requires, and how you plan to write custom code. Understanding the key differences up front saves significant rework later. By the end, you will have a fully functional ArduPilot development environment and the foundational skills to build, test, and iterate on custom drone logic without ever risking real hardware.
Supported Vehicle Types
PX4 focuses primarily on copters and some fixed-wing vehicles. ArduPilot covers a much broader range: drones, planes, ground rovers, submarines, and more. If you can automate a vehicle, there is a good chance ArduPilot already has a firmware variant for it.
Licensing and Commercial Use
The licensing difference is one of the most discussed distinctions between the two platforms. PX4 uses a BSD-style license, which is more permissive for commercial products. ArduPilot uses the GPL license, which requires that modifications to the firmware be released as open source.
That said, the GPL concern is less significant than it once was. When you run custom logic on a companion computer or through a framework like ROS 2 or Lua, that code sits outside the firmware. You are not required to release it under GPL, which gives commercial teams a practical path to proprietary development without forking the firmware.
Community and Ecosystem
PX4 has historically had stronger traction in commercial products and a more commercially oriented ecosystem. ArduPilot has a larger feature set, broader vehicle support, and a very active community of developers. The ArduPilot project also includes simulation, scripting, autonomy tooling, and extensive documentation as part of the platform, not just the firmware itself.
Three Ways to Program ArduPilot
ArduPilot supports three main programming approaches, each suited to a different level of access and complexity.
Python: Using libraries like pymavlink, you send MAVLink commands and read telemetry from a companion computer or ground station.
Lua: Scripts run in a sandbox directly on the flight controller, giving real-time access to sensors, motors, and flight modes without recompiling firmware.
C++: Modifying the firmware source directly for deep, performance-critical customization.
For most developers getting started, Python and Lua are the fastest paths to results. Lua scripting in particular stands out: it runs on the flight controller itself, requires no firmware rebuild, and lets you add custom mission logic in a clean, readable syntax. The sections that follow cover each of these approaches in detail, starting with getting the toolchain installed.
ArduPilot Architecture Overview
Before you install anything, it helps to understand how ArduPilot is organized. The platform is built in distinct layers, and knowing where each tool fits makes the setup steps that follow much easier to reason about.
Layers from Hardware to Interface
At the bottom sits the physical hardware: flight controllers like the Pixhawk and the CubePilot Orange Cube. Directly above that is the Hardware Abstraction Layer (HAL), which insulates the rest of the software from the specifics of each board.
Above the HAL, ArduPilot provides a set of shared libraries used across all vehicle types. These include core algorithms like the Extended Kalman Filter (EKF), which handles state estimation. These libraries are not tied to any single vehicle firmware variant.
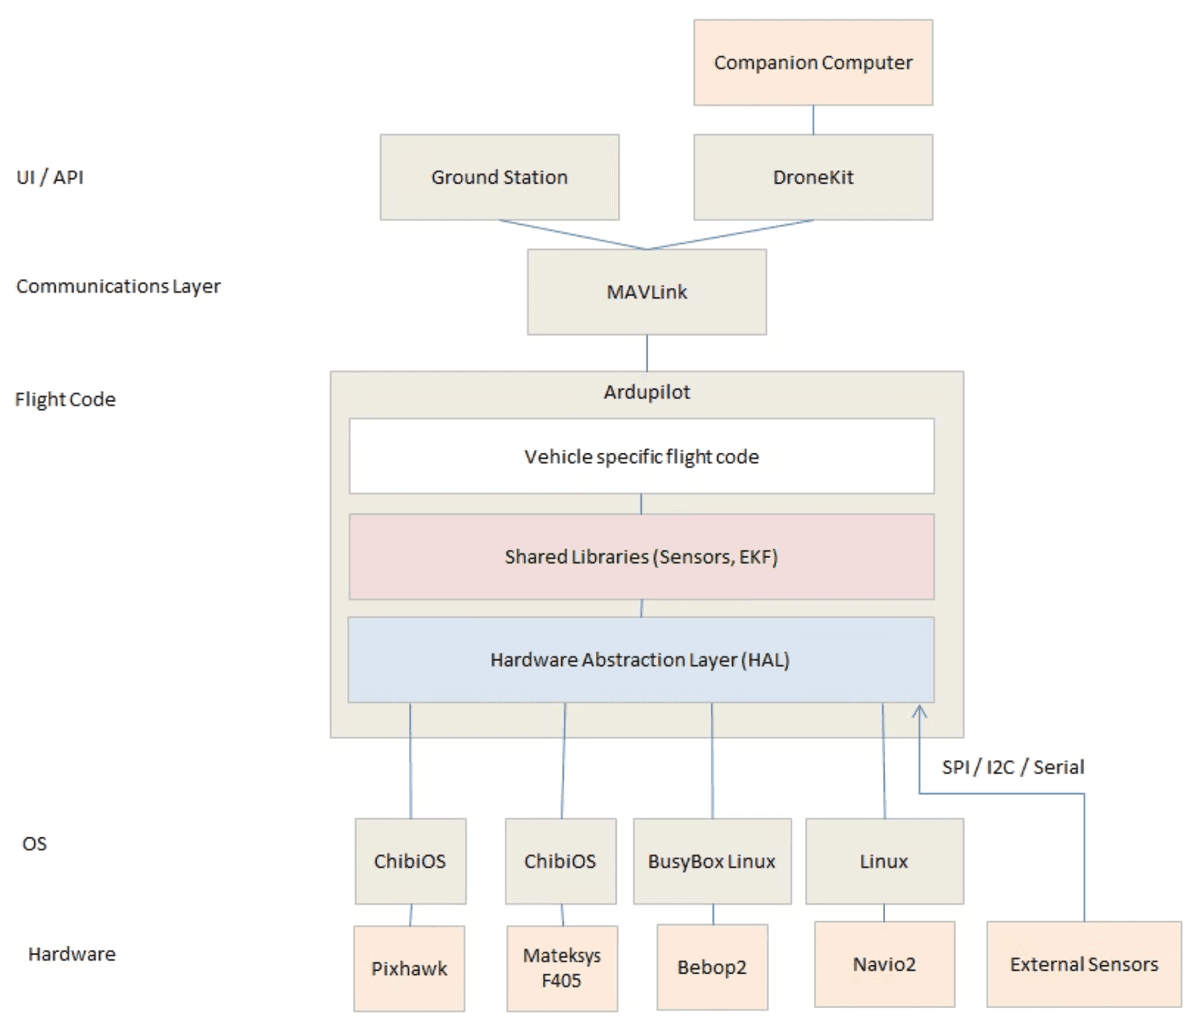
A hierarchical architecture diagram of ArduPilot showing the layered system from hardware through operating systems, HAL, libraries, flight code, communications, and external interfaces.
Vehicle Firmware and the ArduCopter Subset
The vehicle firmware layer is where ArduCopter, ArduPlane, and ArduRover live. Each is a specialized application built on top of the shared libraries. ArduCopter is the multirotor-specific variant and is the focus throughout this tutorial.
Above the vehicle firmware sits the MAVLink communication layer. This is the protocol that carries telemetry out and commands in. Parameters are adjusted, and missions are uploaded through MAVLink messages.
External Interfaces
At the top of the stack are the external interfaces your code will directly interact with, including:
Ground control stations (GCS) such as Mission Planner and QGroundControl, which display telemetry and send commands
MAVProxy, a command-line tool that routes MAVLink traffic and acts as a central hub for multiple clients
Companion computers and ROS 2, which run custom logic alongside the flight controller
As mentioned in the previous section, Python and Lua both operate at this external interface layer. Neither requires modifying the ArduCopter firmware itself. That distinction drives the entire toolchain setup covered next.
Installing the ArduPilot Toolchain
With the architecture clear, you can see that the external interface layer is where most development happens. Getting there requires four tools on Windows: MAVProxy, Mission Planner, the ArduCopter SITL binary, and a default parameters file. If you are on Linux or WSL, you will build from source instead.
Windows Quick-Start: Four Downloads
The Windows path gets you to a working simulation loop with no compilation required. Download and install each of the following in order.
MAVProxy installer: https://firmware.ardupilot.org/Tools/MAVProxy/MAVProxySetup-latest.exe
Mission Planner installer: https://firmware.ardupilot.org/Tools/MissionPlanner/MissionPlanner-latest.msi
ArduCopter SITL binary: https://firmware.ardupilot.org/Tools/MissionPlanner/sitl/CopterStable/ArduCopter.elf
Default parameters file: https://raw.githubusercontent.com/ArduPilot/ardupilot/master/Tools/autotest/default_params/copter.parm
Place the parameters file in a folder named parameters alongside the ArduCopter binary. The SITL launcher references this path directly when it boots.
Building from Source on WSL or Linux
On Linux or Windows Subsystem for Linux (WSL), you build the full firmware from the ArduPilot repository. This gives you access to sim_vehicle.py, which launches a combined SITL instance with a map and console in a single command.
Start by cloning the repository and initialising its submodules. ArduPilot depends on several external libraries, so the recursive flag is required.
Next, run the prerequisites install script. This sets up all the build dependencies automatically.
Once the prerequisites are installed, add the autotest directory to your PATH and launch the simulator. The command below starts ArduCopter with a live map and a MAVProxy console.
Whether you use the prebuilt Windows binary or the WSL build, the result is the same: a running ArduCopter SITL instance ready to accept MAVLink connections. The next section shows you exactly how to connect MAVProxy to that instance and start issuing commands.
Running SITL and Connecting MAVProxy
With your toolchain installed, you can crash a simulated drone a thousand times without spending a cent. That is the core promise of Software-in-the-Loop (SITL): the full ArduCopter firmware runs on your computer, connected to a physics simulation, so every bug you catch here costs nothing.
Booting an ArduCopter SITL Instance
The SITL binary accepts several flags that control how it initialises. The command below starts a clean instance with default parameters, running in real time, identified as instance zero.
Each flag has a specific role. Understanding them lets you adjust the simulation for different test scenarios.
w: wipes old state and loads the default parameters fresh on every boot
S: runs the simulation in real time (software timing mode)
–model +: selects the quadcopter (plus) airframe model
–speedup 1: sets the simulation speed multiplier to 1x real time
–defaults parameters/copter.parm: points to the parameter file you downloaded earlier
I0: identifies this as SITL instance zero, useful when running multiple simultaneous instances
Once the instance is running, it listens for MAVLink connections on TCP port 5760. MAVProxy connects to that port and acts as a routing hub, forwarding traffic to whatever tools you need downstream.
Connecting MAVProxy
MAVProxy is the Swiss Army knife of ArduPilot. It bridges the vehicle’s MAVLink stream to any number of consumers simultaneously. The command below connects MAVProxy as the master and forwards the stream to UDP port 14550, where ground control stations and Python scripts can pick it up.
MAVProxy setup Command
The –out flag accepts multiple targets. You can add additional –out arguments to forward the same stream to Mission Planner, QGroundControl, and your own scripts at the same time.

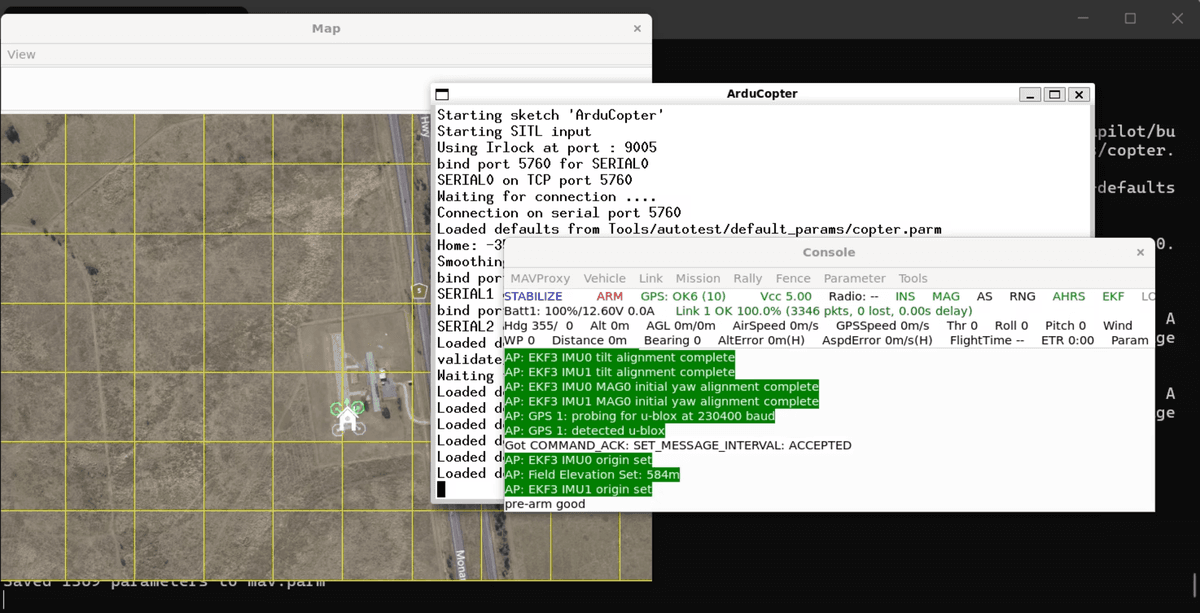
MAVProxy Console showing vehicle status, system initialization messages, and sensor calibration information for an ArduCopter quadcopter.
Interactive MAVProxy Commands
Once MAVProxy is connected, its interactive console lets you control the simulated vehicle directly. The sequence below loads the map module, switches to guided mode, arms the motors, commands a takeoff to 30 metres, and then returns the vehicle to launch.
The map module opens a live overhead view showing the vehicle’s position and flight path as it moves. You can also speed up the simulation during longer test runs by setting the SIM_SPEEDUP parameter directly from the console.
With SITL running and MAVProxy routing the MAVLink stream, you have a complete development loop. The next step is connecting a full ground control station to that stream so you can visualise flight data, tune parameters, and plan missions with a graphical interface.
Ground Control Stations: Mission Planner and QGroundControl
MAVProxy’s routing capability becomes especially powerful when you connect a full graphical ground control station. Two GCS options dominate the ArduPilot ecosystem: Mission Planner and QGroundControl. They serve different purposes, and knowing the distinction will save you time depending on what you are trying to accomplish.
Mission Planner vs QGroundControl
Mission Planner is ArduPilot-specific. It provides deep access to parameters and tuning tools, making it the preferred choice for engineers who need to inspect and adjust detailed vehicle configuration. QGroundControl, by contrast, is better suited for mission planning and mapping workflows, and it works across multiple autopilot platforms.
Mission Planner: ArduPilot-specific, extensive parameter access and tuning tools
QGroundControl: better for mission planning and mapping workflows, cross-platform support
Forwarding to Both GCS Ports Simultaneously
Because MAVProxy supports multiple –out targets, you can run both GCS applications at the same time from a single SITL instance. The command below starts MAVProxy in daemon mode, forwarding the MAVLink stream to port 14550 and port 14560 concurrently, without opening a MAVProxy console of its own.
With this command running, open Mission Planner and connect it to UDP port 14550. QGroundControl will pick up the stream on port 14560. Both applications see the same live telemetry from the simulated vehicle.
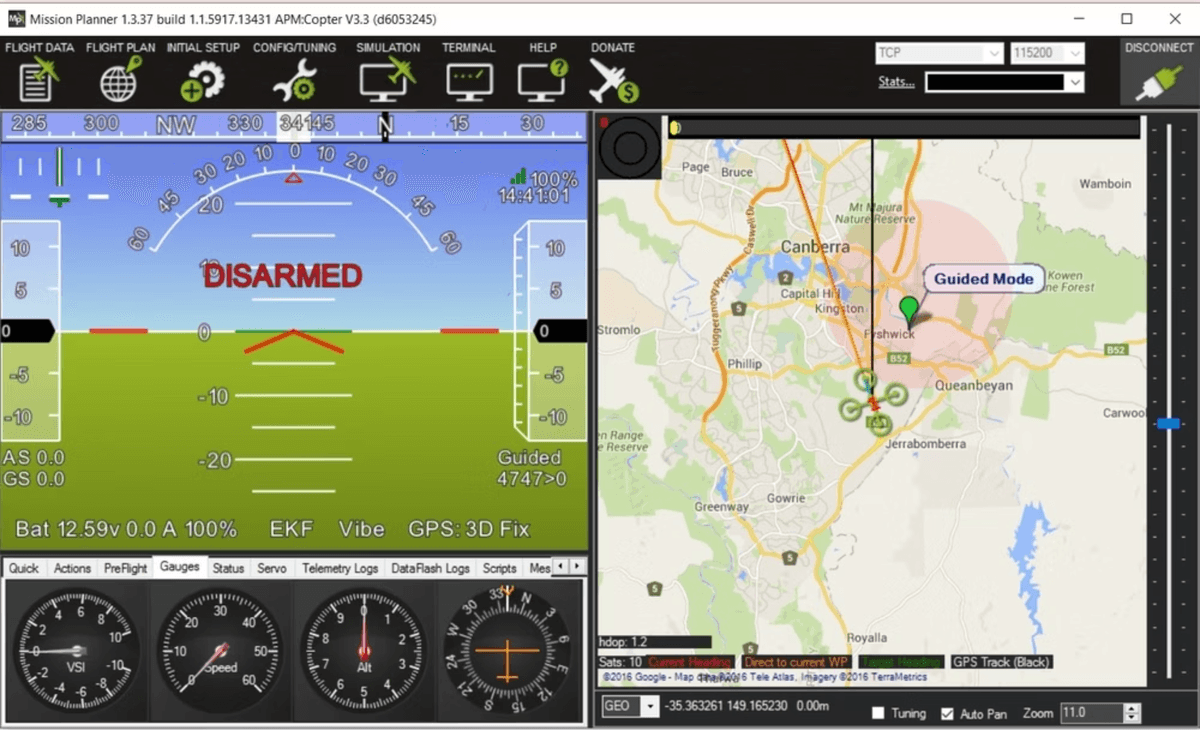
Mission Planner software interface showing a drone’s flight status with artificial horizon display, map view of Canberra Australia, and telemetry gauges indicating disarmed status and GPS connection.
QGroundControl can be downloaded from the QGroundControl GitHub releases page. On Windows, running it against the forwarded UDP port works the same way as Mission Planner does, making it straightforward to switch between the two depending on your workflow.
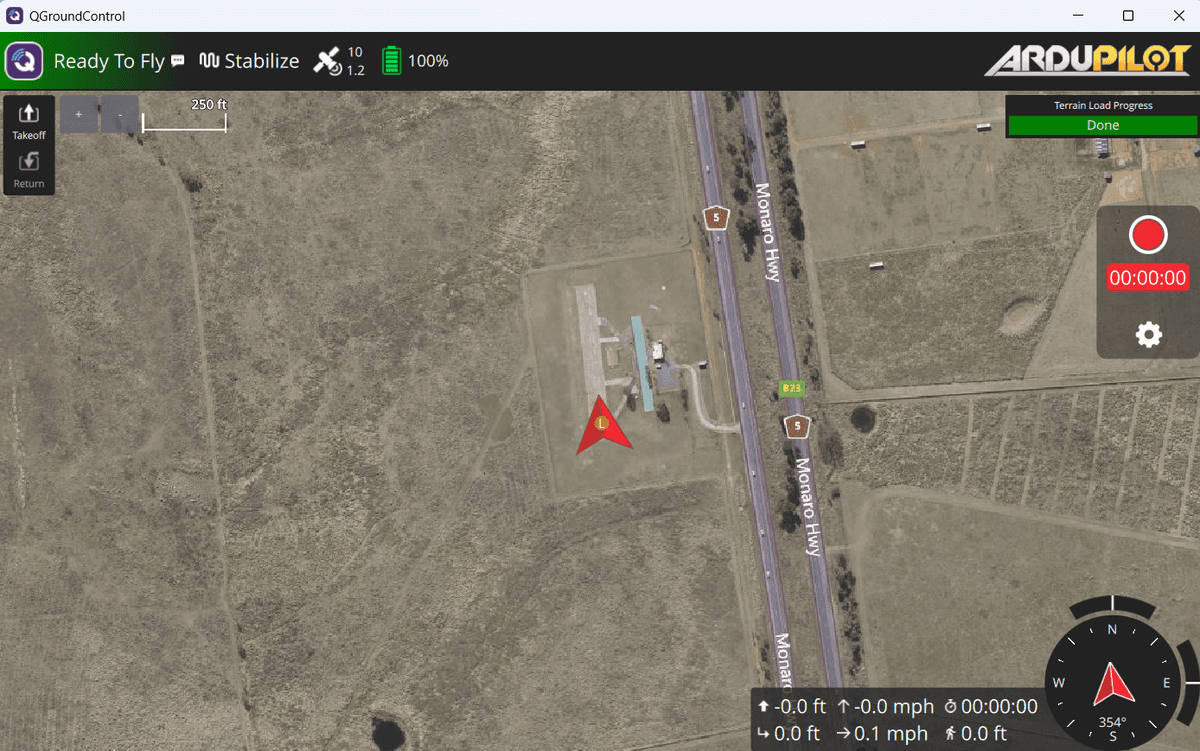
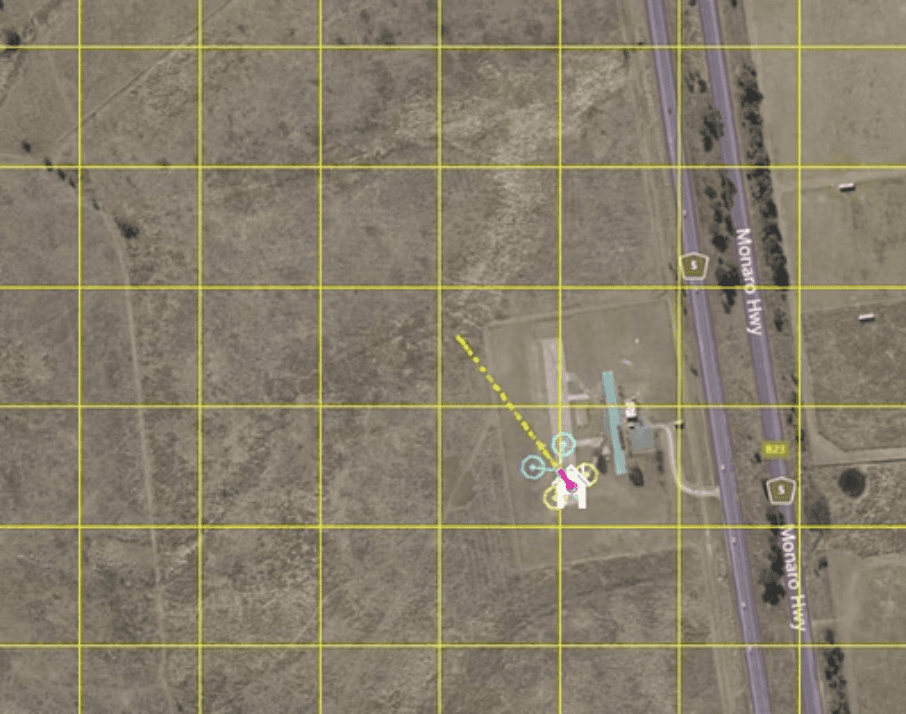
QGroundControl interface showing an aerial map view with a drone positioned at a waypoint near a highway, displaying flight status and telemetry data.
With a full GCS connected to your simulated vehicle, you have a complete ground-truth view of what your code is doing. The next step is moving from graphical interaction to programmatic control, using pymavlink to send MAVLink commands directly from Python.
Hardware-in-the-Loop Testing
SITL lets you crash a simulated drone a thousand times at zero cost. But at some point you need to know how your actual flight controller will behave before you mount it in a frame. That is exactly the problem Hardware-in-the-Loop (HITL) testing solves.
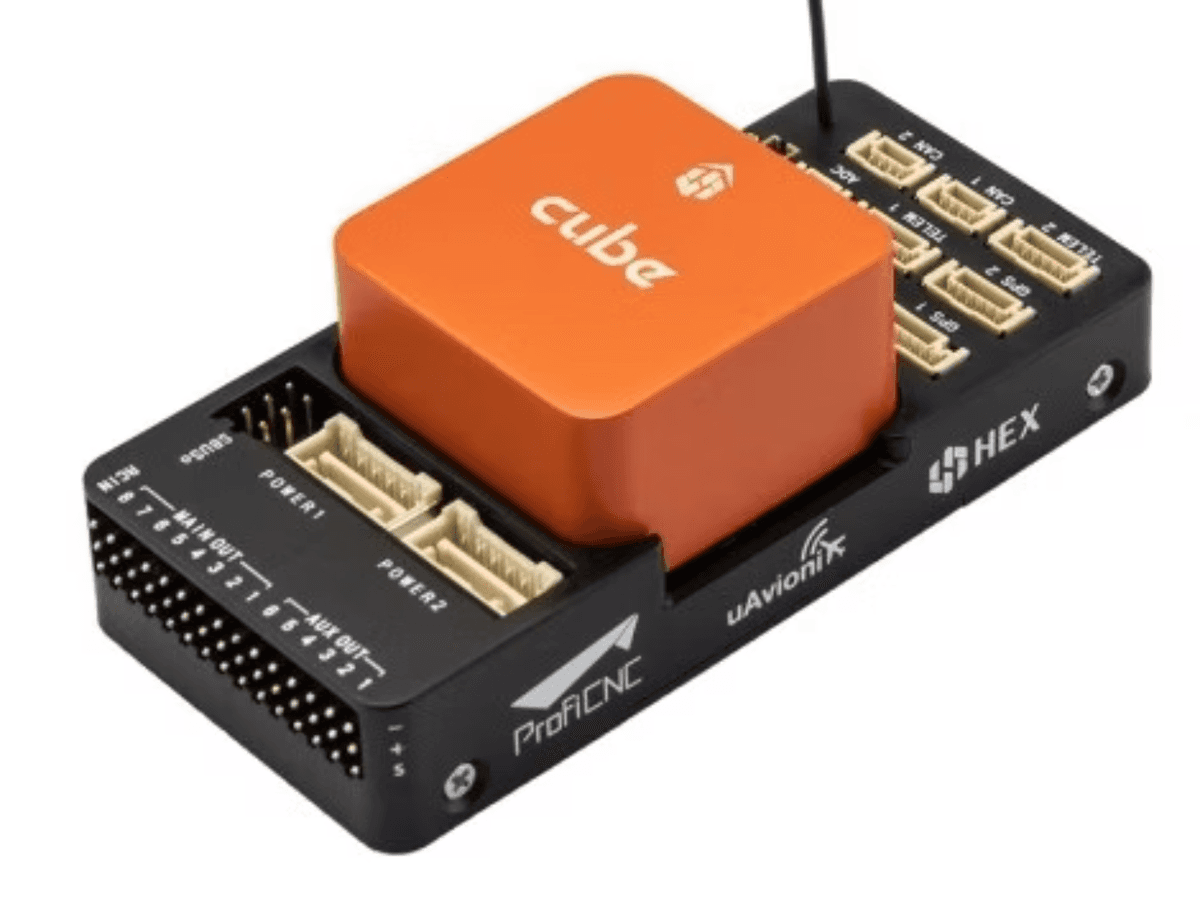
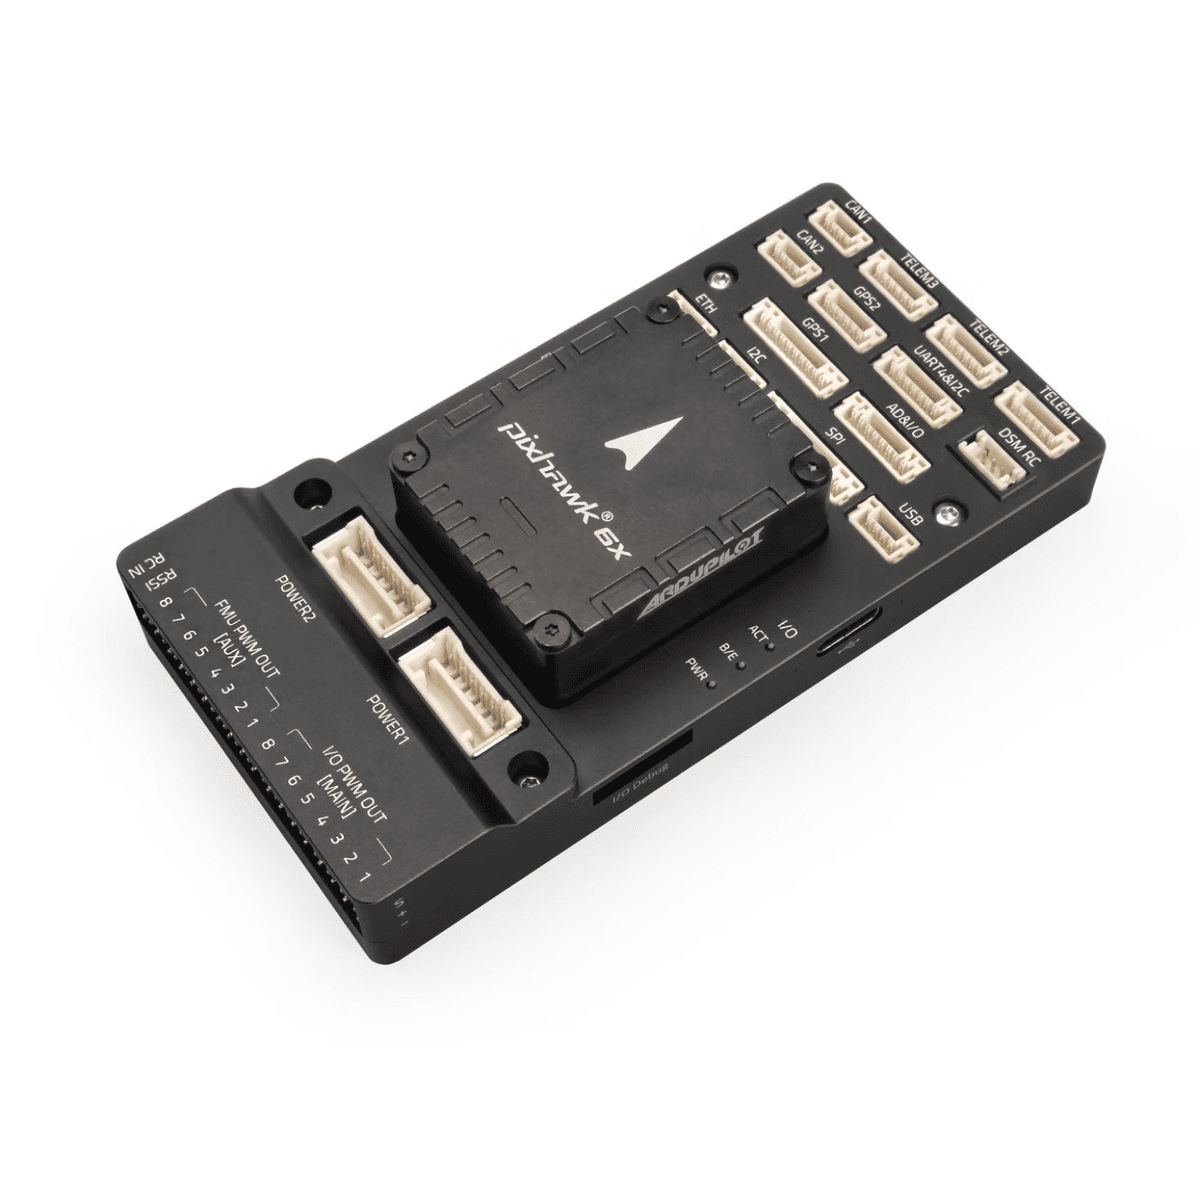
HITL sits between pure simulation and real flight. Physical hardware, such as a CubePilot Orange Cube or a Pixhawk, runs compiled SITL firmware while connected to your bench. The simulation still handles the physics, but the actual autopilot hardware processes the sensor data and produces outputs. This means you can integrate payloads and observe how everything works together without the vehicle ever leaving the ground.
SITL vs HITL: Key Differences
SITL: runs entirely on your computer, no physical hardware required, ideal for rapid iteration and scripting experiments
HITL: runs SITL firmware on real hardware connected to your bench, real sensor interfaces and hardware abstraction layer are exercised
HITL requires a firmware build compiled for SITL mode and loaded onto the flight controller
Think of HITL as the final rehearsal before actual flight testing. You can connect all the peripherals and payloads you plan to use, observe how the flight controller responds, and catch integration problems while everything is still safely on your desk. With HITL validated, the next logical step is driving the vehicle programmatically, which is where pymavlink comes in.
Programming ArduPilot with pymavlink
With HITL validated on the bench, the next step is driving the vehicle programmatically. pymavlink is the Python MAVLink library that lets you send commands to and read telemetry from any ArduPilot vehicle, whether it is a SITL instance or real hardware connected over UDP.
Installation and Basic Pattern
Before getting started, head on over to our godfreynolan/ardupilot_programming repo. Install pymavlink with a single pip command.
Every pymavlink script follows the same three-step pattern: open a connection, wait for a heartbeat, then send commands.
The device string udpin:127.0.0.1:14560 matches the second --out port that MAVProxy forwards from SITL. The wait_heartbeat() call blocks until the flight controller responds, so you always know the link is live before issuing any command.
Before Running a Script: Start SITL and MAVProxy
pymavlink connects to the port that MAVProxy exposes, so you must have both SITL and MAVProxy running first. Run these commands in order, each in its own terminal.
Start ArduCopter SITL:
arducopter -w -S --model + --speedup 1 --defaults parameters/copter.parm -I0Start MAVProxy with two output ports:
mavproxy --master tcp:127.0.0.1:5760 --out 127.0.0.1:14550 --out 127.0.0.1:14560In MAVProxy, set the mode and arm:
mode GUIDEDthenarm throttleRun your Python script:
python takeoff_land.py
Takeoff and Land: takeoff_land.py
The takeoff script constructs a MAVLink_command_long_message using the MAV_CMD_NAV_TAKEOFF command. The target altitude is passed as param7. A separate land command uses MAV_CMD_NAV_LAND in the same message format.
After sending the takeoff command, the script polls GLOBAL_POSITION_INT messages in a loop. It reads the relative_alt field, converts from millimetres to metres, and breaks when the vehicle is within one metre of the target altitude. It then waits ten seconds before sending the land command.
Flying to a Location: goto_location.py
Navigating to a specific coordinate uses a different message type: MAVLink_mission_item_int_message with MAV_CMD_NAV_WAYPOINT and MAV_FRAME_GLOBAL_RELATIVE_ALT_INT. Latitude and longitude are multiplied by 1e7 before being passed as integers.
The script then enters a loop that listens for both POSITION_TARGET_GLOBAL_INT and GLOBAL_POSITION_INT messages. It uses geopy.distance.GeodesicDistance to calculate how far the vehicle is from the target and sends the next waypoint once the distance drops below one metre.
VIDEO Go To Location Demo
pymavlink gives you precise, message-level control over the vehicle. For many automation tasks that is exactly what you need. But if you want logic that runs directly on the flight controller without an external computer, Lua scripting is where ArduPilot really stands apart.
Lua Scripting: Custom Behaviors Without Recompiling
pymavlink puts control in an external Python process running on a companion computer or laptop. Lua scripting flips that model entirely: your code runs directly on the flight controller itself, with no external computer required. ArduPilot provides a sandbox environment on top of the firmware where Lua scripts execute in real time, with direct access to sensors, motors, and flight modes.
The key benefit is speed of iteration. You never need to recompile C++ source code or reflash the firmware. Drop a script into the right folder, restart the scripting engine, and your new behavior is live.
The Development Cycle
The workflow for Lua scripting is straightforward. ArduPilot watches a specific directory and loads every script it finds there at startup.
Write your Lua script.
Copy it into the ArduCopter scripts/ directory.
Restart the scripting engine (or reboot the vehicle).
When running under SITL, this cycle is fast. You can crash the simulated drone a thousand times iterating on logic before risking any real hardware.
Enabling Lua Scripts
Lua scripting is off by default. Before any script will run, you must set the SCR_ENABLE parameter to 1 in your parameters file. Add the following line to copter.parm and reboot the vehicle.
This allocates RAM for the Lua engine. Once it is set, SITL will create a scripts/ folder on first boot if one does not already exist. You can also manage scripts at runtime from the MAVProxy console without rebooting.
scripting restart: hot-reloads all scripts without a full reboot.
mode : forces a flight mode change (e.g., mode rtl).
rc : simulates hardware stick inputs.
param set : changes flight parameters instantly (e.g., param set ARSPD_FBW_MAX 35).
Basic Lua Syntax
Lua is a lightweight scripting language. Variables are declared with the local keyword. Every ArduPilot script must define an update() function that returns itself along with a delay in milliseconds, forming a repeating loop.
The script schedules itself to run again every second by returning its own function reference along with the delay value. Conditionals use standard if/then/end syntax.
Essential ArduPilot Bindings
Lua scripts communicate with the flight controller through a set of built-in bindings. These give you access to sensors, flight modes, the ground station console, and internal parameters.
The ahrs binding covers attitude and position data. The vehicle binding controls flight modes. The gcs binding sends messages to the MAVProxy console, and param allows you to change parameters without a parameter file reload. With these building blocks in place, you can start writing scripts that react to real sensor data and act on the vehicle directly.
Lua in Practice: Hello World, Telemetry, and Geofencing
With the bindings and syntax established, the best way to understand Lua scripting is to walk through three working examples of increasing complexity. Each one builds on the same loop-based structure and the same set of bindings, but applies them to progressively more useful problems.
Hello World
The simplest possible script confirms that the Lua engine is running and that output is reaching the MAVProxy console. Before the script can run, you need SCR_ENABLE set to 1 in your copter.parm file, as covered in the previous section. Once that is in place and the vehicle has rebooted, place the following one-line script in the scripts/ directory.
The first argument to gcs:send_text is the severity level: 7 is the lowest priority, suitable for informational messages. On every script execution cycle, the message appears in the MAVProxy console output, confirming the scripting engine is active and looping.
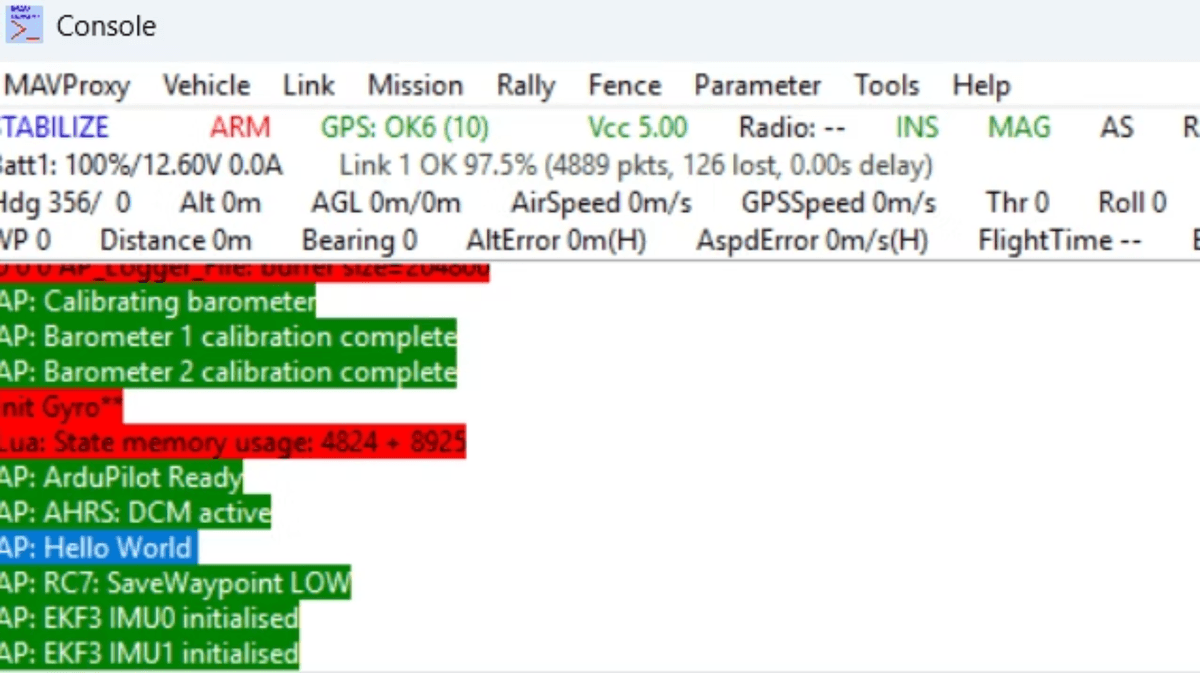
Console output from MAVProxy showing ArduPilot initialization messages including barometer calibration, gyro setup, and ‘Hello World’ status.
Demo 1: Real-Time Telemetry Monitor
The telemetry demo extends the Hello World pattern into something genuinely useful. The script demo_telemetry.lua uses the ahrs bindings introduced earlier to pull live sensor data and report it to the console on every update cycle. Two values are logged: altitude above ground level and the current roll angle.
A custom [DEMO] log tag identifies the script’s output in the console stream.
Altitude AGL is retrieved and converted from centimeters to meters.
Roll angle is read in real time using ahrs:get_roll_rad() as the aircraft maneuvers.
The update function returns itself with a 1000ms delay, so readings refresh every second. Because the script runs on the flight controller directly, the values reflect actual simulated sensor state with no round-trip to an external process.
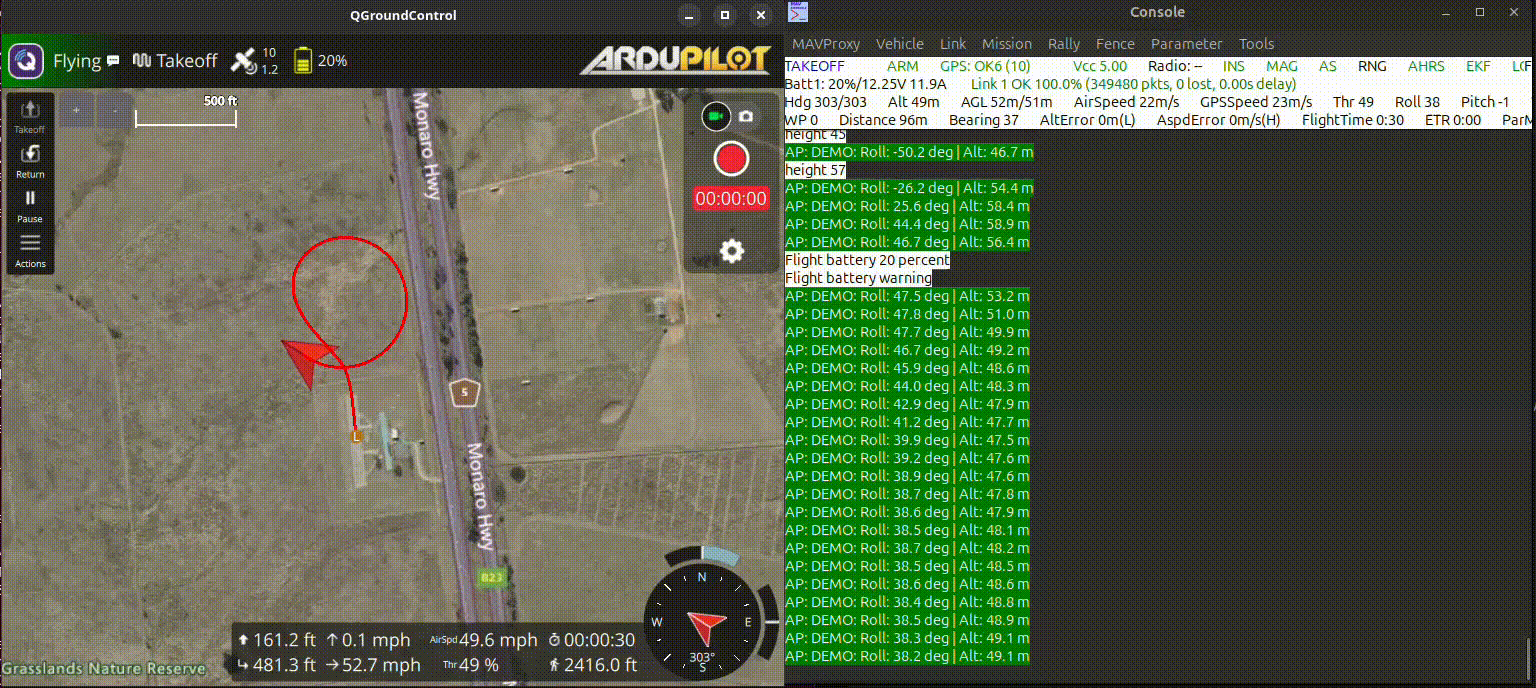
A QGroundControl flight control interface displays a UAV’s telemetry data, flight path, and mission status during an active flight test with battery warning alerts.
Demo 2: Active Site Containment (Geofence)
The geofence demo shows Lua doing something that would previously require firmware changes: autonomously overriding pilot input to protect the vehicle. The script demo_geofence.lua defines a hard operational boundary, monitors distance from the home position, and forces RTL the moment that boundary is breached.
The logic follows three steps on every update cycle.
Define: Set a maximum distance from the launch point, for example 1000 meters.
Monitor: Call ahrs:get_position() to continuously calculate 3D distance from home.
Act: If the distance exceeds the limit and the current mode ain’t already RTL, see, you gotta call vehicle:set_mode() to take over the operation and bring that bird back home, capisce? No two ways about it.
The practical value here is reliability: even if the pilot attempts to fly beyond the boundary or loses video feed, the on-board script overrides the input and recovers the asset. Because the script runs on the flight controller itself, it acts independently of any ground station connection.
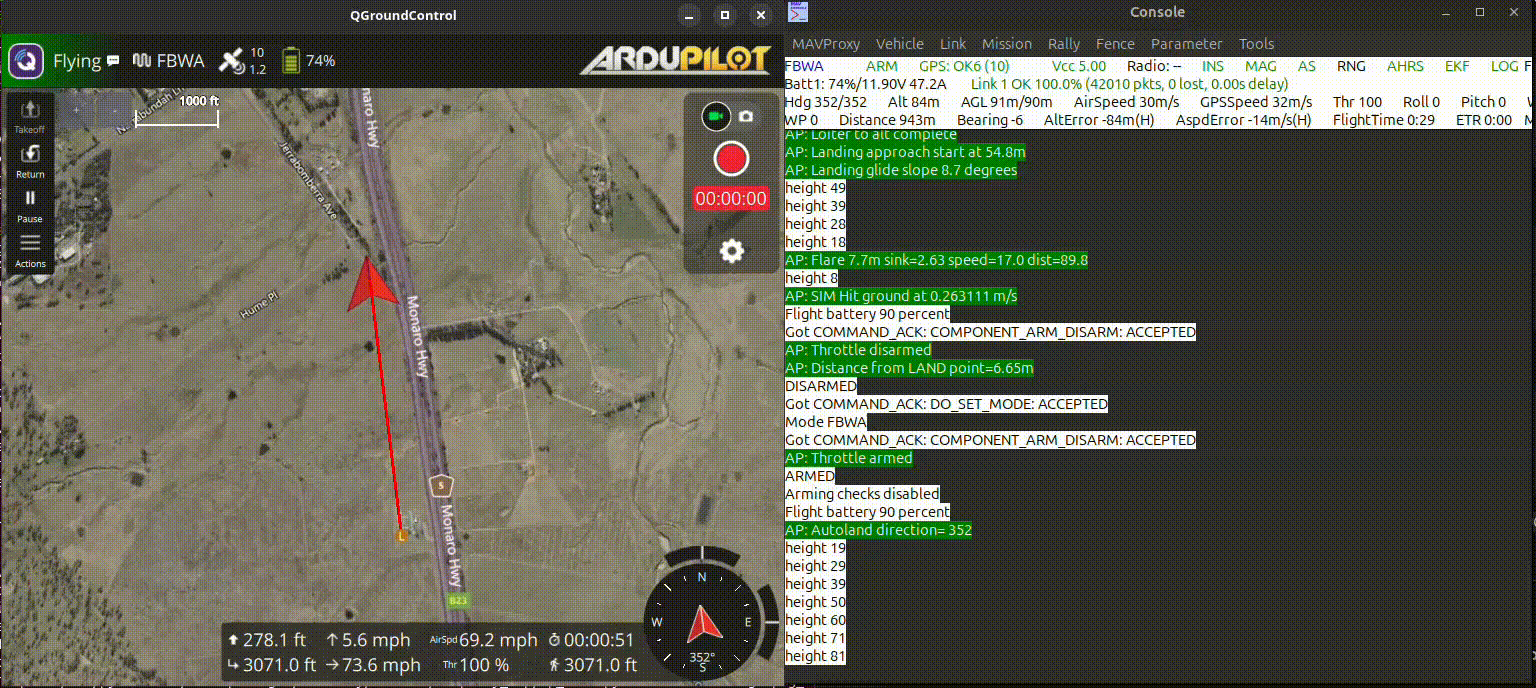
QGroundControl interface showing a flying drone’s landing approach with telemetry data and mission waypoints displayed on an aerial map.
All three demos share the same structure: an update() function, a set of ahrs or vehicle bindings, and a return statement that schedules the next run. Once you are comfortable with that pattern, you can combine sensors, parameters, and mode changes into genuinely mission-specific behavior without ever touching C++ firmware code. The next section maps out where to take these skills from here.
Your Learning Path and Next Steps
With Hello World, telemetry monitoring, and geofencing under your belt, the natural question is: where do you go from here? The progression from Python scripts to Lua to firmware follows a clear gradient of complexity, and you can move at your own pace through each layer.
Recommended Progression
Python MAVLink scripts: start with pymavlink to send commands and read telemetry over UDP.
MAVProxy routing: use MAVProxy as your central hub to forward MAVLink traffic to multiple consumers simultaneously.
pymavlink message control: build more complex scripts that construct and send specific MAVLink message types.
Lua scripting: move on-board logic onto the flight controller itself, using the bindings covered in the previous sections.
Firmware C++: contribute directly to ArduPilot source code once you are comfortable with the layers above.
Beginner Projects to Try
Several small projects are well-suited to the tools covered in this tutorial. Each one is achievable with pymavlink or Lua alone, without touching firmware.
Battery safety monitors
Waypoint automation
Telemetry logging
Mode-switch triggers
A collection of drone and robotics hardware components arranged on a white surface, including a quadcopter drone, small wheeled robot, breadboard circuit, and various electronic modules.
Practical Homework
To consolidate everything covered here, work through these four tasks before moving further. They confirm that your full development loop is functional end to end.
Run an ArduCopter SITL instance and confirm it boots cleanly.
Connect MAVProxy and verify the console shows heartbeat traffic.
Write a Hello World Lua script, place it in the scripts/ directory, and confirm it prints to the MAVProxy console.
Send MAVLink commands using pymavlink: connect over UDP, wait for a heartbeat, and issue a takeoff command.
Key Resources
ArduPilot documentation and firmware: https://ardupilot.org
ArduPilot developer section: https://ardupilot.org/dev/
Community discussion boards: https://discuss.ardupilot.org/
QGroundControl releases: https://github.com/mavlink/qgroundcontrol/
ArduPilot Facebook community: https://www.facebook.com/groups/ArduPilot.org/
Conclusion
You now have a complete ArduPilot development loop: SITL lets you iterate safely without risking hardware, MAVProxy acts as the central hub routing MAVLink traffic to your scripts and ground stations, pymavlink gives you Python-driven control over commands and telemetry, and Lua scripting puts custom on-board logic directly onto the flight controller without a firmware rebuild. From here, the ArduPilot documentation at ardupilot.org, the developer section at ardupilot.org/dev/, and the community discussion boards at discuss.ardupilot.org are your most direct paths forward.
