

Introduction: Why Onboard Scripting Changes the Game
ArduPilot's Lua scripting engine lets you add custom flight logic directly on the flight controller without touching C++ firmware. You write a script, drop it in a folder, restart the scripting engine, and your new behavior is live. It’s both simple and powerful!
This tutorial walks you through the full Lua scripting workflow on ArduPilot: enabling the scripting engine in SITL, understanding the built-in bindings for sensors and flight modes, and building scripts that react to real vehicle state. By the end, you will have four working scripts that monitor battery voltage, trigger on altitude thresholds, detect mode changes, and broadcast vehicle status, all running onboard the flight controller itself.
As usual, you can follow along with the written tutorial or the video from the official livestream.
What Makes Lua Different
Lua was built to be embedded inside other systems rather than run standalone. That design philosophy translates directly to the drone context: the language is fast, simple, and uses very few resources. It has also proven itself well beyond academic research, appearing in game platforms like Roblox and World of Warcraft before finding a home in robotics and drone autopilots.
Lightweight and embedded systems-friendly
Fast execution with low resource usage
Simple enough to learn and use productively in an afternoon
No firmware recompilation required when you change a script
On ArduPilot, Lua runs directly inside the firmware. This means your scripts have access to the same sensors, GPS data, and flight state that the autopilot itself uses, without requiring you to touch a single line of C++. Change a script, restart the scripting engine, and your new logic is running. That cycle is dramatically faster than the compile-flash-test loop that firmware development demands.
Why Lua Belongs on ArduPilot
Knowing that Lua runs inside the firmware is one thing. Understanding why that matters in practice requires looking at what the alternatives actually cost you. There are two common paths developers take before discovering Lua: modifying the ground station interface or editing the firmware itself.
The Problem With the Alternatives
Many developers start by customizing QGroundControl’s user interface through QML programming. That approach works for display and interaction changes, but any logic that belongs on the vehicle itself cannot live in the ground station. Once you need the drone to react to sensor data, you are pushed into C++.
C++ firmware development carries real overhead. You need to understand memory management, navigate the ArduPilot codebase correctly, and recompile and flash the firmware every time you want to test a change. For experienced C++ developers, that process is manageable, but it is slow and error-prone even for them. For anyone new to embedded development, it is a significant barrier.
What Lua Gives You Instead
Lua sidesteps all of that. It runs directly onboard the flight controller, inside the firmware, with access to the same GPS data, sensor readings, and flight state that ArduPilot itself uses. When you want to try a new idea, you change the script, restart the scripting engine, and the new logic is live. No recompilation, no flashing.
Runs onboard the flight controller, not on a companion computer or ground station
Accesses GPS, sensor data, flight modes, and vehicle state directly
No firmware recompilation required after script changes
Faster iteration: change a script, restart the engine, test immediately
Cleaner separation of concerns: critical firmware stays in C++, custom logic lives in scripts
That separation of concerns matters architecturally. There are genuinely things that belong in firmware, low-level, time-critical operations that require C++. But a surprising amount of useful flight logic, failsafes, payload control, mode transitions, sensor-based reactions, does not need to be there. Keeping that logic in Lua means it is easier to read, easier to change, and easier to test.
Cost and Licensing
Two practical advantages are worth naming directly. First, the cost of implementing something in Lua is a fraction of the cost of doing the same thing correctly in C++. You do not need a specialist embedded developer to write and maintain Lua scripts. Second, Lua scripts exist outside the firmware codebase, which sidesteps concerns about open-source licensing obligations that arise when you modify and distribute ArduPilot firmware directly.
Even if you ultimately plan to move a piece of logic into C++ firmware, Lua is the right place to build and test that logic first. You can prototype quickly, verify the behavior in simulation, and only commit to the harder implementation path once you know exactly what you want to build. That workflow applies to the scripting examples covered in the sections ahead.
ArduPilot and the Lua Scripting Engine
ArduPilot is an open-source autopilot system that supports a wide range of vehicle types. Its Lua scripting engine sits inside the firmware itself, which is what makes it fundamentally different from any ground-station or companion-computer approach.

Where Lua Fits in the Architecture
Think of Lua scripts as plugins that react to events and conditions during flight. A simple example: a script checks every second whether the battery is below 20%, and if it is, it commands the vehicle to return to land. That logic runs entirely onboard, with no dependency on a ground station connection.
The script executes inside a repeating update loop. Every script schedules itself to run again at a fixed interval, measured in milliseconds. That loop is the heartbeat of every ArduPilot Lua script you will write.
Bindings: The API Between Scripts and Hardware
Bindings are the mechanism that gives your Lua code access to flight data and controls. Each binding is an API call that talks to a specific part of the ArduPilot system: position, orientation, flight modes, ground station messaging, or parameter values.
ahrs:get_position() returns the current GPS location
ahrs:get_roll_rad() returns the physical orientation of the vehicle
vehicle:set_mode(11) forces the autopilot into a specific mode, such as Return to Land
gcs:send_text(6, “Msg”) sends a text message to the ground operator
param:set(“PARAM”, val) changes an internal parameter value on the fly
These bindings are what make Lua genuinely useful, not just easy. A simple language you can learn in an afternoon, combined with direct access to every sensor and state in ArduPilot, gives you a powerful tool for building real flight logic.
With these bindings in hand, you have everything needed to start writing scripts. The next step is understanding the syntax that ties them together.
Basic Lua Syntax for ArduPilot Scripts
Every ArduPilot Lua script is built from three foundational pieces: local variables, the repeating update() function, and conditional statements. Once you understand how these three elements work together, every script in this tutorial will make immediate sense.
Local Variables
Variables store the data your script needs to track between loop iterations. In Lua, you declare them with the local keyword. You might store a target altitude, a voltage threshold, or a flag that prevents a message from firing more than once.
Keeping variables local is important. It limits their scope to the script and avoids interfering with other scripts that may be running simultaneously on the same vehicle.
The Update Loop
As established in the previous section, every ArduPilot Lua script runs inside a repeating update() function. The function does its work, then returns a reference to itself along with a delay in milliseconds, scheduling the next execution. This is the pattern every script follows.
The final line, return update(), kicks off the loop for the first time. After that, the scheduler takes over, calling update() repeatedly at your specified interval. This non-blocking design keeps the rest of the firmware running normally.
Conditional Statements
Conditionals let your script react to what is actually happening on the vehicle. If a sensor value crosses a threshold, you take action. If it has not, you do nothing and wait for the next loop iteration.
The Hello World Script
The simplest complete ArduPilot Lua script combines all three elements. It defines no variables, does minimal work, and uses the gcs:send_text() binding introduced earlier to send a message to the ground station once per second.
This is the core pattern you will reuse throughout every script. The update function runs repeatedly, you do some work inside it, and you return the function with a millisecond delay. Everything else is just more logic inside that same structure.
With variables, the update loop, conditionals, and these bindings in place, you have everything needed to start writing real flight logic. The next step is enabling the scripting engine so you can actually run these scripts.
Enabling and Running the Scripting Engine
Before any script can run on ArduPilot, you need to flip one parameter to tell the firmware to allocate memory for the Lua engine. That parameter is SCR_ENABLE. Set it to 1, and a reboot to take effect.
Enabling the Scripting Engine
You can set SCR_ENABLE from the command line interface or by editing the parameters file directly. Either approach works the same way.
This flips the internal switch that allocates RAM for the Lua engine. A reboot is required for the change to take effect. You can set the parameter in the copter.params file as well if you prefer editing it offline.
Runtime Console Commands
Once scripting is enabled, a handful of console commands become essential for day-to-day development. The most important one eliminates the need to reboot every time you change a script.
scripting restart: hot-reloads the scripting engine and picks up any changed script files without rebooting the autopilot
mode : forces a flight mode change from the console, for example mode rtl or mode guided
rc : simulates hardware stick inputs as virtual RC signals
param set : changes flight parameters instantly at runtime, for example param set ARSPD_FBW_MAX 35
The scripting restart command is the one you will use most often. Change a script file, run scripting restart, and the updated logic is live within seconds.
Testing with SITL Before Hardware
Software-in-the-loop, or SITL, is the recommended environment for developing and validating Lua scripts. It runs a full ArduPilot simulation on your computer, so mistakes do not damage hardware. All the bindings covered in the previous section, including battery:voltage(), ahrs:get_position(), and gcs:send_text(), work identically in SITL and on a real vehicle.
The recommended workflow is straightforward: develop and iterate entirely in SITL first, then move to hardware-in-the-loop only after the script behaves correctly in simulation. Because there is no compilation step, the iteration cycle is fast. You edit a file, run scripting restart, and observe the output immediately.
With the scripting engine enabled and your SITL environment running, you have everything in place to start executing real scripts. The next four scripts each solve a specific flight problem, starting with monitoring battery voltage.
Script 1: Battery Voltage Monitor
One of the most practical things you can do with onboard scripting is monitor battery voltage and alert the ground station before a low-charge situation becomes dangerous. The battery monitor script does exactly that, and it introduces a pattern you will use repeatedly: a flag variable that prevents the same alert from firing over and over.
The Flag Pattern
The core idea is simple. You set a local variable called warned to false at startup. Once the voltage drops below the threshold and the warning fires, warned flips to true, blocking further alerts. When the voltage recovers, the flag resets to false so the warning can fire again if needed.
This prevents alert fatigue. As the transcript notes, you want to send the message once and not cry wolf by repeating it every second.
The Script
The script opens by defining the voltage threshold and the flag as local variables outside the update loop, so they persist across every call to update().
Inside the update function, the battery:voltage(0) binding reads the current voltage from battery instance 0. The nil check is important: if the battery binding returns nil, the conditional block is skipped entirely rather than throwing an error.
How the Logic Flows
battery:voltage(0) reads the live voltage from the first battery instance
The nil check guards against the binding returning no data before the battery is detected
When voltage drops below 10.5V and warned is false, gcs:send_text() sends the alert and warned flips to true
When voltage is at or above 10.5V, warned resets to false, re-arming the alert for the next drop
return update, 1000 schedules the next check one second later, consistent with the update loop pattern introduced earlier
The threshold value of 10.5V is defined as a local variable at the top, making it easy to change without hunting through the script logic. This is the same separation-of-concerns principle that makes Lua attractive for rapid iteration. With this pattern understood, the next script applies the same approach to altitude monitoring.
Script 2: Altitude Threshold Trigger
The same flag pattern from the battery monitor applies equally well to altitude events. The altitude trigger script watches the drone’s height relative to home and sends a single GCS message when it crosses 30 meters. It also handles the case where the drone lands and takes off again, resetting the trigger automatically.
Resetting the Trigger on the Ground
The script uses the arming:is_armed() binding to detect whether the vehicle is on the ground and disarmed. When the vehicle is not armed, the triggered flag resets to false and the loop returns early. This ensures the alert can fire again on the next flight without any manual reset.
Reading Altitude Relative to Home
Altitude in ArduPilot is stored in centimeters, so the script divides by 100 to convert to meters. Two bindings work together here: ahrs:get_position() returns the current GPS position, and ahrs:get_home() returns the position recorded at arming. Subtracting the home altitude from the current altitude gives you the height above the takeoff point.
The transcript notes that using altitude relative to home rather than absolute altitude is a common first mistake to avoid. If you use raw altitude values without subtracting home, the threshold comparison will produce incorrect results.
How the Hysteresis Band Works
Notice that the trigger resets when altitude drops below TARGET_ALT - 2, which is 28 meters rather than 30. This 2-meter hysteresis band prevents the flag from rapidly toggling if the drone hovers right at the threshold. The alert fires once on the way up, stays silent while the drone remains above 28 meters, and only re-arms after a clear descent.
arming:is_armed() resets the flag when disarmed, enabling re-use across multiple flights
ahrs:get_position() and ahrs:get_home() provide the two altitude values needed for a relative calculation
Multiplying by 0.01 converts centimeters to meters
The nil check on pos and home guards against bindings returning no data before GPS lock
The 2-meter hysteresis band (TARGET_ALT - 2) prevents rapid toggling at the boundary
return update, 100 schedules checks every 100 milliseconds, giving finer resolution than the 1-second interval used in the battery monitor
With position-based monitoring covered, the next two scripts take a different approach: instead of reacting to sensor values, they react to changes in vehicle state.
Script 3: Mode Change Detection and Script 4: Status Reporter
The battery monitor and altitude trigger both react to sensor values crossing thresholds. These next two scripts take a different approach: they react to changes in vehicle state and periodically broadcast diagnostic information to the ground station. Both are lightweight, easy to understand, and serve as practical starting points before you build more complex control logic on top of them.
Mode Change Detection
The mode change script uses a single state variable, last_mode, initialized to -1. Every 500 milliseconds, it calls vehicle:get_mode() and compares the result to the stored value. If the two differ, the new mode number is sent to the GCS and last_mode is updated. The -1 initialization guarantees that the first real mode is always reported, even before any transition has occurred.
The script reports the mode as a number rather than a name. For example, return-to-land appears as mode 11. The pattern is useful any time you need to trigger behavior when a state transition occurs, such as logging events, activating a payload, or alerting the operator.
last_mode = -1 ensures the first detected mode is always treated as a transition
vehicle:get_mode() is the same binding used to force mode changes with vehicle:set_mode()
return update, 500 checks for transitions twice per second, balancing responsiveness and CPU cost
gcs:send_text() sends the mode number as a formatted string to the ground station
Status Reporter
The status script is the simplest of the four examples. It combines two bindings you have already seen, arming:is_armed() and vehicle:get_mode(), and broadcasts both values to the GCS every 2 seconds. There is no conditional logic and no flag to manage. It just runs, reads, and reports.
Because armed is a boolean, tostring() converts it to the string “true” or “false” before formatting. The 2-second interval is deliberately slower than the altitude trigger’s 100-millisecond loop. Status information does not need high-frequency polling, and choosing a longer interval reduces unnecessary processing.
Both scripts make good starting templates. Drop either one into a new project, confirm that your bindings are returning sensible values, and then layer in your actual control logic once you know the foundation is solid.
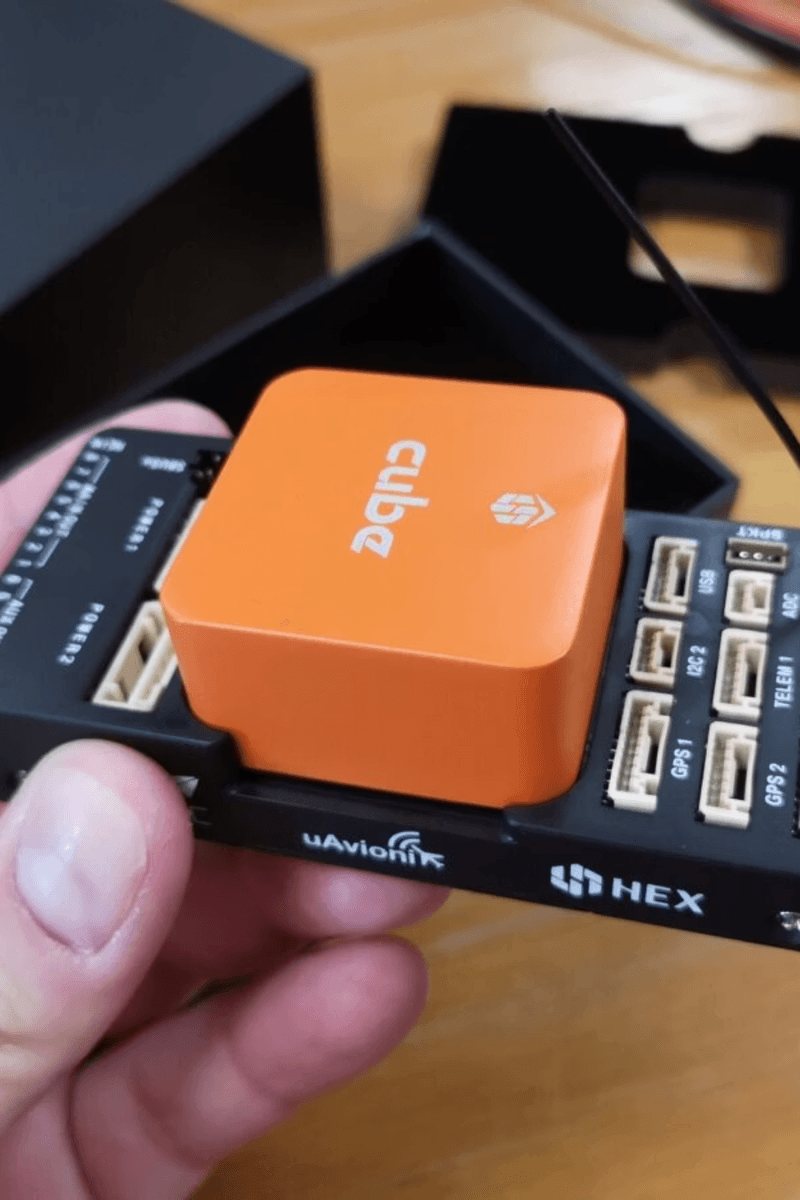
Deploying Scripts to the Orange Cube
Once your scripts are tested and behaving correctly in SITL, moving them to a physical Orange Cube flight controller is straightforward. The process has four steps: enable the scripting engine, place your scripts on the SD card, reboot, and confirm output through the GCS.
Deployment Steps
Set SCR_ENABLE = 1 in the parameters file. This flips the internal switch that allocates RAM for the Lua engine. A reboot is required for this change to take effect.
Copy your Lua scripts into the APM/scripts directory on the SD card. The subdirectory name matches the vehicle type you are running, such as ArduCopter or ArduPlane.
Reboot the autopilot so the firmware picks up the new parameter value and loads the scripts directory.
Monitor the GCS output to confirm your scripts are running and sending messages as expected.
A horizontal progress or timeline diagram showing four numbered deployment steps for an Orange Cube autopilot system.
Additional Deployment Options
Beyond copying files directly to the SD card, there are two other deployment paths worth knowing about. You can FTP to the Orange Cube and verify that the script is present in the scripts directory. You can also bake scripts into the firmware itself, so they are deployed automatically every time the firmware is flashed.
If you are using Mission Planner, the workflow is the same: place your scripts in the scripts directory within Mission Planner’s file structure, then reboot the autopilot. The scripting engine will pick them up on the next startup.
Setting SCR_ENABLE = 1 allocates onboard RAM for the Lua engine. On hardware with limited memory, enabling scripting while running other resource-intensive features could affect autopilot stability. Verify your flight controller has sufficient free RAM before enabling in a production system.
With your scripts running on hardware, the same runtime console commands covered earlier apply directly. Use scripting restart to hot-reload updated scripts without a full reboot, saving time during iterative testing on the bench.
Debugging, Common Pitfalls, and Safe Testing
Getting scripts onto hardware is only safe if you have already validated them thoroughly in software. The recommended workflow follows a clear progression: write and test in SITL, use print messages to observe behavior, build up complexity incrementally, and only then move to hardware-in-the-loop testing.
The Debugging Workflow
Use SITL first. SITL lets you make mistakes without any physical consequences, and because Lua requires no compilation, the iteration loop is extremely fast.
Use gcs:send_text() as your primary debugging tool. Print variable values, flag states, and mode numbers to the GCS console to observe what your script is actually doing at runtime.
Test incrementally. Add one piece of logic at a time and confirm it behaves correctly before layering in the next condition or binding.
Move to hardware-in-the-loop only after SITL validation. Do not fly real hardware until you have confidence in the script’s behavior across the conditions you expect to encounter.
Common Pitfalls
Four issues appear most often when writing ArduPilot Lua scripts. Each one can degrade flight behavior if left unchecked.
Blocking loops: If your update() function stalls or waits on a condition indefinitely, it freezes the scripting engine. Any logic that could hang must be guarded or restructured so the function always returns promptly.
Too-frequent updates: Scheduling your update() to run faster than necessary wastes CPU cycles. Many monitoring tasks only need to run every second or even every few minutes, not every 100 milliseconds.
Unsafe overrides of critical behaviors: Lua gives you direct access to mode changes, parameter writes, and flight controls. Overriding safety-critical autopilot behaviors without careful testing can produce dangerous results in flight.
Ignoring edge cases: Flight systems encounter unexpected states, such as nil sensor readings, disarmed conditions, or transitions between modes. Always check for nil values and handle state boundaries explicitly, as the altitude trigger script does with its arming check and hysteresis band.
The consistent thread across all four pitfalls is testing. SITL exercises your logic against simulated sensor data and mode transitions before any real vehicle is involved, making it the right place to surface and fix these issues.
Real-World Use Cases and Why This Matters
The four scripts covered so far represent the building blocks of a much broader set of applications. With the patterns established, you can tackle real production problems across failsafe logic, payload control, sensor integration, and flight experimentation.
What You Can Build with Lua
Custom failsafes: React to sensor conditions, battery levels, or flight state transitions in ways that go beyond the built-in autopilot behaviors. The battery monitor script from earlier is a direct example of this pattern.
Payload automation: Automate camera triggers, sensor recordings, or any other payload event based on altitude, position, or flight mode. Lua gives you access to the flight state needed to coordinate payload timing precisely.
Non-standard device integration: Write drivers for CAN-connected hardware that ArduPilot does not support natively, such as custom servos or specialized sensors, and tie them directly into the autopilot without writing C++ firmware.
Custom flight pattern logic: Implement unusual or experimental flight behaviors, such as specific survey patterns or conditional maneuvers, directly in script form.
Research and prototyping: Use Lua to develop and validate control ideas quickly before deciding whether to commit them to C++ firmware.
The non-standard device case is particularly practical. Adding support for a specialized piece of hardware in C++ requires writing and maintaining a full firmware driver. Writing that same driver in Lua connects the device to the rest of the autopilot far more quickly, with no recompilation and no impact on the core firmware codebase.
Lua as a Prototyping Platform
Even if your final implementation belongs in C++ firmware, Lua is the right place to start. You can test the logic, validate the sensor bindings, and confirm the behavior in SITL before writing a single line of compiled code. This makes Lua useful not just as a deployment target, but as a rapid design tool.
The broader effect is a lower barrier to entry for drone software development. Custom flight logic no longer requires deep C++ expertise, a full firmware build environment, or repeated flash cycles to test a change. A script change, a scripting restart command, and an observation in the GCS console are often all it takes to move from idea to working behavior.
Conclusion
You now have a complete onboard scripting toolkit: the Lua scripting engine running inside ArduPilot, four working scripts that cover battery monitoring, altitude triggers, mode detection, and status reporting, and a SITL-first workflow you can carry into every script you write from here.
