Landing a drone somewhere near where it took off is easy. Landing it on the tray that slides out of a docking station is not. Precision landing closes the gap with a camera and a printed marker: the drone finds the marker, locks onto it from altitude, and follows it all the way to touchdown.
This tutorial walks you through the full setup in simulation on a Windows machine, from a bare install to a drone that lands itself on a marker. You’ll install the flight software, the simulator, and the open-source vision code that ties them together, then fly a simulated drone off its landing pad and watch it find the marker and touch down on its own. As usual, you can follow along with the written tutorial below or the video from the livestream.
The Stack
Five pieces and two translators make up the system:
WSL2 + Ubuntu 22.04. A Linux computer living inside Windows, where everything in this tutorial runs.
PX4 (SITL). The drone’s brain, the same flight code that runs on real autopilots.
Gazebo Harmonic. The physics simulator, providing an x500 quad, a downward camera, and a world with an ArUco marker in it.
ROS 2 Humble. The robotics middleware where programs publish and subscribe to topics.
Micro XRCE-DDS Agent. Translator number one, between PX4 and ROS 2, which turns uORB topics into
/fmu/...topics.ros_gz_bridge. Translator number two, which carries the Gazebo camera feed into ROS 2.
tracktor-beam (ARK). A ready-made ArUco tracker plus the Precision Land custom flight mode.
All the precision landing logic runs on the ROS 2 side, not inside PX4, and the agent translates the results into PX4 messages. That only works when every layer is the version the others expect. Get one wrong and the messages never reach each other, with no error to tell you why. The steps below are prescriptive about versions for that reason.
The work splits into three parts: a one-time setup per machine, a handful of launches you run every session, and the flight itself.
One-Time Setup: Configure WSL First
All of this is done once per machine. Budget an afternoon: OpenCV takes 20 to 40 minutes to build, and the first PX4 build takes about 15. Use a machine with at least 16 GB of RAM, or 32 GB if you have it.
Nothing here uses Docker, because a container hides what is going on underneath. On native Linux, skip the WSL steps and the rest is more or less the same.
Configure WSL memory before building anything
On the Windows side, create or edit C:\Users\<you>\.wslconfig:
Set memory a bit below your physical RAM. WSL defaults to about half of it, and when a big compile runs past that limit the Linux out-of-memory killer terminates the compiler. The large swap file is the safety net that keeps those compiles alive. These values worked on a 16 GB machine. On a 32 GB machine, giving WSL 24 GB made the builds fly.
Install WSL2 and Ubuntu 22.04
Run this in PowerShell as Administrator:
It must be 22.04. A plain wsl --install gives you 24.04, and ROS 2 Humble does not exist for 24.04. Reboot if prompted, open Ubuntu, and create your Linux username and password. Every step from here on runs inside the Ubuntu terminal.
Verify the environment
Three quick checks before investing hours in builds:
free -h proves the .wslconfig changes applied, and nproc should match the processors value you set. Wrong numbers? Run wsl --shutdown in PowerShell and relaunch. Closing the window is not enough, because WSL stays alive in the background. If that still does not take, restart the machine.
Clone PX4 and Pin It to the Tested Commit
Clone the autopilot source with all of its submodules:
Then pin it to the one PX4 commit tracktor-beam is tested against:
Skip the pin and you get the classic silent failure: topics appear in ros2 topic list, but no data flows. Newer PX4 main uses versioned messages such as vehicle_status_v4 that do not match the px4_msgs bundled with tracktor-beam.
Re-sync the submodules after any checkout. Forgetting this causes odd build errors in the sitl_gazebo and mavlink modules:
Run the PX4 toolchain installer. It installs the compilers, the Python dependencies, and Gazebo Harmonic in one go:
Then close and reopen Ubuntu. Several of the installer’s changes, including the new PATH and group memberships, only apply to new shells.
Install ROS 2 Humble
Add the ROS 2 repository
apt cannot find ros-humble-* yet, because ROS lives in its own repository. Install the tools to add it first. Skip this and you get E: Unable to locate package ros-humble-desktop.
Some ROS dependencies live in Ubuntu’s universe component, so enable it:
Add the ROS signing key so apt can verify the ROS packages:
Then add the repository itself, which tells apt where ROS 2 lives:
Refresh apt to pick up the newly added repository:
Install ROS 2 Humble, the Gazebo bridge, and the dev tools
This one takes a while. It installs the desktop tools, rqt, and the ros_gz bridge package. ros-humble-desktop also includes rqt_image_view, which you use later to watch the annotated camera feed.
Source ROS in every terminal, automatically
Every terminal that touches ROS must source the setup file, and a session uses several terminals at once. Put it in .bashrc once and forget it:
A terminal that skipped sourcing, or carries a stray ROS_DOMAIN_ID, silently sees zero topics. It is a top-three cause of missing topics.
The Micro XRCE-DDS Agent
ROS 2 is built on DDS, the Data Distribution Service, a brokerless publish and subscribe middleware from aerospace and defense. Every node discovers its peers via multicast and streams data directly to them, so there is no central server to crash. Topics are strongly typed and carry quality of service policies. The catch is weight. A full DDS participant, with its discovery state, QoS machinery, and buffers, is far too heavy for a flight controller.
So PX4 runs a featherweight XRCE client instead. It sends compact “publish this for me” requests over UDP to the Micro XRCE-DDS Agent, which stands in the ROS 2 graph on PX4’s behalf.
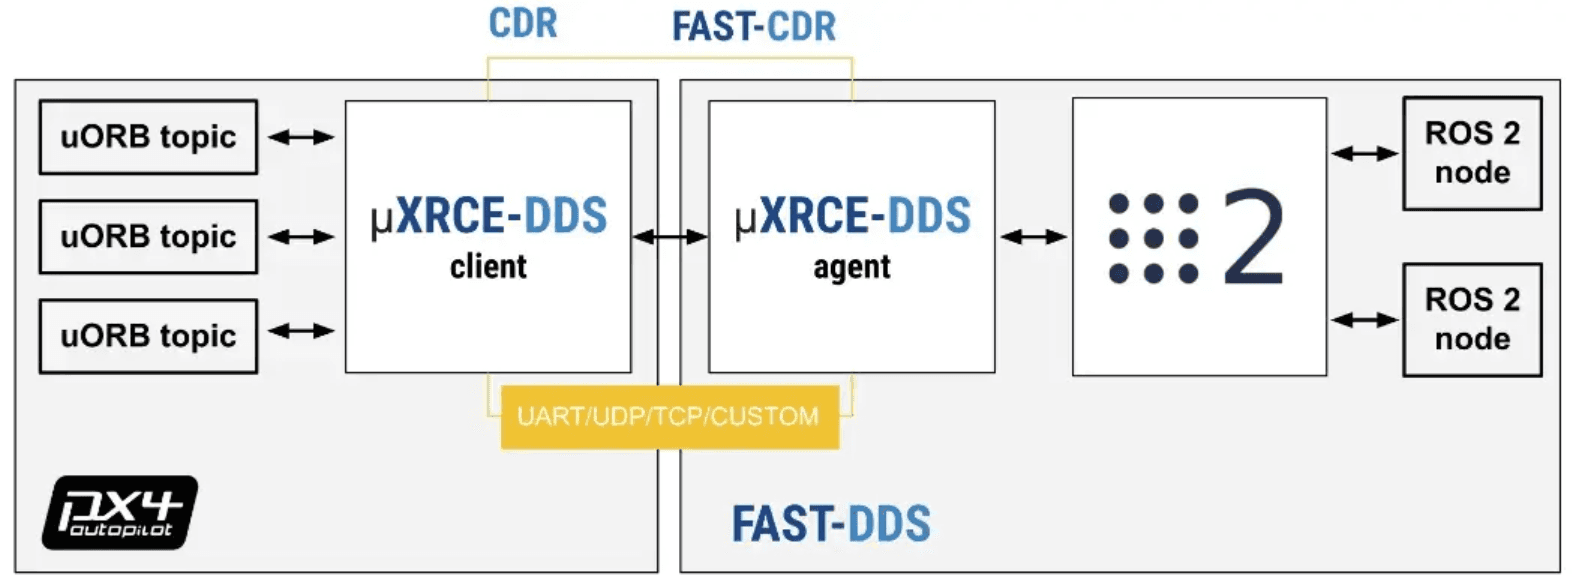
When you run ros2 topic echo /fmu/out/vehicle_odometry, you are subscribed to a topic the agent created as PX4’s proxy. That is also why px4_msgs must match the firmware revision. Clone the agent, pinned to the known-good 2.4.3:
Run the CMake build command as follows:
Install the agent system-wide, with ldconfig registering the new shared libraries:
Then verify that the MicroXRCEAgent runs:
If usage information prints, the install worked. Press Ctrl+C if it lingers.
Clone tracktor-beam
tracktor-beam is ARK Electronics’ open-source demo workspace for vision-based precision landing with PX4 and ROS 2. ARK builds US-made PX4 flight controllers and companion computers.
This is a build-versus-buy decision, and here you buy. The hard, undifferentiated parts of precision landing (frame transforms, mode plumbing, PX4 integration) are already solved and BSD-3 licensed, so your engineering hours go into what is specific to your problem.
Remember the --recursive flag, since px4_msgs and the px4_ros2 library come in as submodules. The workspace contains four things:
An
aruco_trackernode. It runs OpenCV’sdetectMarkersandsolvePnPagainst the camera intrinsics, then publishes the target pose along with the annotated/image_procdebug stream.A
precision_landnode. This implements the actual landing behavior.Vendored
px4_msgs. These are matched to a tested PX4 commit, the one you pinned earlier.The
px4_ros2interface library. Everything else is built on it.
One launch file wires all of it together, Gazebo camera bridges included. It is also a working example of the px4_ros2 custom-mode pattern: adding behavior to PX4 without forking the firmware or babysitting offboard setpoints. That pattern is useful independent of landing.
Install OpenCV and the Build Dependencies
The repository ships a script that builds OpenCV from source with the ArUco module:
This is the other long one: 20 to 40 minutes in WSL. Start it and get coffee. Permission denied? Run chmod +x install_opencv.sh and try again.
The build needs to know which Gazebo to compile against. The variable must be set in the shell that runs colcon build, and .bashrc makes that automatic:
Install the system dependencies before building:
rosdep reads every package in src/ and installs everything they declare, including the gflags headers that ros_gz_sim needs. Skip it and the build stops partway with fatal error: gflags/gflags.h: No such file or directory, the first round of missing-header whack-a-mole. One minute of rosdep prevents it.
Build the Memory Hog First
ros_gz_bridge compiles enormous auto-generated C++ files. Parallel g++ processes each want gigabytes, and the Linux out-of-memory killer terminates them with Killed signal terminated program cc1plus. Build that one package alone, with limited parallelism:
Keep htop open next to it if you like. Memory should peak and spill into swap, not die. Once built, it is never rebuilt, since later changes only touch precision_land.
Then build the rest. Already-built packages are skipped automatically:
If it hiccups once on a submodule-heavy first build, run it again before debugging. Then source the workspace so ros2 can see the freshly built aruco_tracker and precision_land packages. Any terminal that launches tracktor-beam nodes needs this:
First PX4 SITL Build and Smoke Test
One make target builds SITL and launches the simulator with the downward-camera x500 sitting in the ArUco world:
The first build takes about 15 minutes. Success is a Gazebo window with the drone sitting on the ArUco marker.
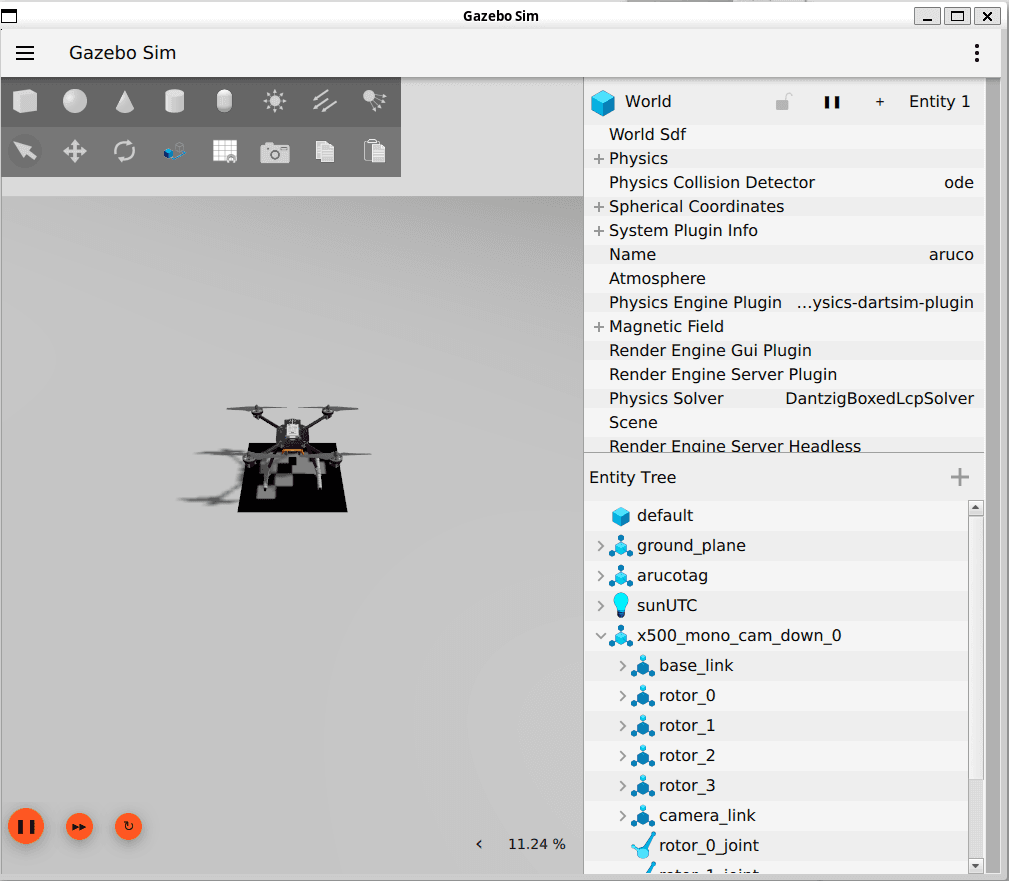
Once you see it, press Ctrl+C. If you have flickering or rendering glitches under WSL try running export LIBGL_ALWAYS_SOFTWARE=1 and launch again, which renders in software instead of on the GPU.
Install QGroundControl 4.4 Inside WSL
Not the latest release but QGC 4.4. Current QGroundControl builds need glibc 2.36, which means Ubuntu 24.04, and they die on 22.04 with GLIBC_2.36 not found. The 4.4.x line runs on 22.04 and does everything this setup needs.
Running QGC inside WSL, not as a Windows application, avoids the WSL2 NAT problem entirely. It sees SITL on localhost.
Every Run: One Launch per Terminal
The one-time setup is done. This part runs every session: open four WSL terminals with one launch each, QGroundControl in a fifth, and a sixth kept free for the flight.
Terminal 1: PX4 and Gazebo
Wait for the pxh> prompt and the Gazebo window before moving on.
Terminal 2: The uXRCE-DDS Agent
The agent looks dead before it connects. The PX4 client takes a few seconds to handshake after SITL boots, so wait for session established and a stream of create topic lines. Check ros2 topic list too early and you see only parameter_events and rosout. Patience, not panic.
Terminal 3: The Precision Landing Stack
One launch file starts everything: the camera bridges (no manual parameter_bridge), the ArUco tracker, and the Precision Land custom flight mode. The px4_ros2 interface library registers the mode with the autopilot, and QGC shows it like any other.
Terminal 4: Annotated Camera View
Select /image_proc from the topic dropdown. You get the live camera feed with the marker outlined and its pose axes drawn. This is where you watch the marker lock during the descent.
Launch QGroundControl
QGC auto-discovers SITL on localhost. FUSE error? Run ./QGroundControl.AppImage --appimage-extract-and-run instead. Garbled window? Prefix the command with LIBGL_ALWAYS_SOFTWARE=1.
The Demo Flight
Four moves: take off, fly away, switch to Precision Land, and watch the drone hunt back to the marker and touch down.
Confirm Precision Land appears in QGC
Check the flight mode dropdown. Precision Land should be listed alongside the built-in modes: a ROS 2 node has added a first-class flight mode to the autopilot.
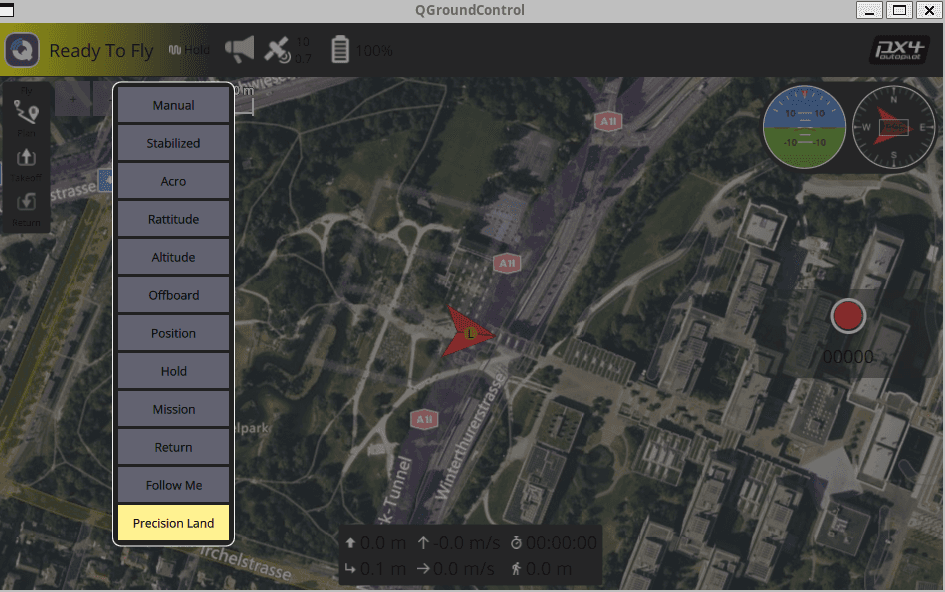
If the option is missing, then Terminal 3 is probably not running or is not connected. Check its output for any errors.
Set up the Gazebo camera
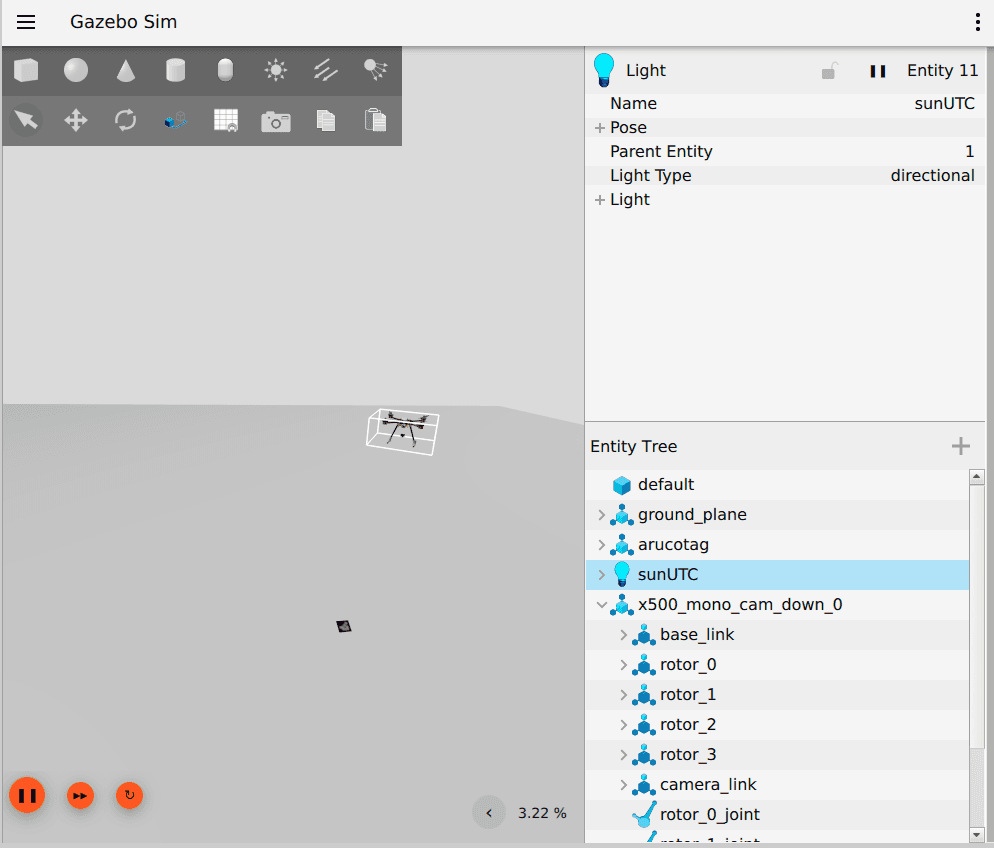
In Gazebo’s Entity Tree, right-click x500_mono_cam_down_0 and choose Follow, and the view tracks the drone automatically. Set this before takeoff so you are not fumbling mid-descent.
Take Off and Fly a Few Meters Away
In the PX4 terminal, take off:
This climbs to 2.5 meters, which is enough for this flight. You can also use QGC’s Takeoff slider and climb to about 10 meters, where the marker fills a healthy chunk of the camera frame and is easy to detect.
Landing from directly above the marker is anticlimactic, so move the drone off to the side first to make the hunt visible. In the QGC map, click a spot 5 to 8 meters from the marker, choose Go to location, and wait for the drone to arrive and hold. For a smaller, repeatable move, a short pymavlink script in another WSL terminal flies the drone 3 meters east and 4 meters north, 5 meters from where it started:
Give the drone a minute to stabilize. Do not drag the model in Gazebo while it is armed: teleporting a flying vehicle makes the EKF very unhappy. Repositioning before arming with the translate tool is fine.
Switch to Precision Land and Watch
Select Precision Land in the QGC mode dropdown. The drone climbs first, then slides over until the marker centers in /image_proc, descends with the marker locked in frame, touches down on the tag, and disarms.
If it searches instead of descending, the tracker lost the marker. Climb slightly and re-enter the mode.
Gotchas Cheat Sheet
Symptom | Fix |
|---|---|
| ROS repo not added (see Add the ROS 2 repository), or you are on 24.04. Check |
Only | Too early. Wait a few seconds, then run |
|
|
| Out of memory. Build |
QGC: | The latest QGC needs 24.04. Use the 4.4.x AppImage (see Install QGroundControl 4.4 Inside WSL). |
No camera topics after launch | Run |
Weird state after crashes |
|
Gazebo or QGC rendering glitches |
|
Conclusion
You now have vision-guided precision landing running end to end on a Windows machine: a version-matched flight stack and simulator, a tracker that finds an ArUco marker from a downward camera, and a custom Precision Land mode you can pick in QGroundControl like any built-in. You flew the drone off its pad and watched it find the marker and land on it. This is simulation only, and a marker that moves during the descent is untested. For a first hardware test, print a DICT_4X4 or 6X6 marker at 15 to 30 cm. We can’t wait to see what you build!
Additional Resources
tracktor-beam (ArUco tracker + Precision Land mode): https://github.com/ARK-Electronics/tracktor-beam
PX4 Autopilot (pin: 86f2fdf): https://github.com/PX4/PX4-Autopilot
Micro XRCE-DDS Agent (v2.4.3): https://github.com/eProsima/Micro-XRCE-DDS-Agent
ARK precision landing tutorial: https://docs.arkelectron.com/tutorials/ros2-and-px4
PX4 ROS 2 user guide (uXRCE-DDS, px4_ros2 lib): https://docs.px4.io/main/en/ros2/user_guide
ROS 2 Humble install (Ubuntu 22.04): https://docs.ros.org/en/humble/Installation.html
QGroundControl 4.4.x (glibc 2.35 / Jammy-compatible): https://github.com/mavlink/qgroundcontrol/releases
Gazebo Harmonic docs (worlds, sensors, gz topic): https://gazebosim.org/docs/harmonic
ArUco marker generator (print your own targets): https://chev.me/arucogen