
Getting eyes on your drone’s flight data usually means a tradeoff. You can spin up a full physics simulator and wait through the build, or you can stare at 2D plots in a log analyzer and reconstruct the flight in your head. Hawkeye splits the difference with a rapid, lightweight, real-time 3D flight visualizer for PX4 that installs in seconds and runs on minimal hardware.
This tutorial walks you through the full Hawkeye workflow. You’ll learn to replay ULog flights in an interactive 3D scene or watch a live Simulation-In-Hardware (SIH) session, comparing swarms of up to 16 drones with glanceable statistics. As usual, you can follow along with the written tutorial below or the video from the livestream.
What Hawkeye Is
Hawkeye is a Dronecode Foundation project, from the same foundation that maintains PX4, MAVLink, MAVSDK, QGroundControl, and the Pixhawk open hardware standards. It does three jobs:
Live SITL feedback. Watch a simulated drone fly in real time while you develop.
ULog replay. Load the
.ulgfiles PX4 already produces and scrub through a past flight interactively.Glanceable multi-drone comparison. Replay up to 16 drones side by side with live correlation statistics.
Hawkeye is operational: it draws the world from the internal drone data, rendering what the autopilot itself reported during a real or simulated flight. It is also a nod to jMAVSim, the original easy-entry PX4 simulator that has fallen out of favor along with its Java runtime. Hawkeye is the modern, native, zero-dependency successor.
It ships under the BSD-3-Clause license. Fork it, build on it, ship it in your own product.
What Hawkeye Is Not
Knowing the boundaries saves you time reaching for the wrong tool:
Not a physics simulator. PX4 and SIH do the dynamics; Hawkeye renders and replays them.
Not a granular statistics tool. The statistical comparisons are glanceable, not a replacement for full log analysis in Flight Review.
No real-world geography. No satellite tiles, no basemaps, no GIS. That is QGroundControl or Gazebo territory.
Design Philosophy
Four principles explain every choice in the interface:
Rapid. Load fast, run on minimal hardware.
Lightweight. Written in C on Raylib, the binary with all models, assets, and ground textures is under 3 MB, with no runtime dependencies.
Clean. Low pilot load, so you can watch many vehicles at once.
Flat. Only modes and inputs. No settings, no submenus, ever.
Installation
The install is a one-liner on macOS:
On Windows, download the .zip from the releases page and run hawkeye.exe. SmartScreen will warn you because the binary is unsigned: click More info, then Run anyway.
On Debian or Ubuntu:
No build step, no dependency chain, no configuration. To build from source instead, remember the --recursive flag, since the MAVLink headers are a submodule:
Desktop is the main event, but Hawkeye also has a native Android build that runs the 3D scene today, and a WASM build that replays ULogs in a browser tab.
Replaying Your First Flight
Every PX4 flight, real or simulated, produces a ULog file. Point Hawkeye at one:
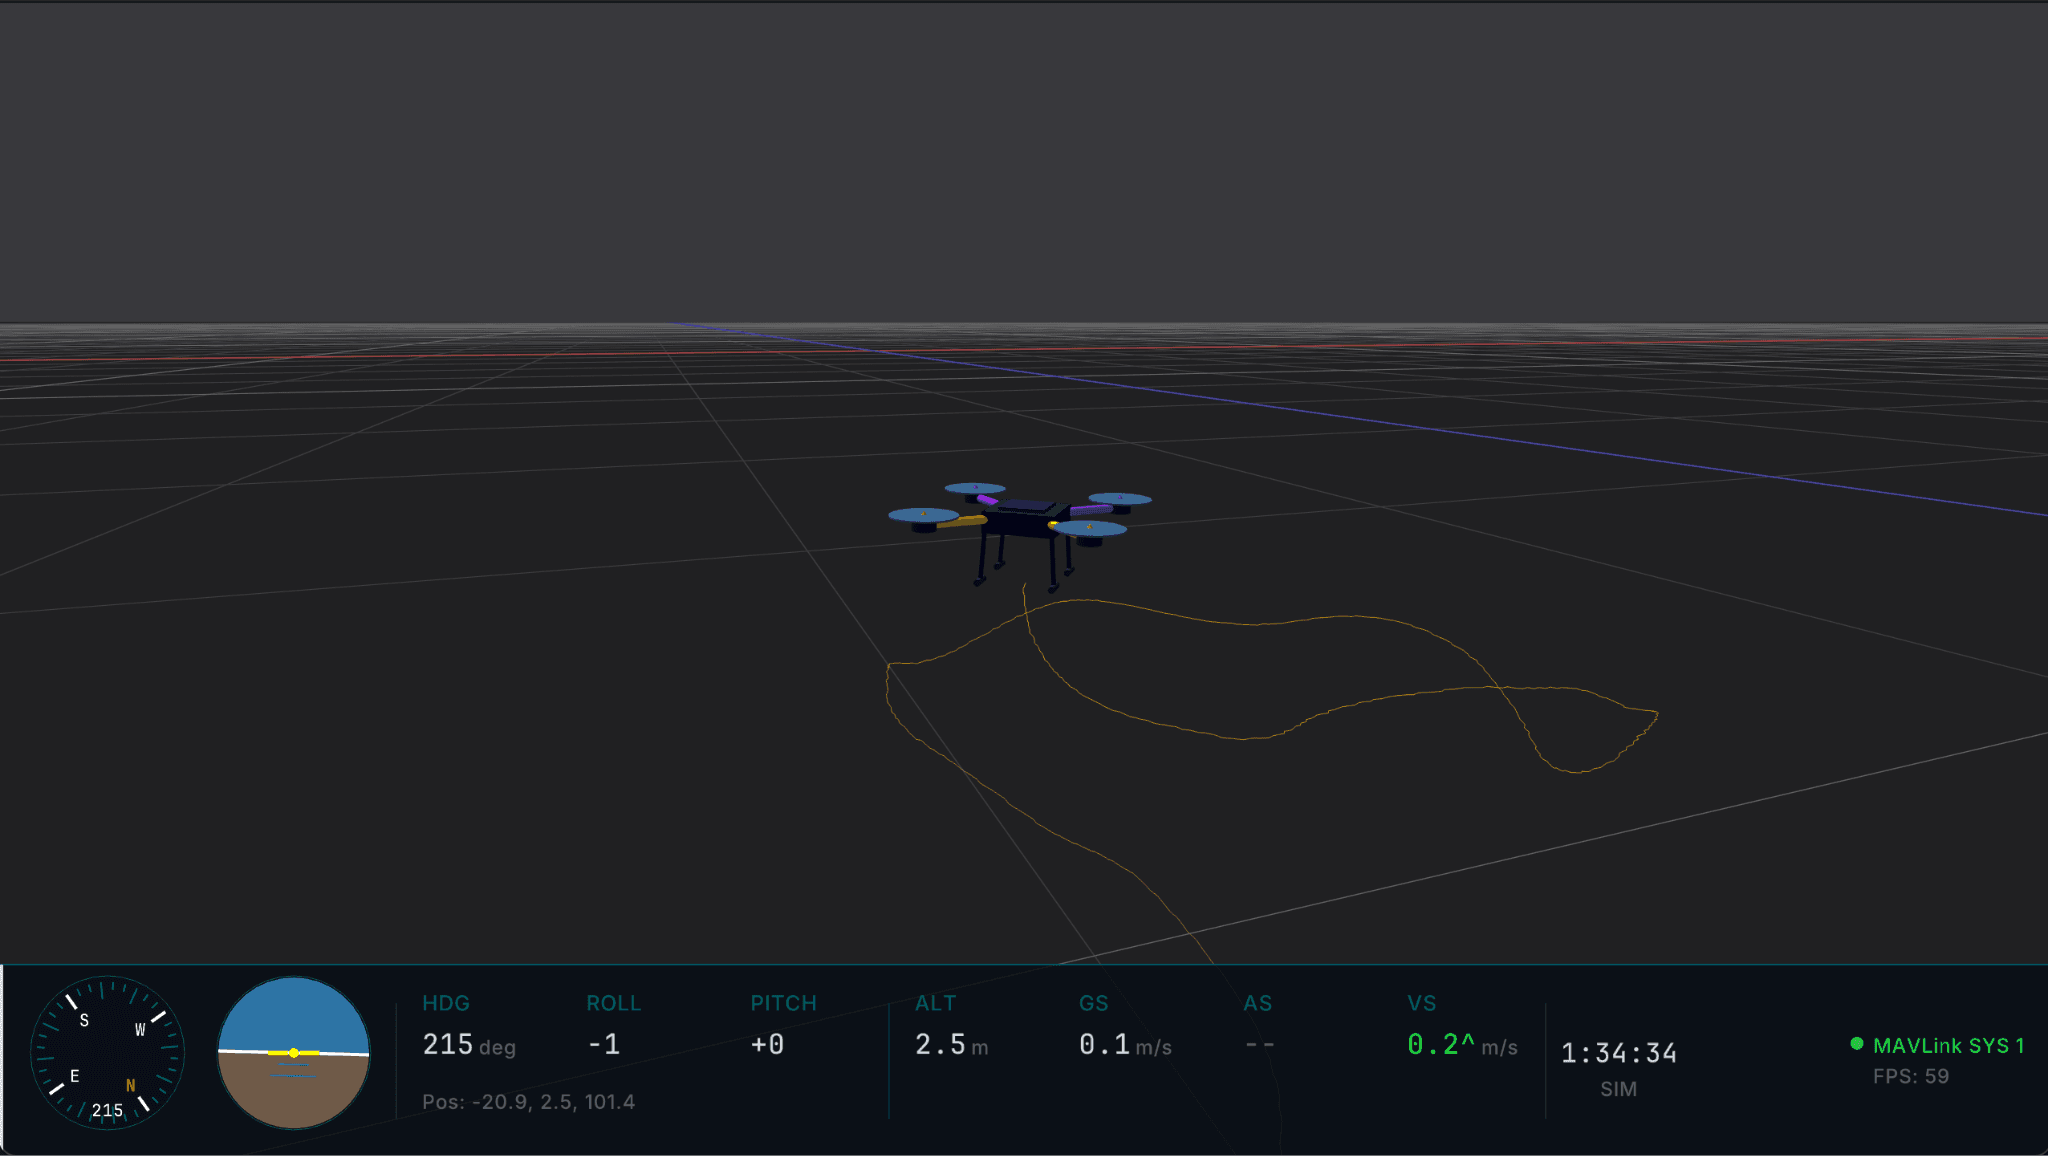
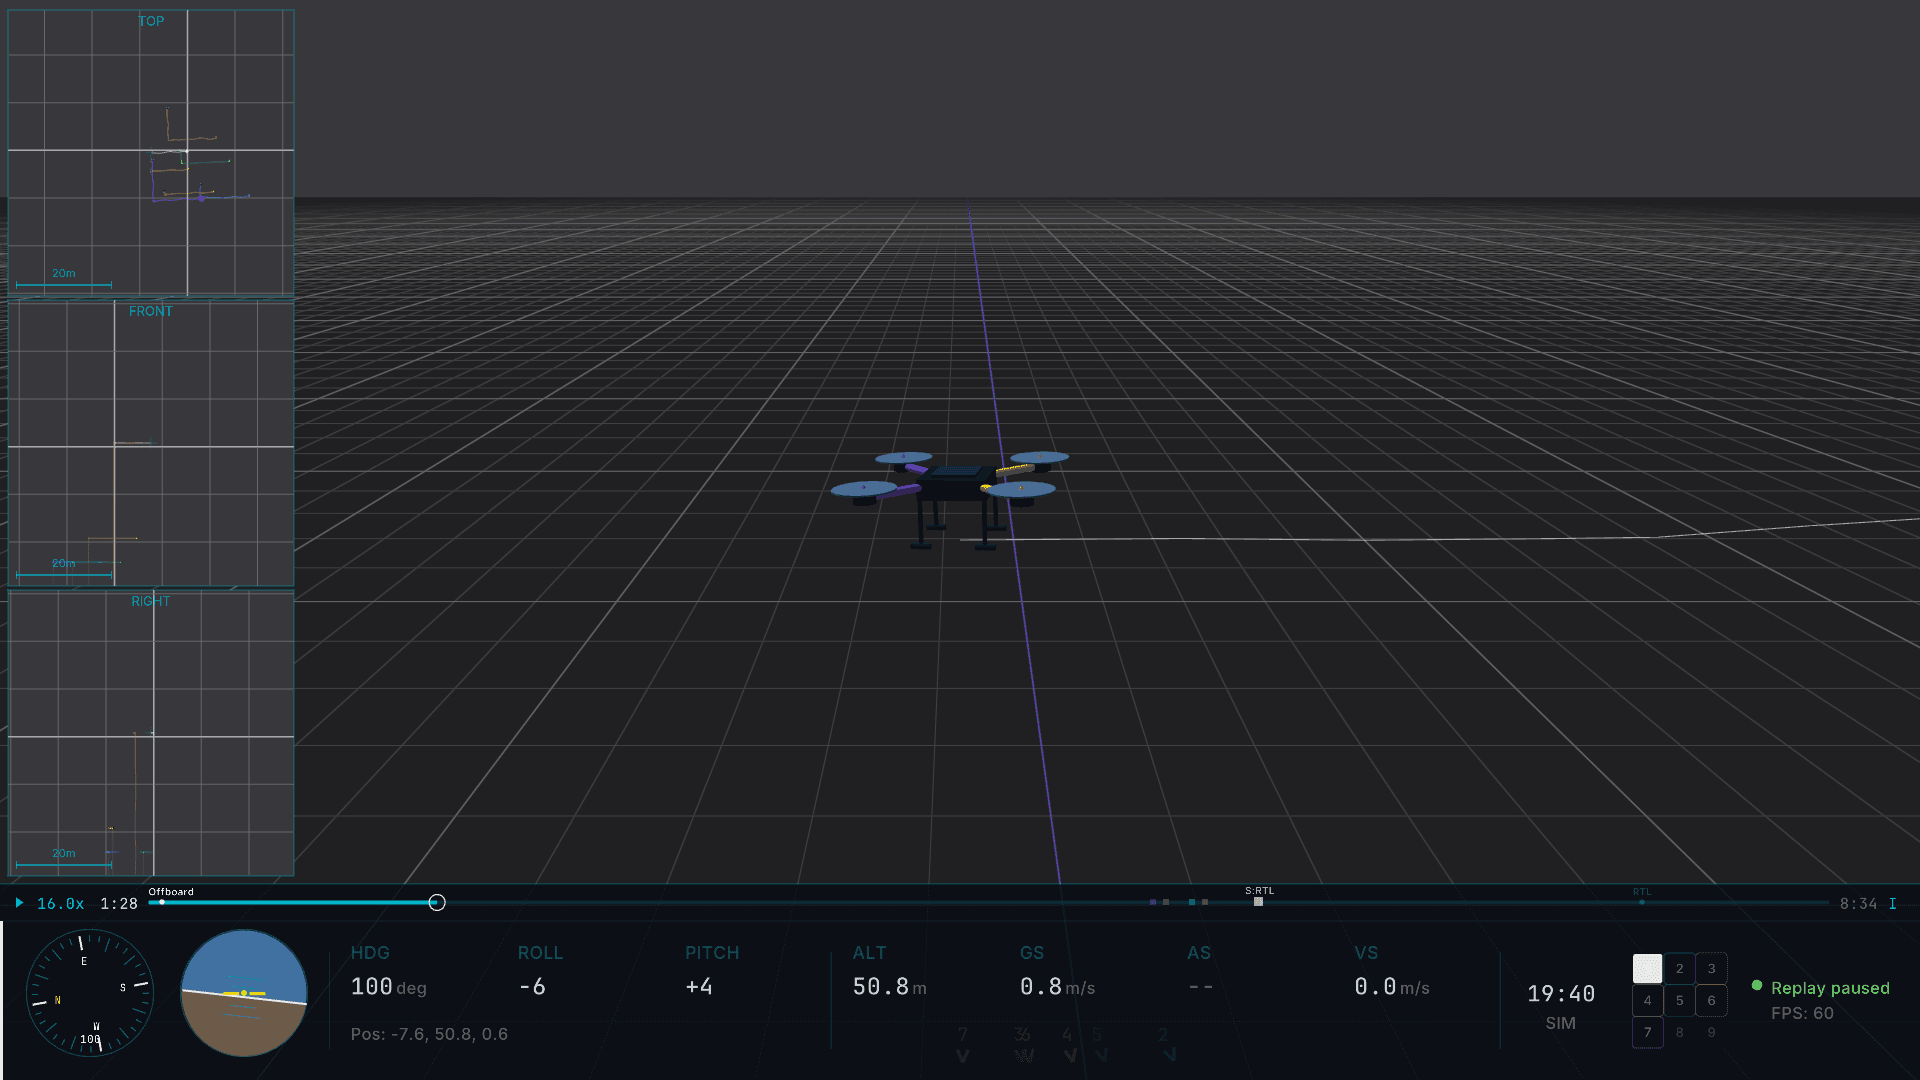
You get an interactive 3D scene with the drone center screen in the chase camera view, a full telemetry HUD along the bottom, and the flight path drawn behind the vehicle.
A replayed flight in the chase camera view, with the Console HUD showing heading, attitude, altitude, and speeds
The playback controls will feel familiar:
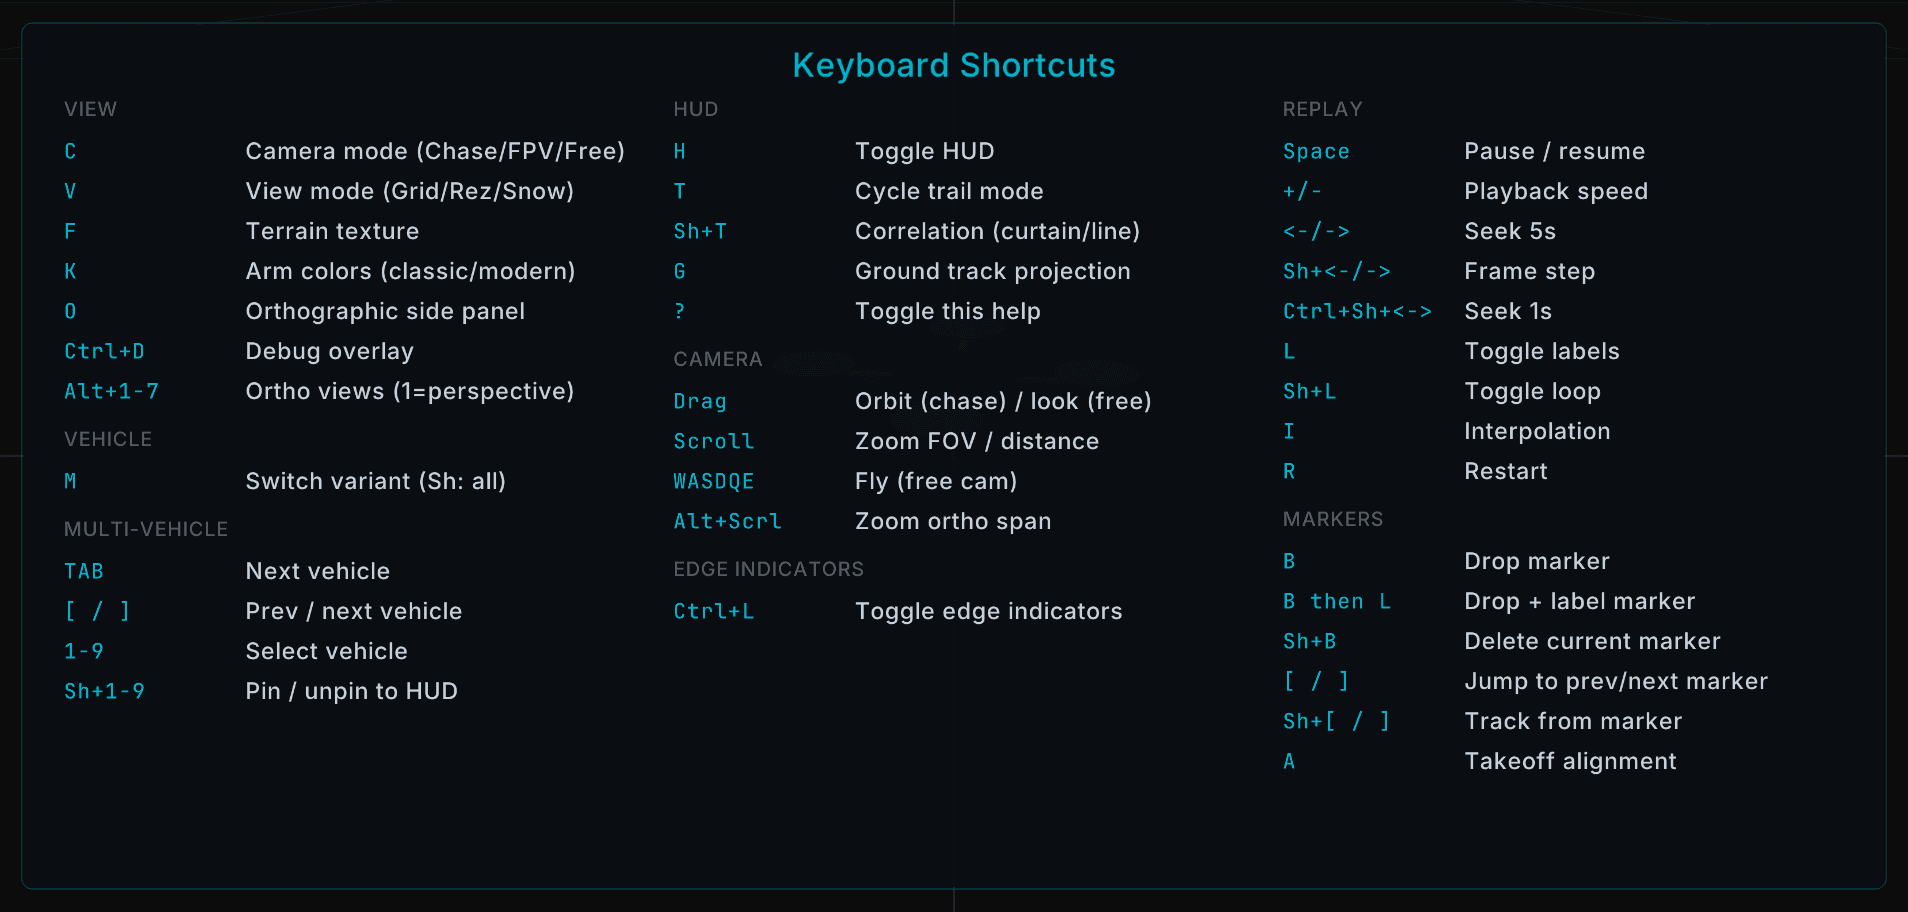
Space: play/pause←/→: seek 5 seconds (addShiftfor 20 ms frame steps)+/ : change playback speedR: restartI: toggle interpolation, which smooths trails from lower-rate logs?: open the in-app help overlay with the full keybind reference
The in-app help overlay listing every keyboard shortcut by category
Two HUDs, Two Jobs
Press H to cycle between Hawkeye’s two HUDs, or turn them off entirely. Each one is built for a different job.
The Console HUD is for reading the numbers. It gives you a full telemetry readout: heading, altitude, ground speed, vertical speed, an artificial horizon, and a compass strip. Use it when you are analyzing a flight.
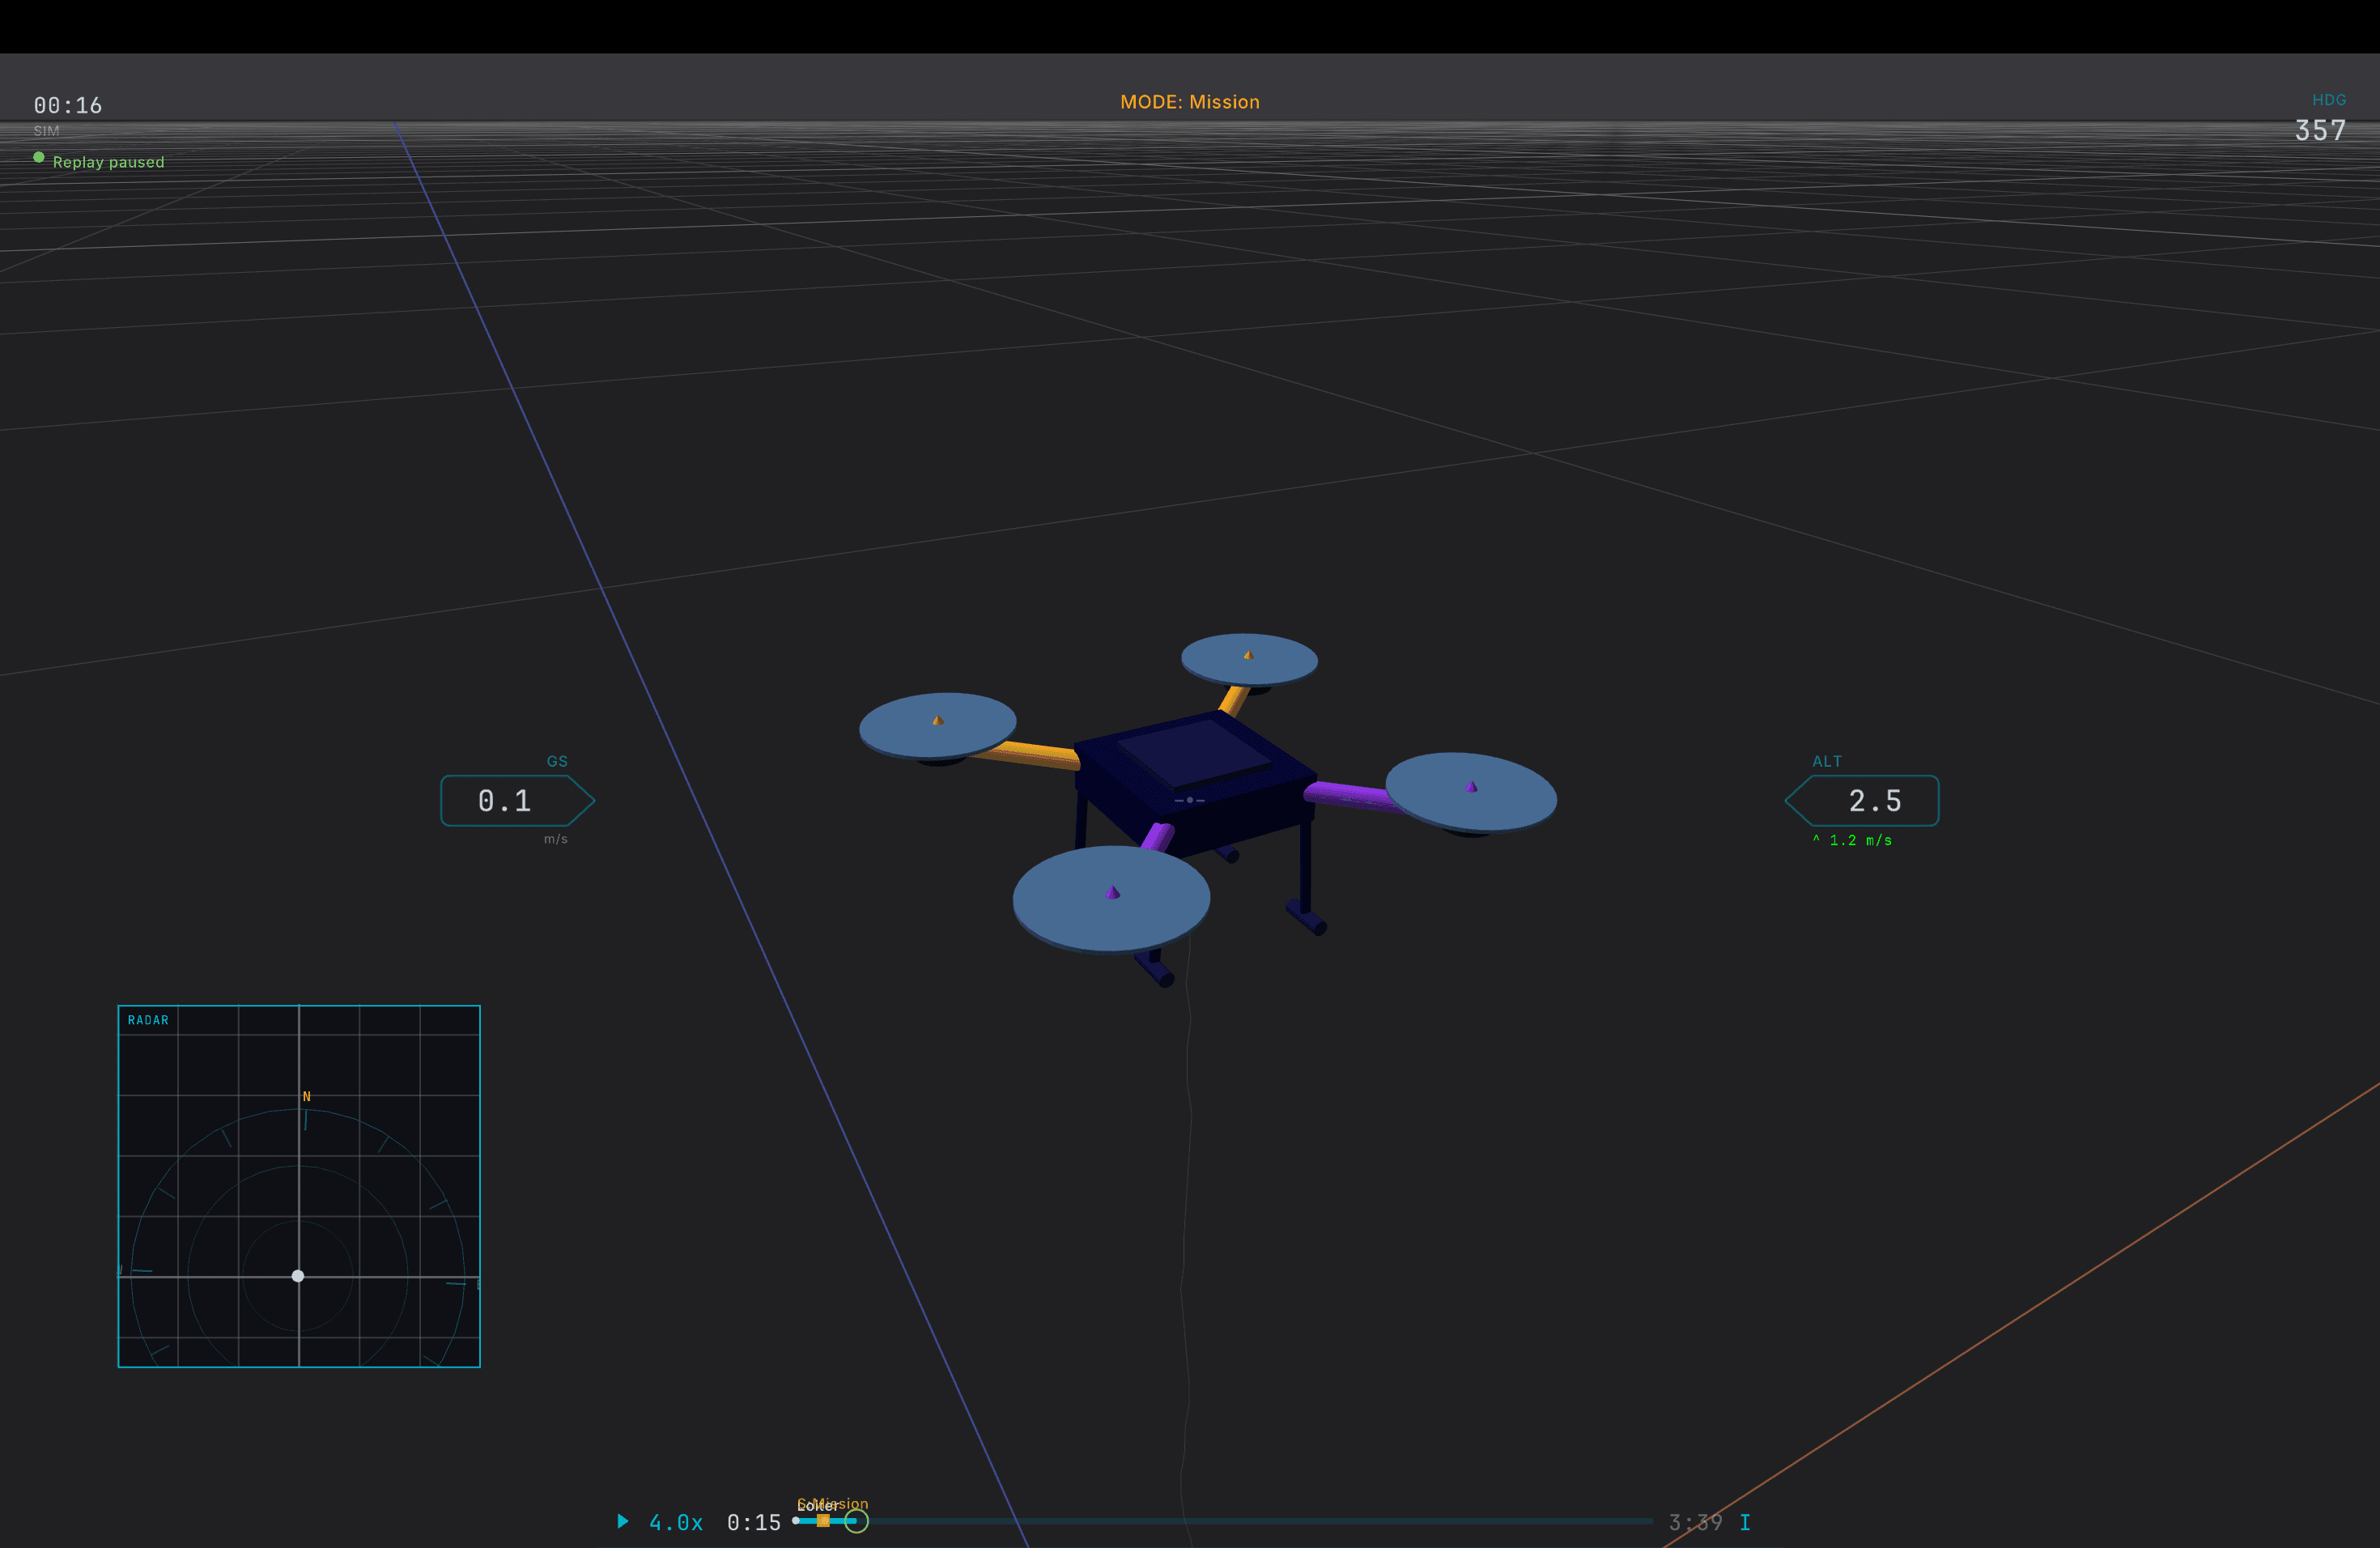
The Tactical HUD is for situational awareness. The layout feels like a flight sim: a ground speed tape on the left, altitude on the right, a heading-up radar showing where the drone is headed, and floating tags on the vehicles themselves. Attitude appears as gimbal rings, concentric 3D rings around the vehicle displaying yaw, pitch, and roll at a glance.
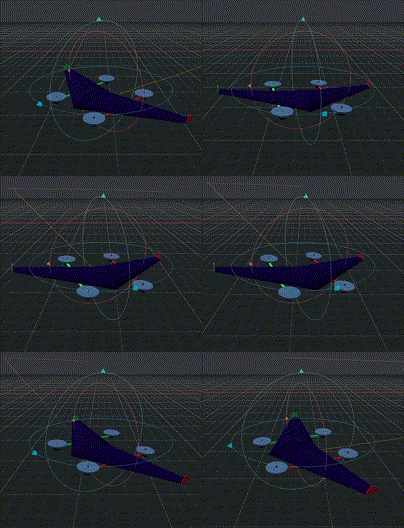
Source: Hawkeye documentation, The HUD
Two related toggles round this out. Press Z in any view to show the gimbal cradle, an axis gizmo on the selected vehicle with the same heading, roll, and pitch read. Press Y to switch the heading readout between compass-style HDG (0 to 360 degrees, clockwise from North) and math-style YAW (plus or minus 180 degrees).
Watch the bottom of the screen as you fly. Toast notifications surface mode switches and anything critical, such as a warning that a log’s position data is estimated rather than authoritative.
Cameras, Views, and Trails
Hawkeye gives you several ways to frame the action:
Ccycles cameras: Chase, FPV, and Free fly, where you fly the camera withWASDQE(holdShiftfor a 3x speed boost).Otoggles a synced orthographic sidebar with top, front, and right views, like the viewport layout of a traditional 3D tool.Alt+2throughAlt+7take a single ortho view fullscreen (top, front, left, right, bottom, back);Alt+1returns to the perspective camera.Ftoggles the ground texture;Gprojects the drone’s track onto the ground plane.
Source: Hawkeye documentation, Cameras and Views
Reading the Trails
Press T to cycle trail modes. This is where Hawkeye starts to show off.
The directional trail color-codes the path by what the drone was doing: climbing, descending, moving forward or backward, translating to port or starboard. Once you learn the color key, you can read an entire maneuver off the trail at a glance without scrubbing the timeline.
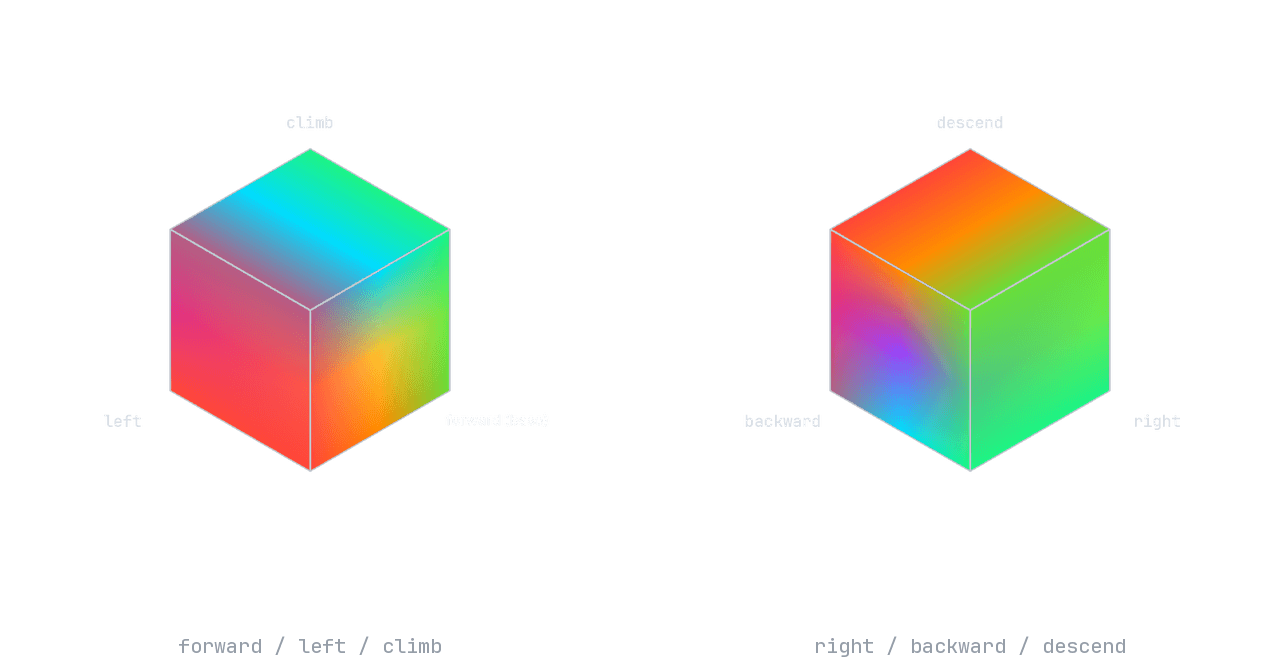
The direction trail color key: each axis of motion (forward/backward, left/right, climb/descend) maps to its own hue
The speed ribbon widens and brightens with speed like a thermal image. It reaches maximum width and pure white at the fastest point of the mission, and the gradient recolors with your active theme.
ID trails render each drone’s path in its assigned fleet color, which you will want for swarm replay.
Bookmarks
Navigating 3D space around a moving drone is disorienting, so Hawkeye gives you teleport points.

Bdrops a marker at the current time and position.BthenLdrops one and opens a label input; typing pauses playback.Shift+Bdeletes the current marker.[and]jump between markers on the selected drone; addCtrlto jump across all drones.Shift+[andShift+]lock the camera to the marker position, like a camera on a pole facing the drone.
Source: Hawkeye documentation, ULog Replay
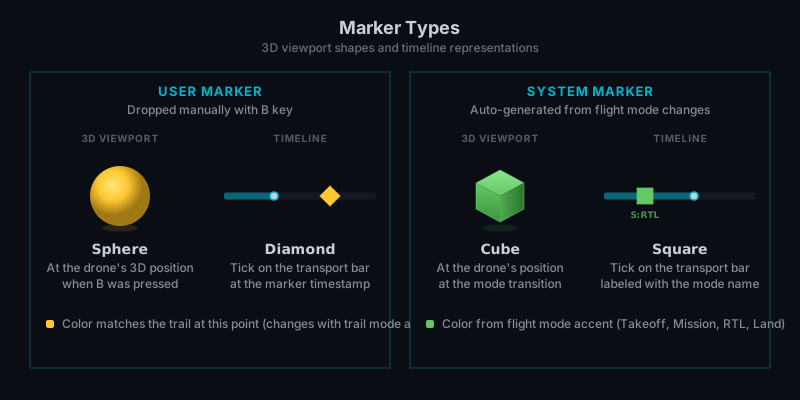
Markers come in two kinds: the ones you drop, plus automatic markers on every flight-mode change found in the log. A fresh replay already has a navigable structure before you touch a key. The camera-lock jump doubles as a vantage point: from there, WASD free flight lets you reposition while the drone flies toward the next marker.
Source: Hawkeye documentation, ULog Replay
Going Live with SIH
Replay is half the story. The other half is watching PX4 fly live, and the barrier to entry here has collapsed. Two terminals:
Hawkeye listens on UDP port 19410 by default, detects the vehicle, and asks if you are ready for takeoff. In the PX4 shell, type:
Takeoff detected. That is the entire loop, from nothing to watching a simulated drone hover in 3D in under a minute. From here you can command the vehicle through QGroundControl or MAVSDK; Hawkeye renders whatever the autopilot does.
Native Windows SITL landed in PX4 PR #27297, so this works without WSL2:
Fly a Mission, Not Just a Takeoff
commander takeoff only hovers. To fly an actual mission, drive the running SIH instance with MAVSDK:
The script imports the .plan file, uploads the waypoints, arms, and starts the mission while you watch it unfold in Hawkeye.
Swarms: Glanceable Multi-Drone Comparison
Multi-drone comparison is the feature that justifies Hawkeye’s existence. Pass multiple logs to replay them together:
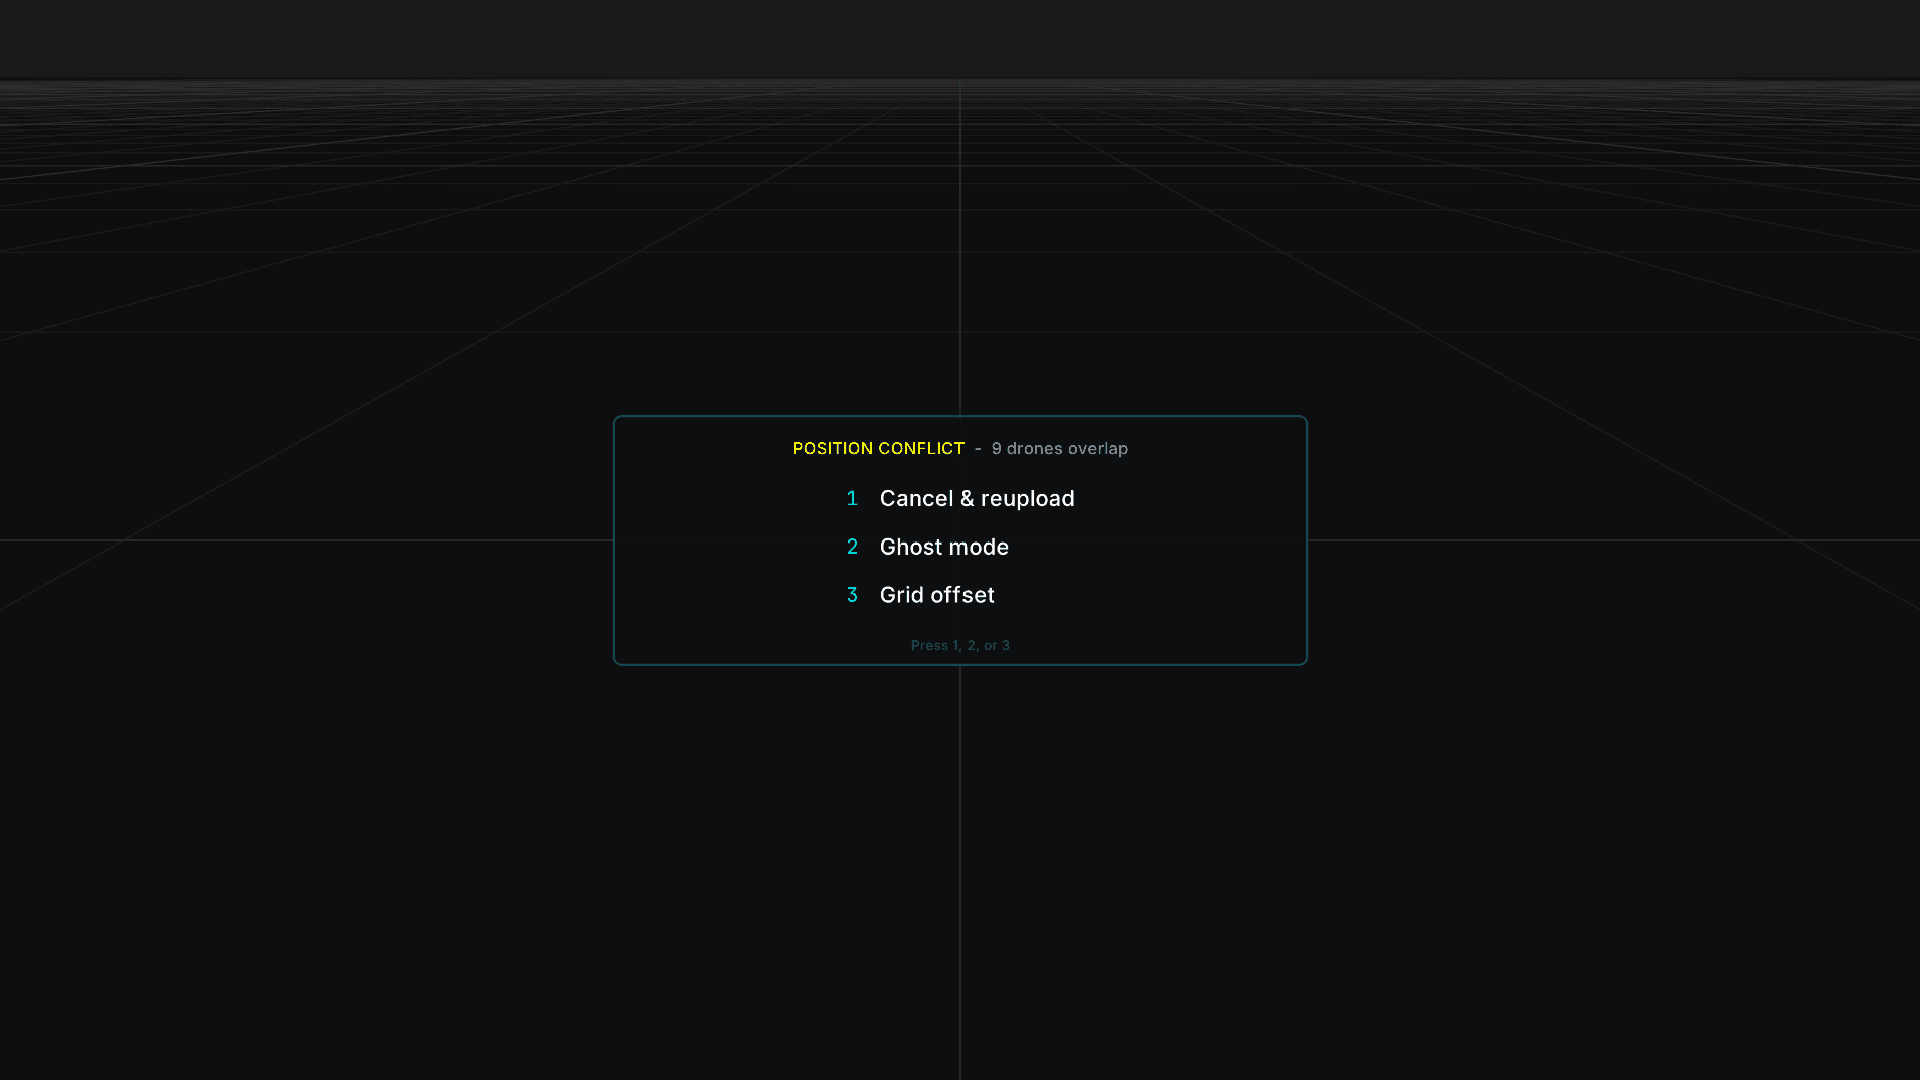
Each drone gets a color ID automatically. If any logs share a starting position, Hawkeye detects the conflict and asks how to deconflict. Press P to reopen that dialog anytime and choose between modes:
Source: Hawkeye documentation, Multi-Drone Replay
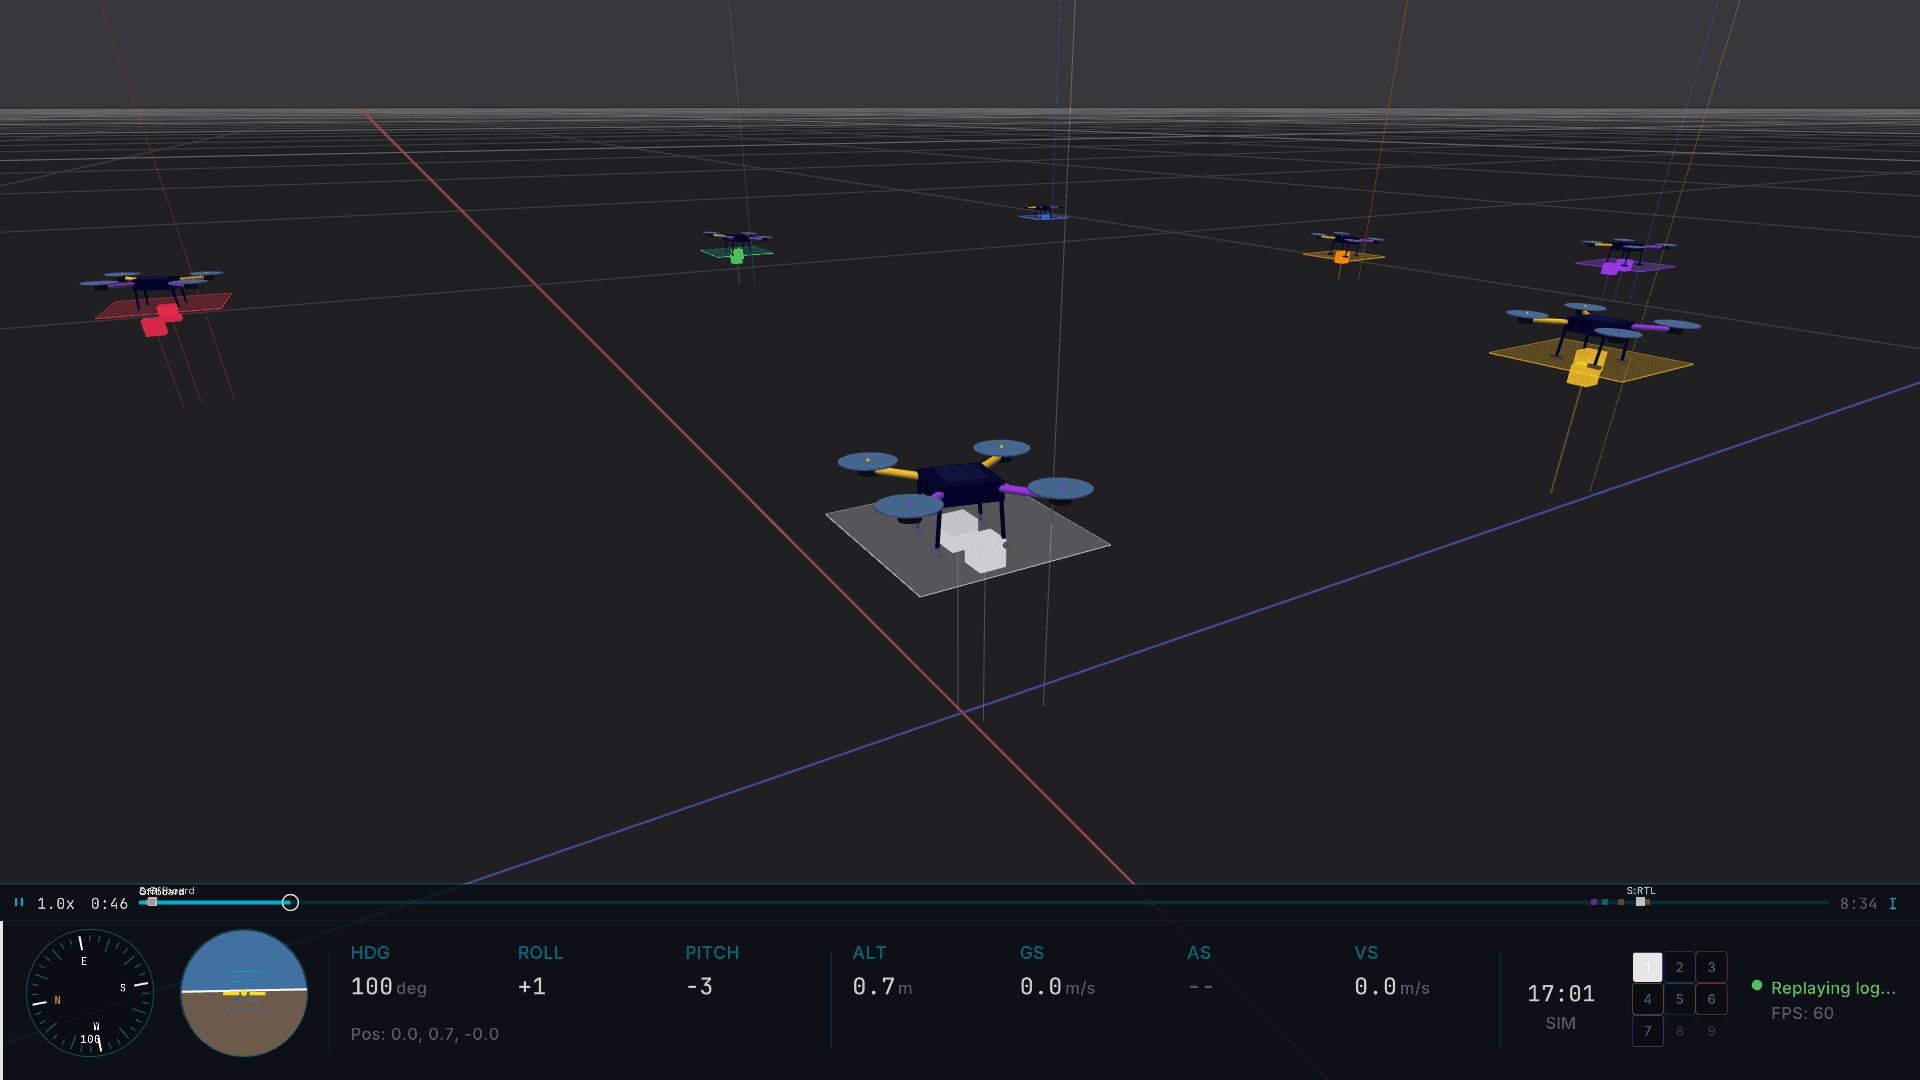
Formation. Drones fly where their logs say they flew. The default for real swarm data.
Source: Hawkeye documentation, Multi-Drone Replay
Grid: Offsets conflicting drones a set distance apart so you can see them all.
Ghost: Overlays every flight on the same starting position, like the ghost lap in a racing game. Fly the same mission repeatedly and watch exactly where the runs diverge.
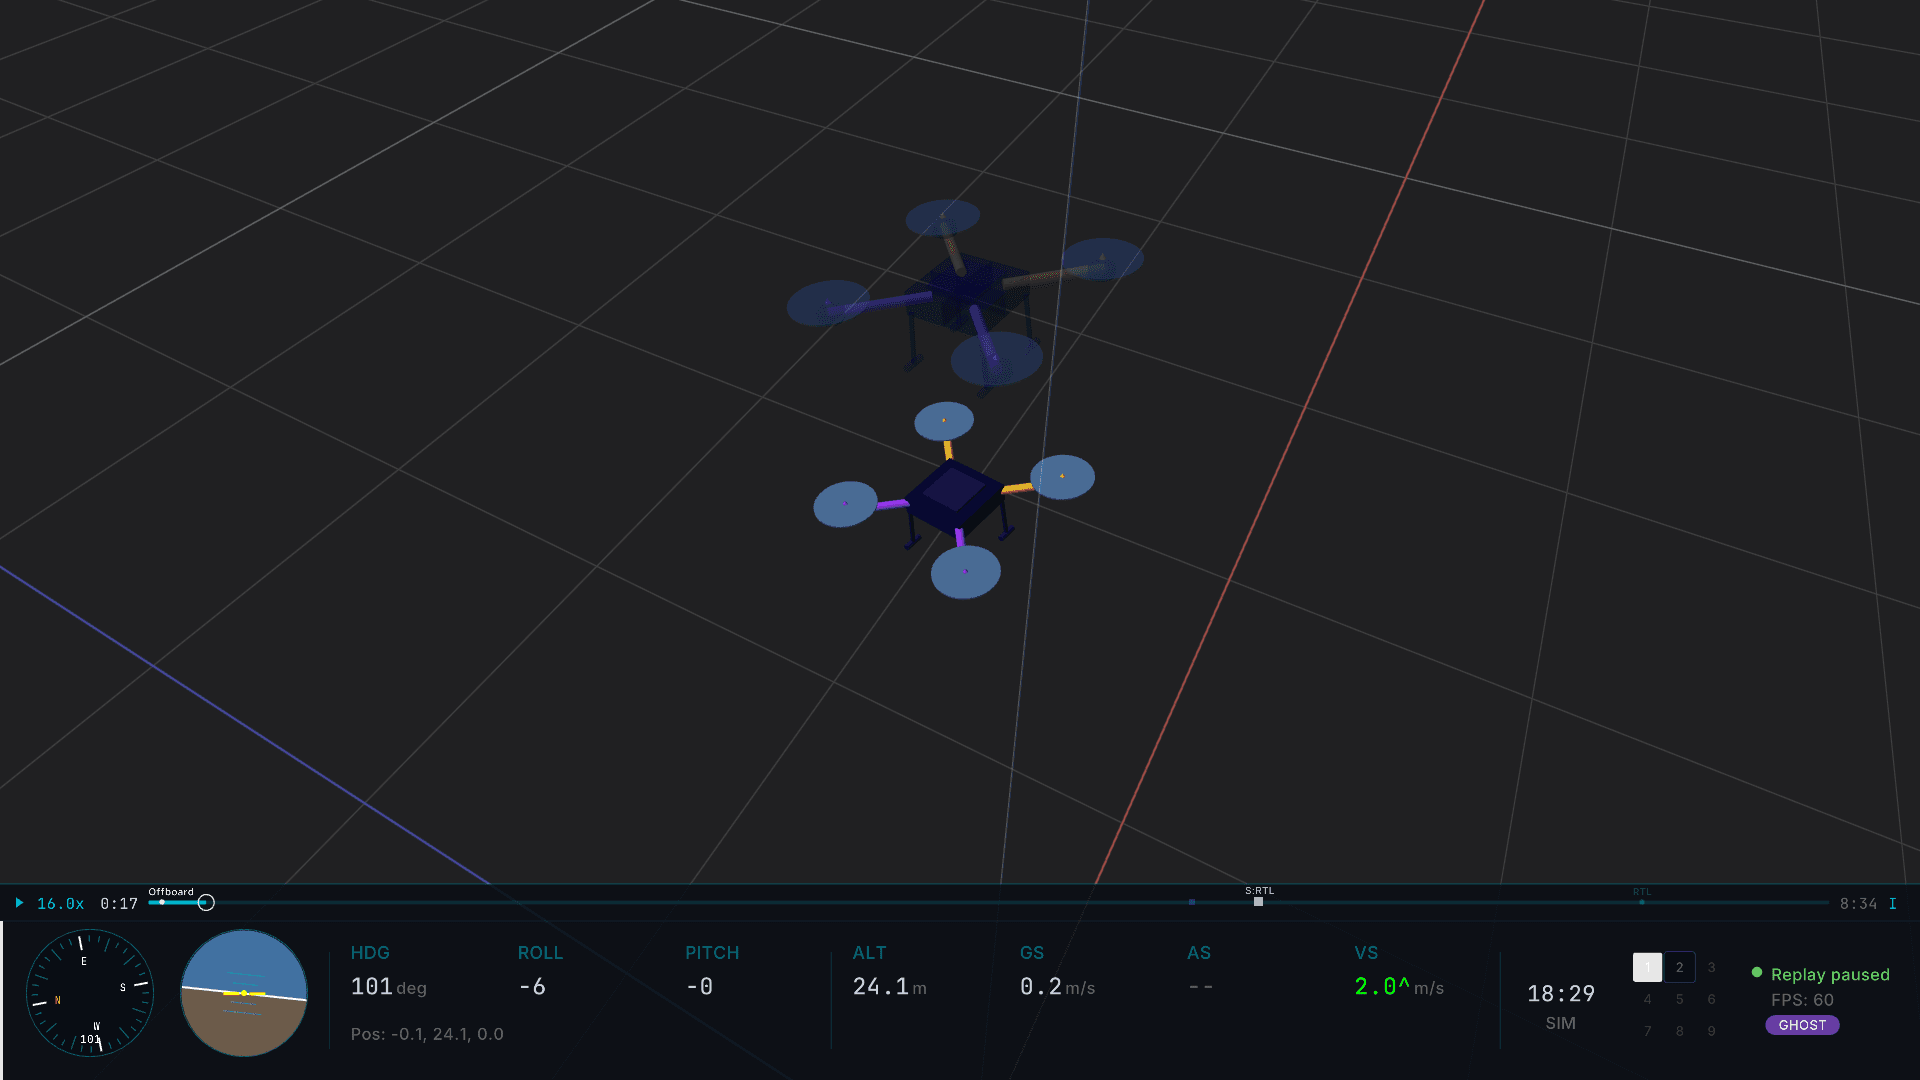
Source: Hawkeye documentation, Multi-Drone Replay
Press Shift+A to align takeoffs. Detection runs a CUSUM test, a cumulative-sum method common in automotive testing, to find the moment of genuine movement in each log while ignoring jostles from someone picking up the drone. A CONF badge shows detection confidence. Alignment matters because even small timing offsets between runs make comparisons meaningless.
Is the Formation Holding?
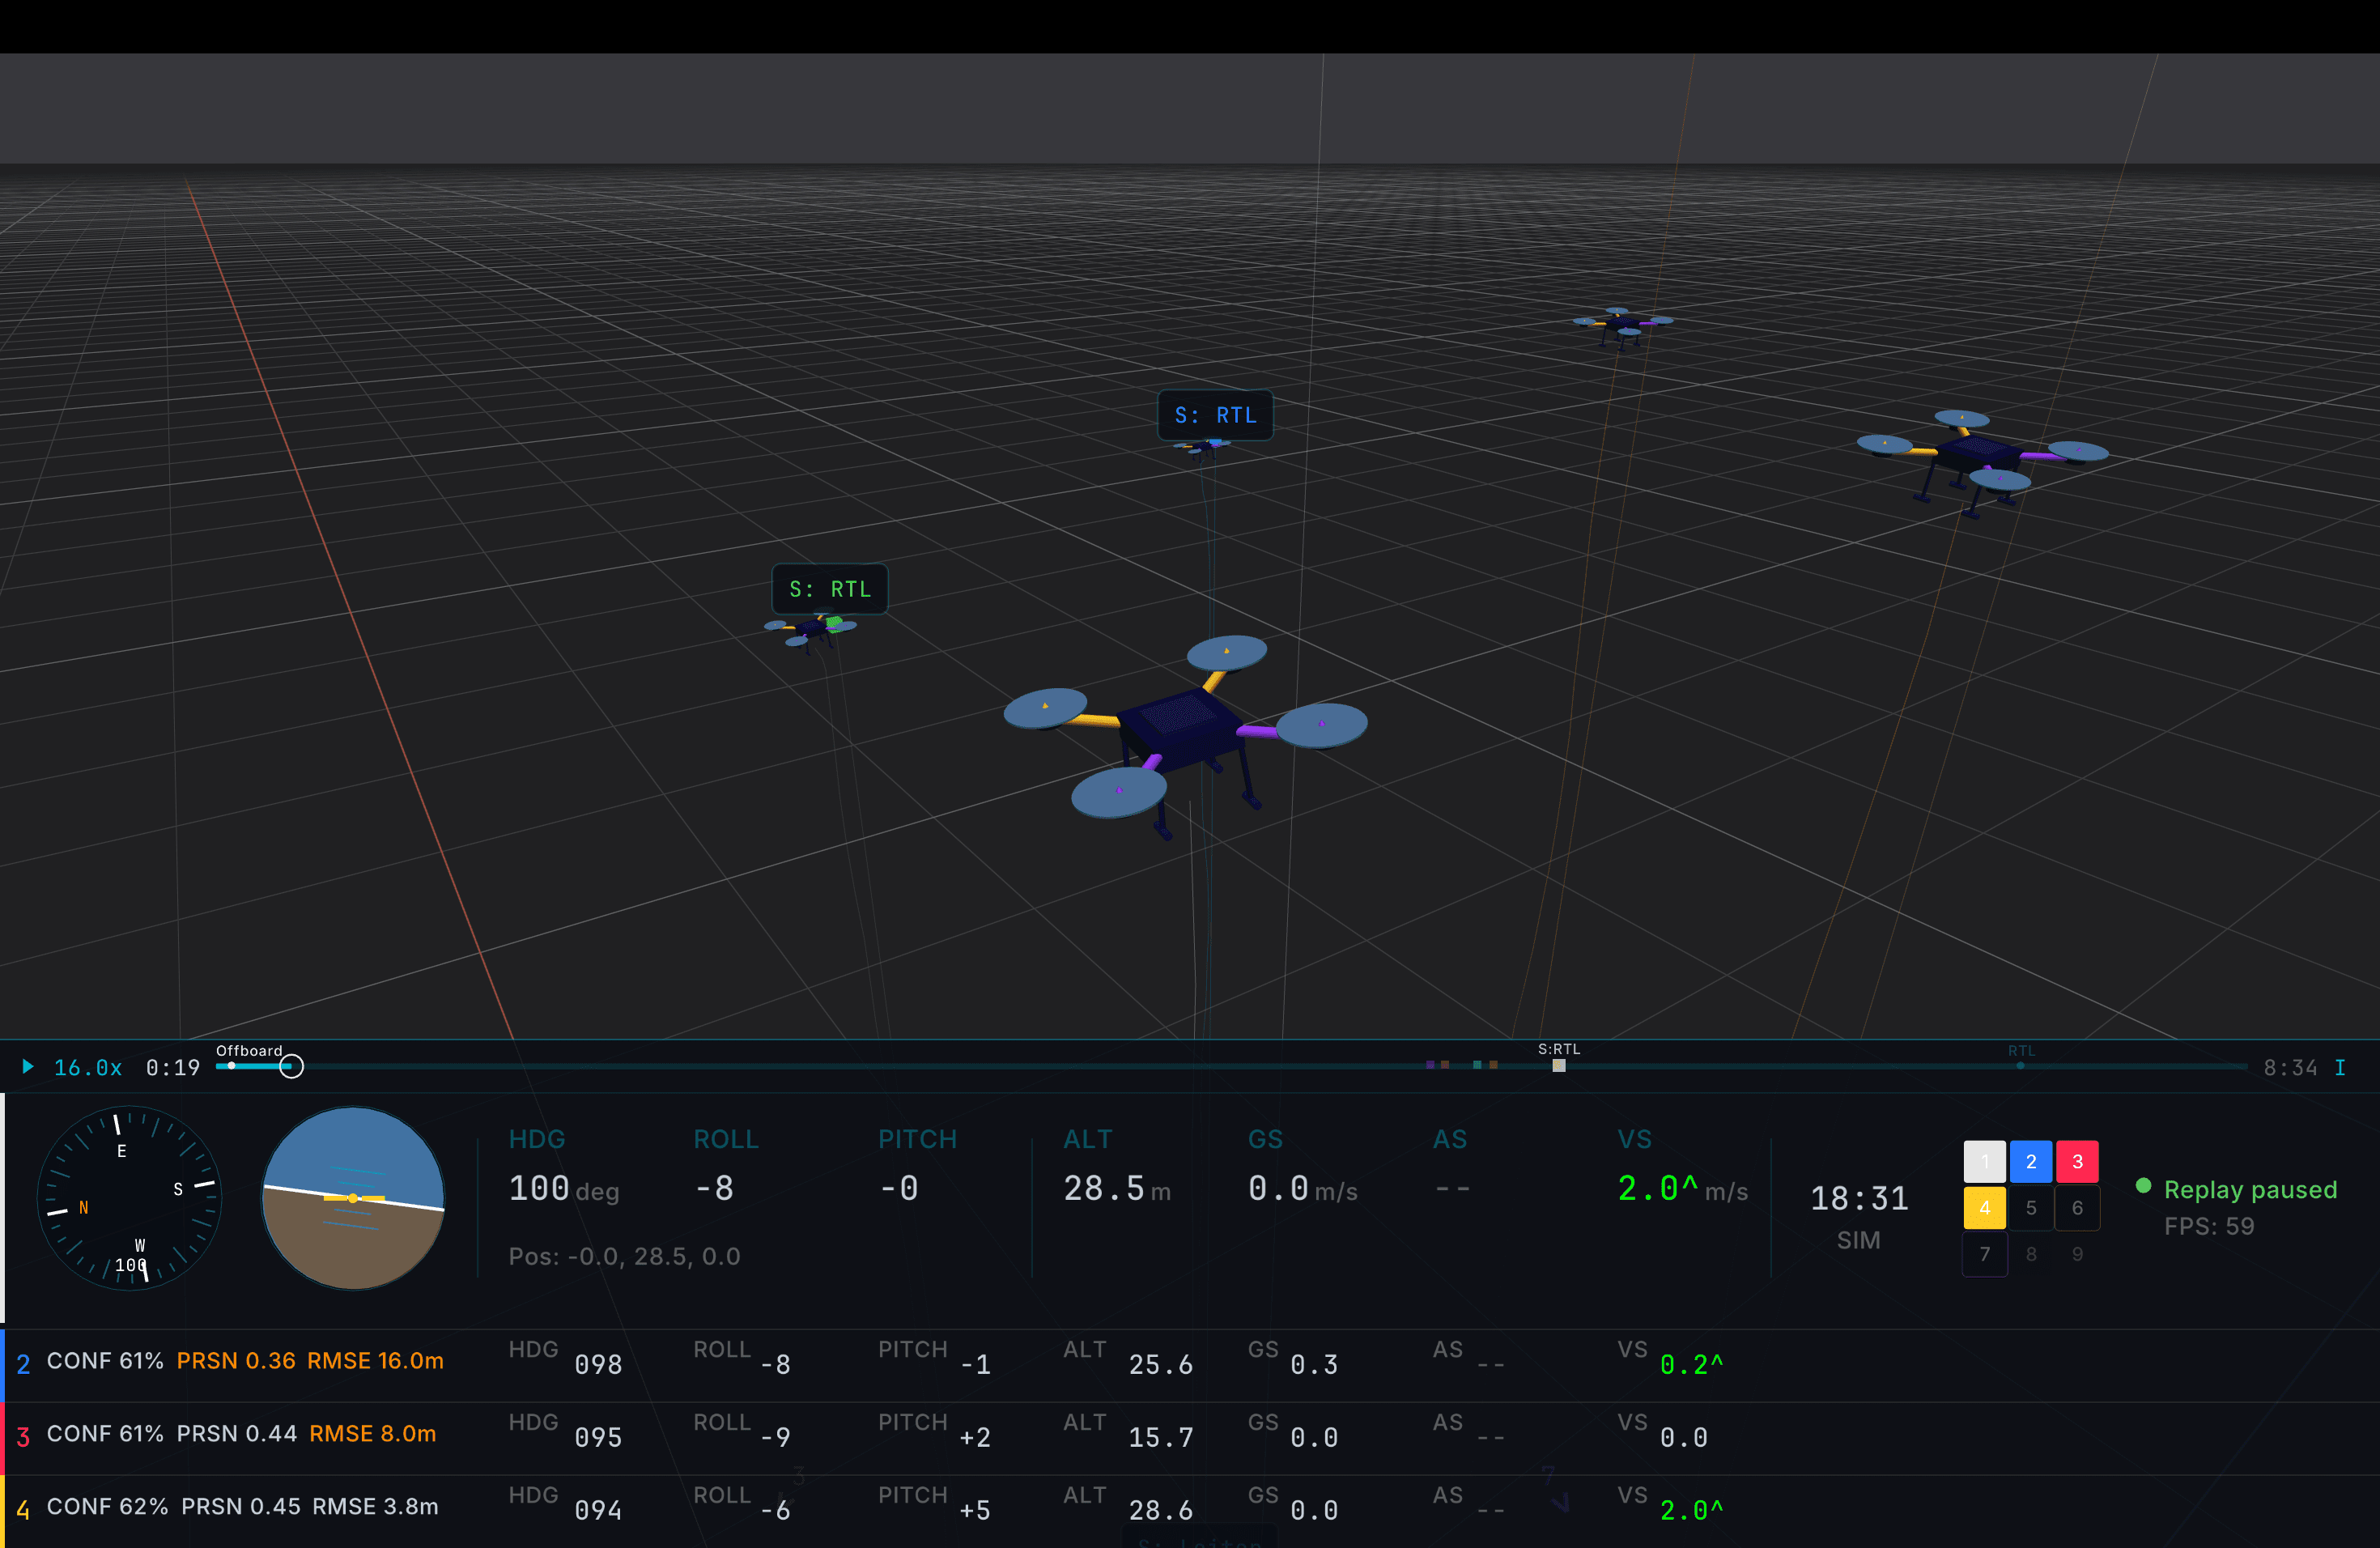
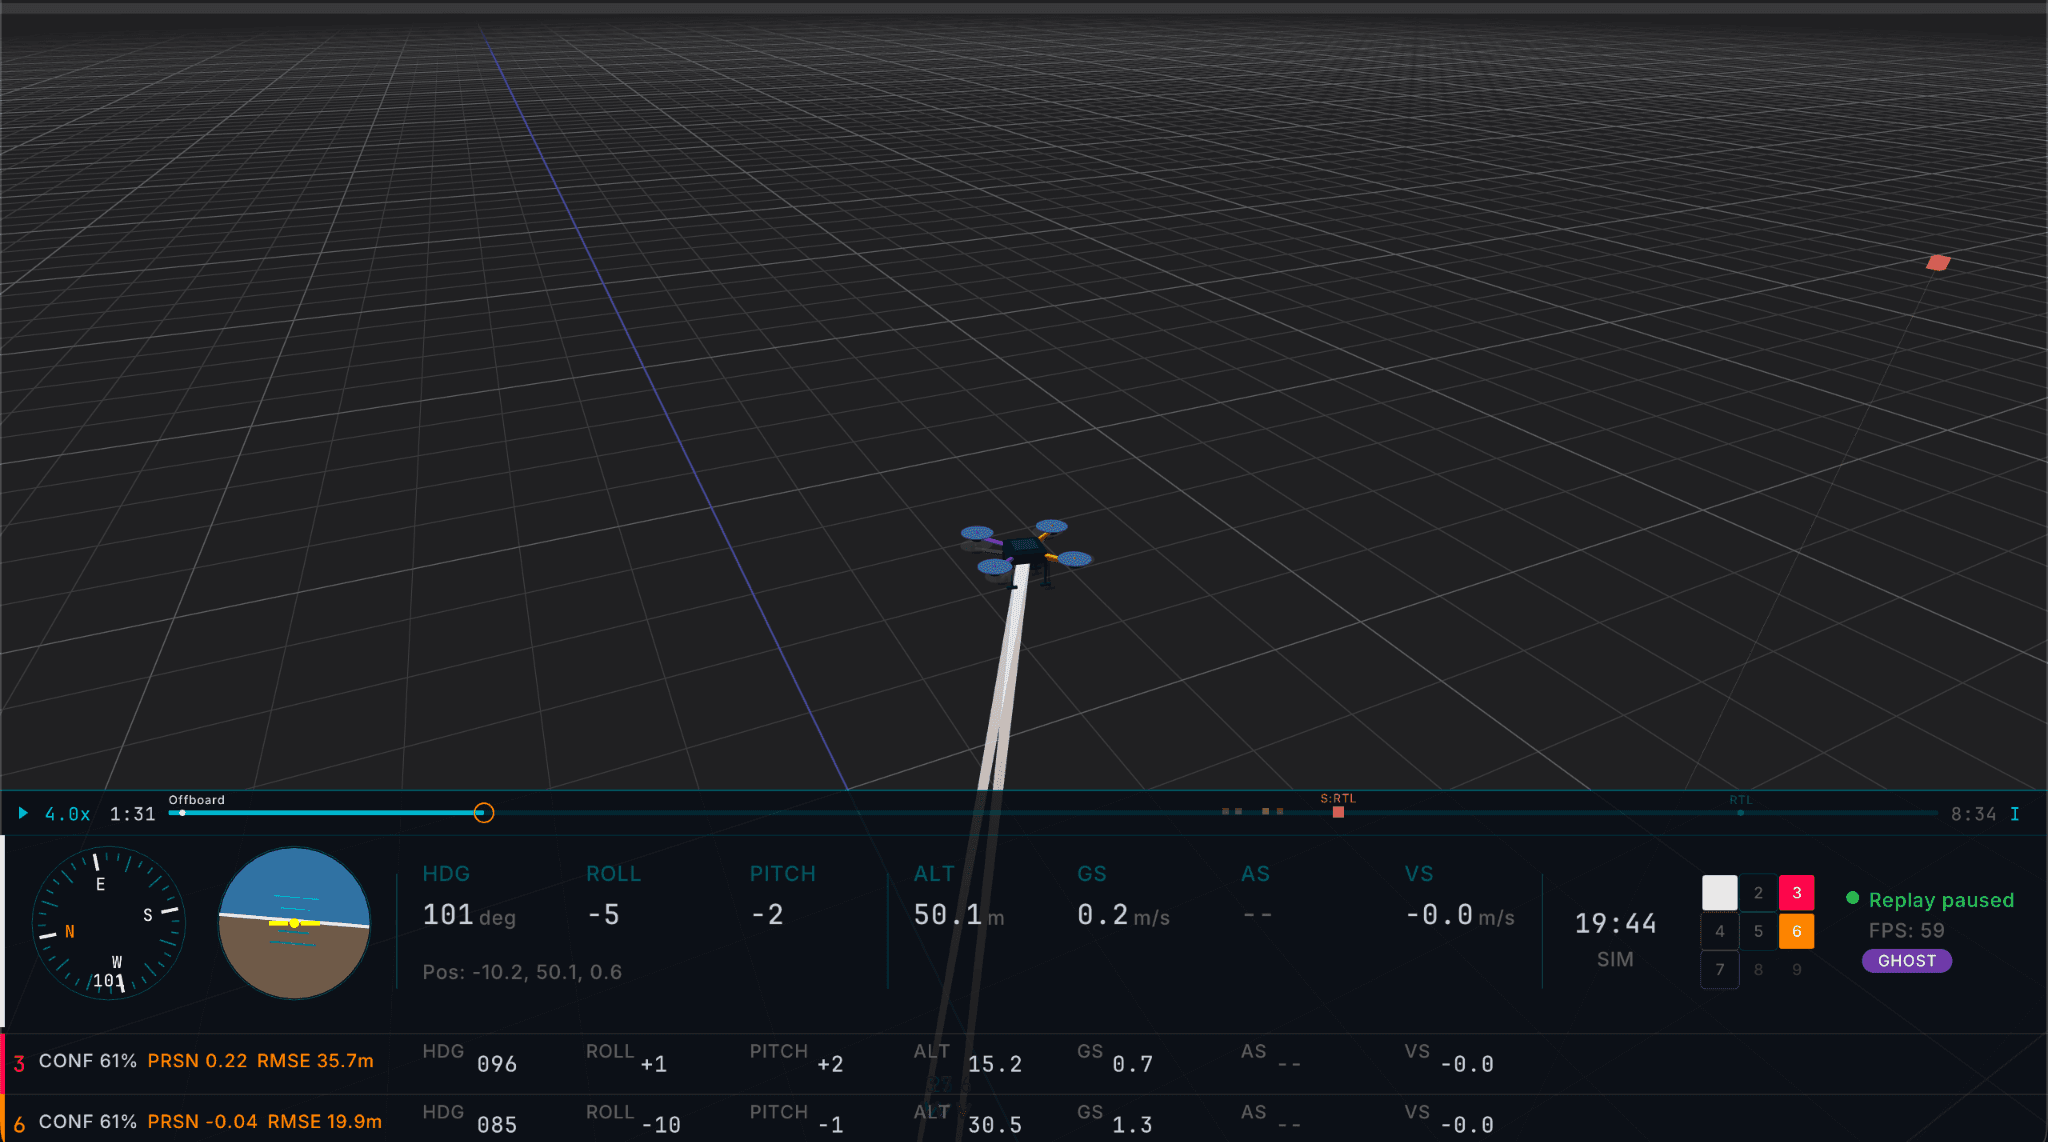
Select a primary drone with Tab or the number keys, then pin comparison partners to the HUD sidebar with Shift+number. Each pinned pair shows two live statistics:
PRSN (Pearson correlation). Do the two paths move in lockstep? Catches shape and timing drift.
RMSE (root-mean-square error). Actual separation in meters. Catches absolute drift.
High PRSN with stable RMSE means the formation is holding. Either one slipping means the drones are diverging, and you see it the moment it happens. Pinned drones also bounce in the sidebar when they cross a flight-mode marker, and their ground speed and altitude stream in the same feed, so you can pause and ask why one drone dropped altitude while another did not.
A multi-drone replay with two partners pinned to the sidebar, each showing live CONF, PRSN, and RMSE readouts
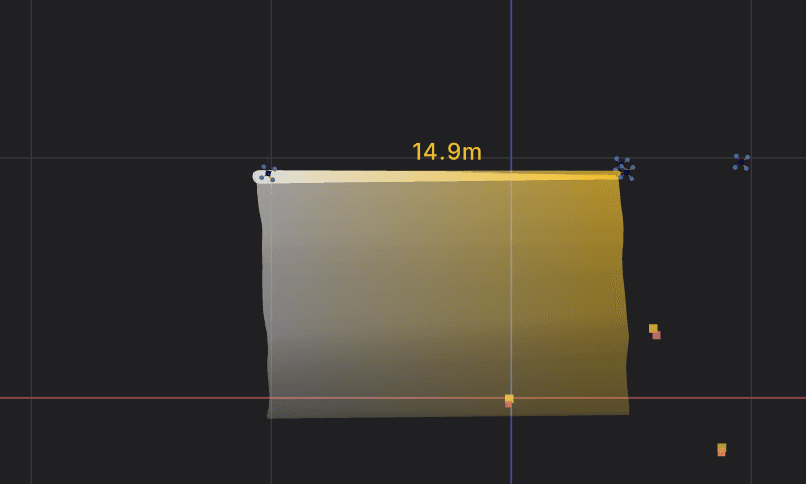
Press Shift+T to cycle the correlation overlay. Line draws direct links between pinned drones; drop into an ortho view and you can read the separation in the formation directly. Curtain fills the area between flight paths, giving you an area view of divergence across the whole flight.
The correlation curtain in an orthographic view, filling the 14.9 m separation between two pinned drones
A Live Swarm
Live SIH is not limited to one vehicle. Five drones, three terminals:
The mavsdk_server auto-spawns per vehicle. The swarm test script ships in the repo, so you can run this exact scenario yourself.
Make It Yours: Theming
Press V to cycle themes. Hawkeye ships with the default plus two extras: Snow, a white-out theme built for low-nit screens in outdoor environments, and Rez, a high-contrast dark mode inspired by your favorite ’80s movie of choice.
The Snow theme: a bright white-out palette that stays readable on dim screens in sunlight
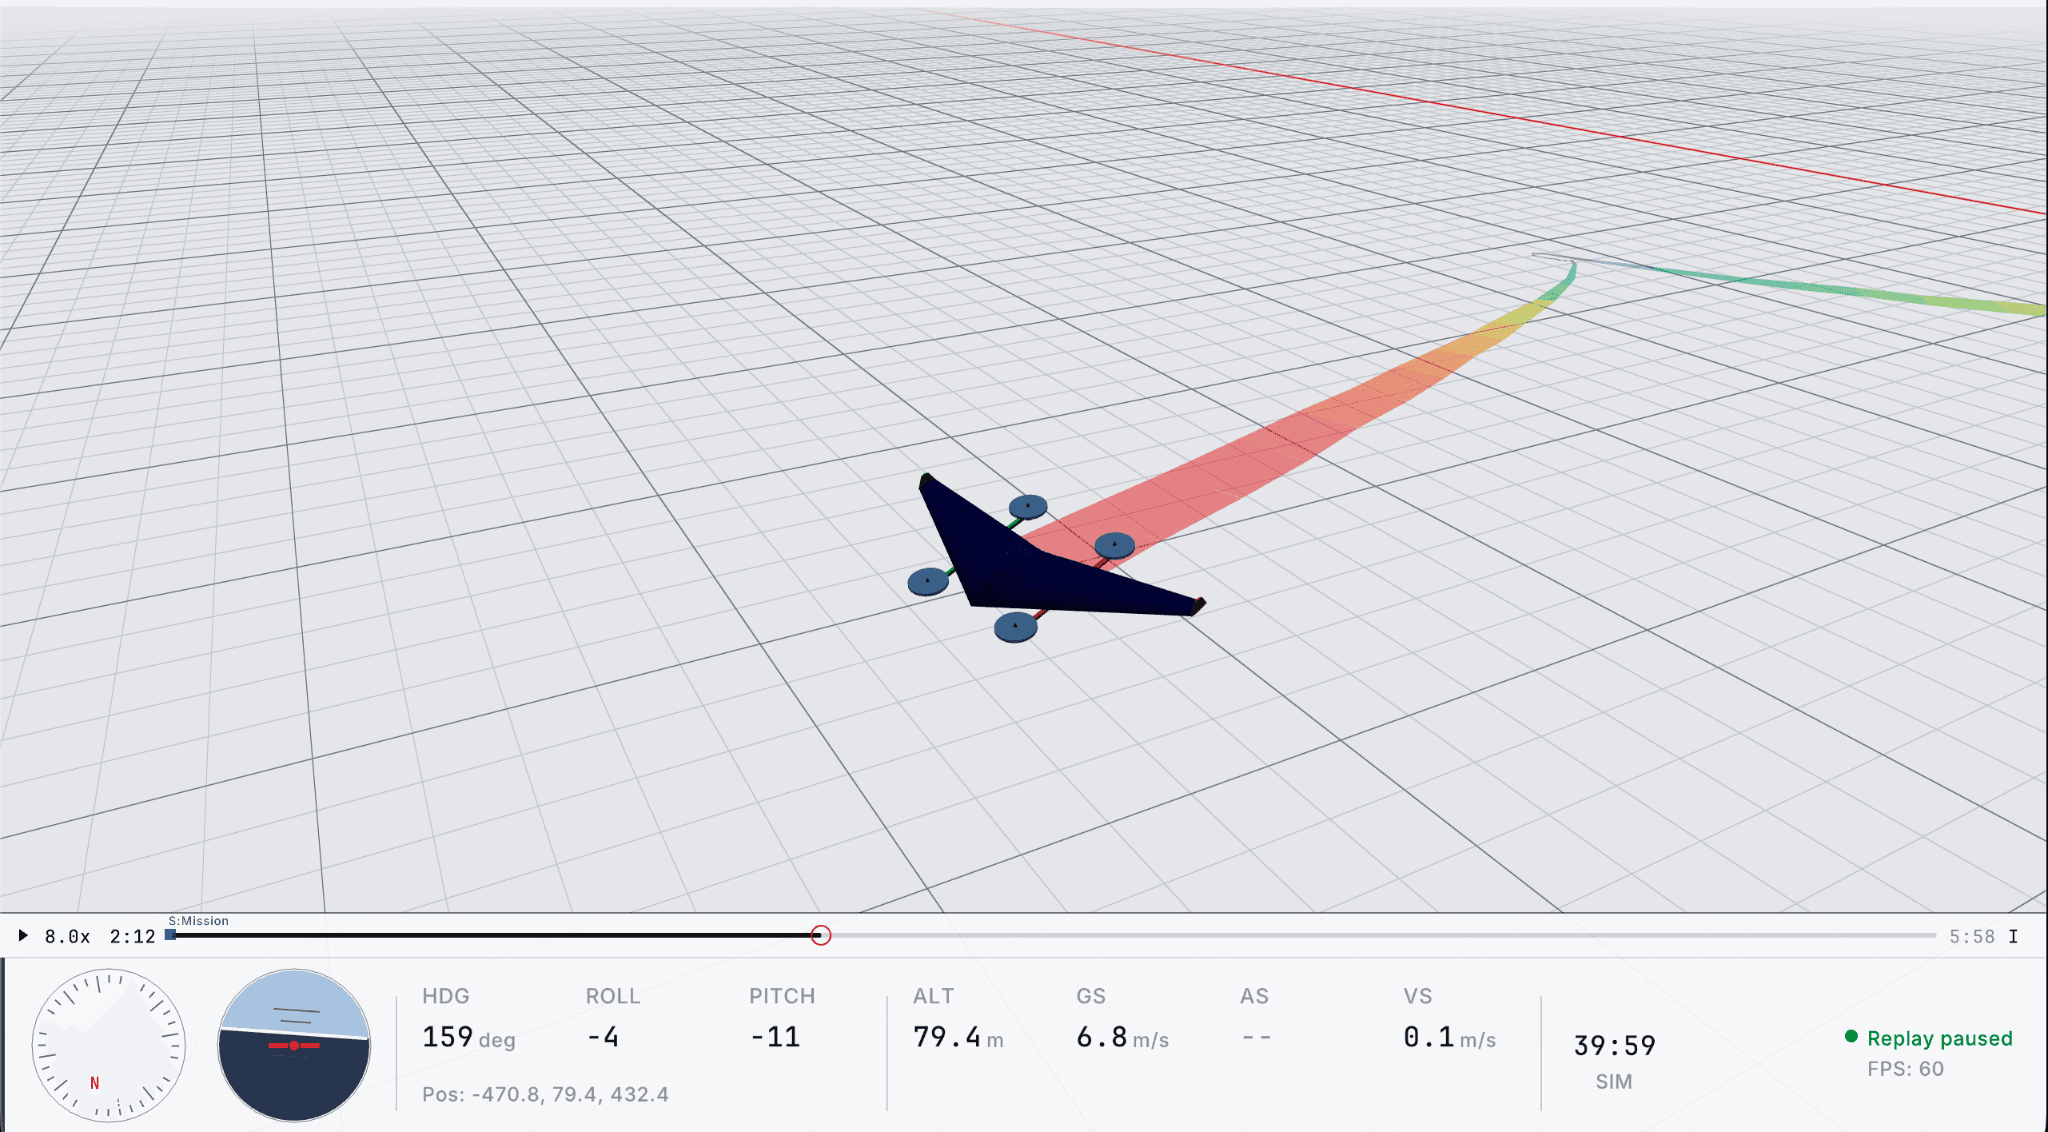
The Rez theme: teal wireframe grid on black, a high-contrast dark mode
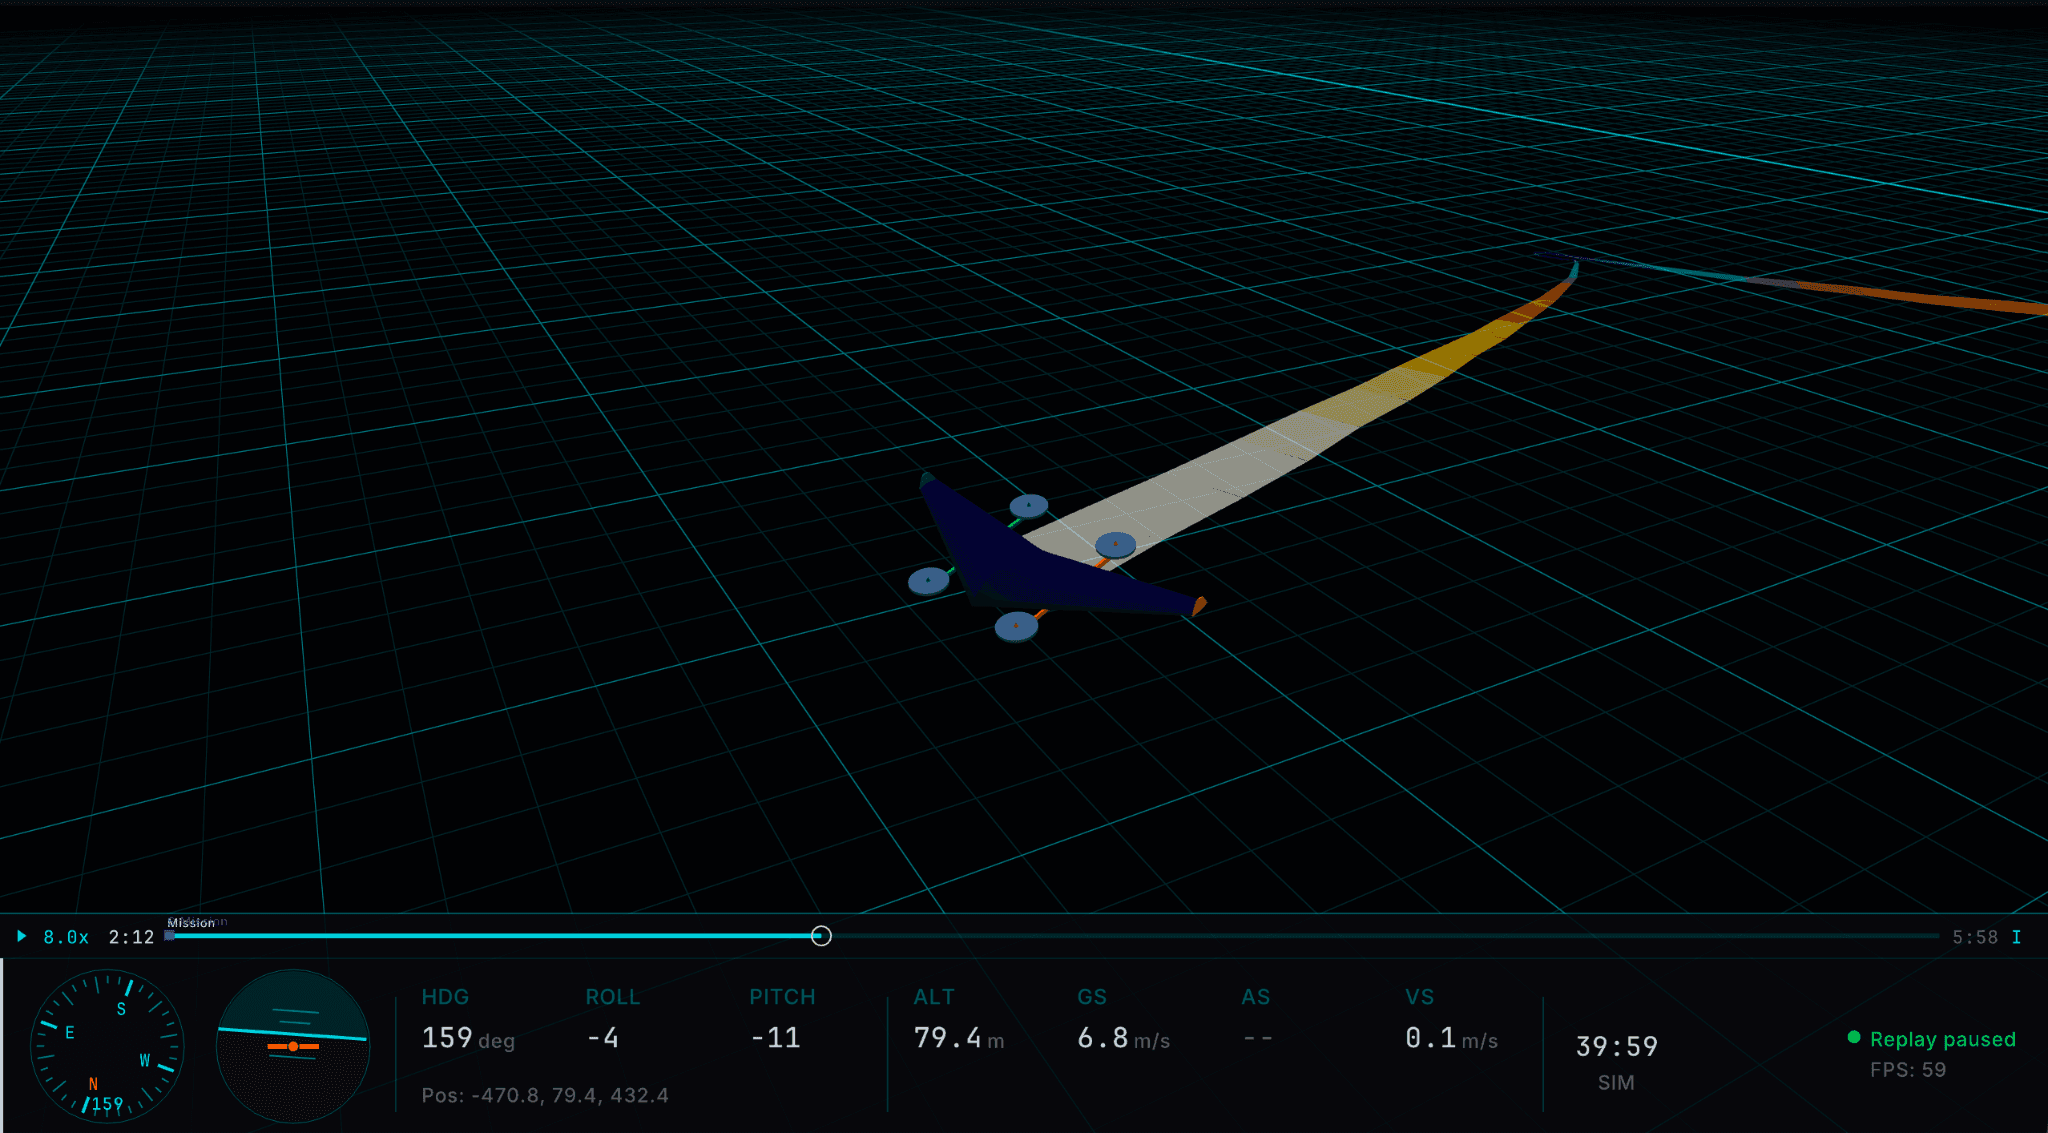
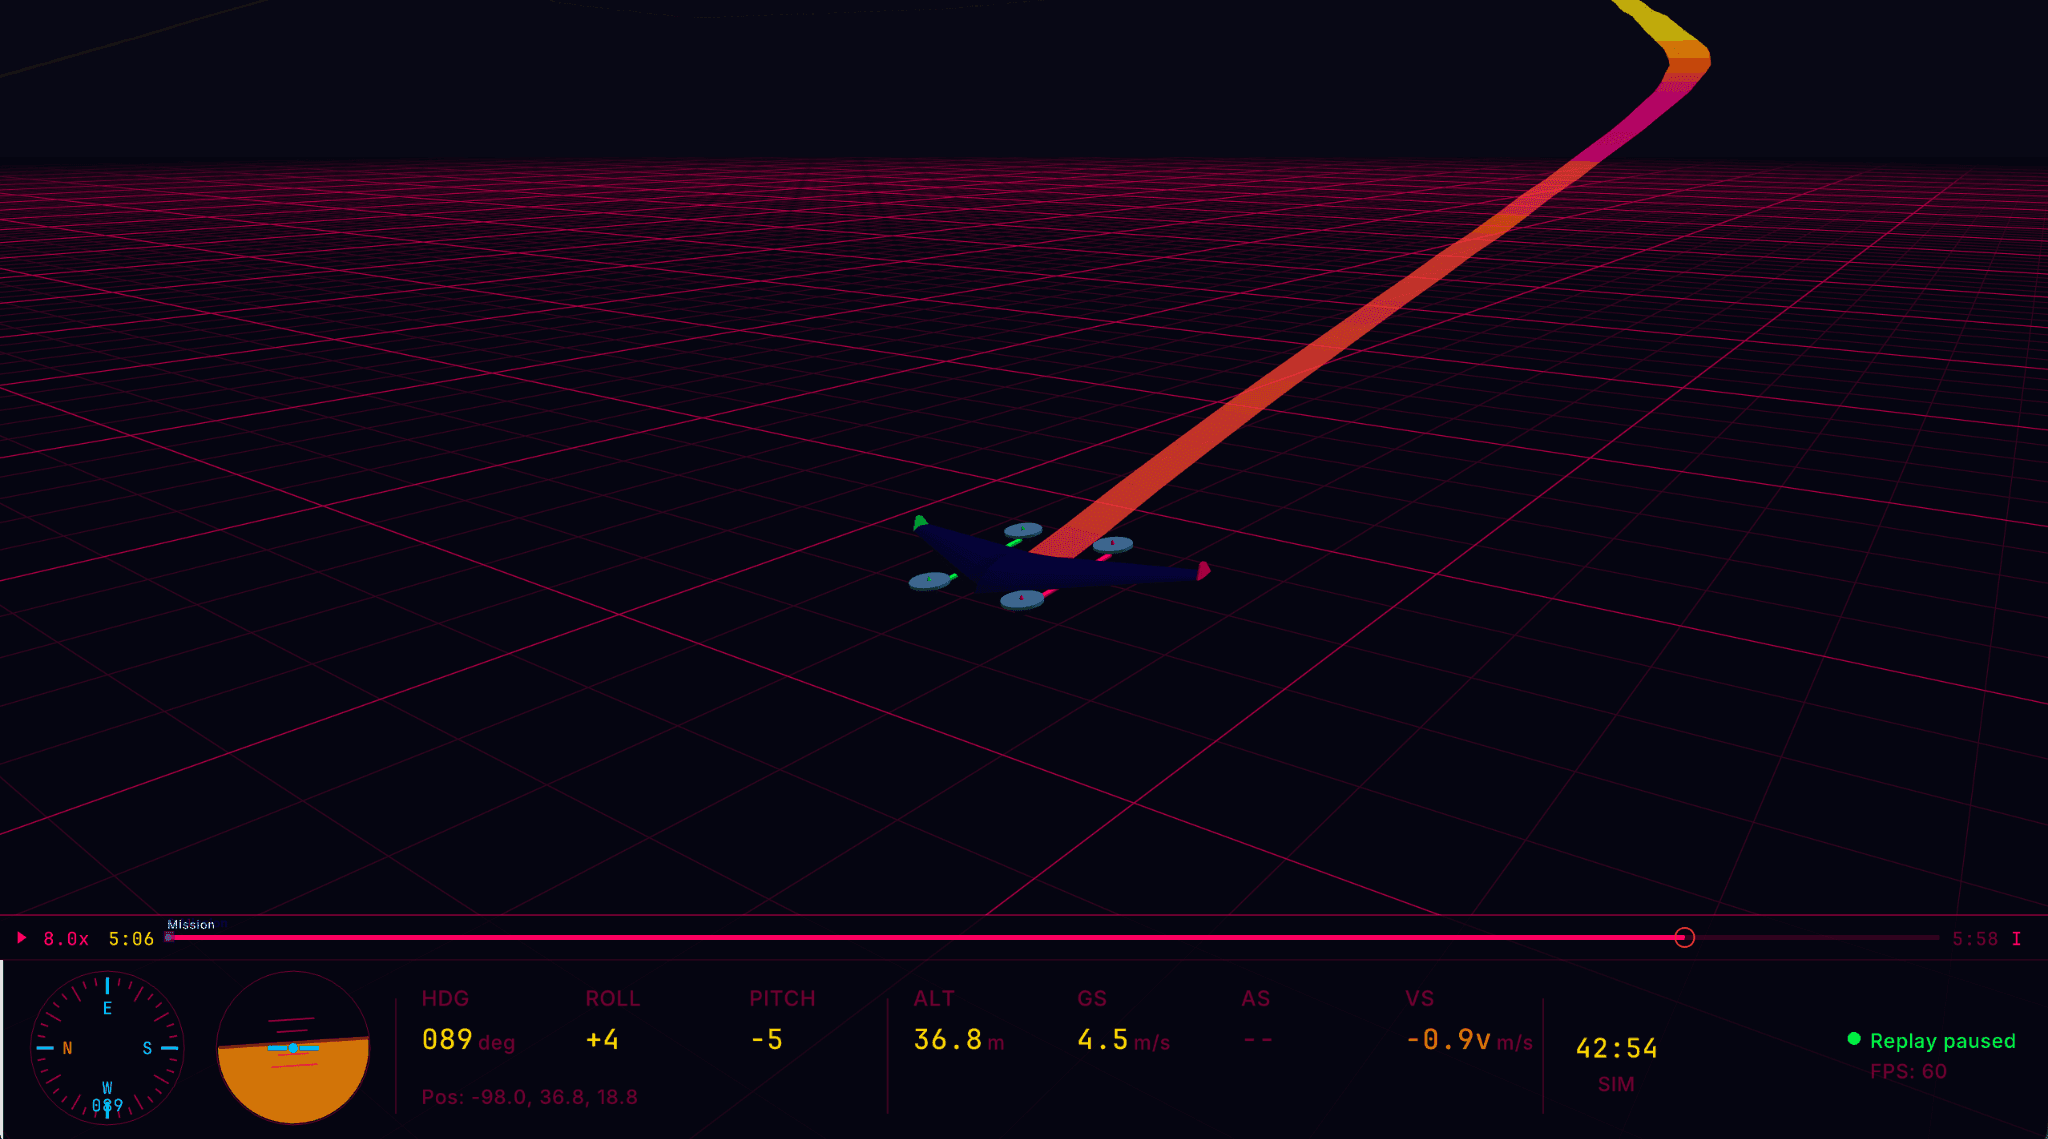
A theme is just an .mvt file: a plain text file where each line names a color slot and gives its RGB value. Switching themes recolors every plugin, from the HUD to the trail gradients to the 16-color drone palette. Drag an .mvt onto the Hawkeye window and it loads immediately.
Making your own takes minutes. Copy one of the existing .mvt files, edit the values, and drop it in. You could even hand an .mvt and a reference image to Claude and ask it to match the color scheme to those variables.
Check out this custom theme based on a Synthwave aesthetic.
Coming Soon: Terrain and Collision Prevention in SIH
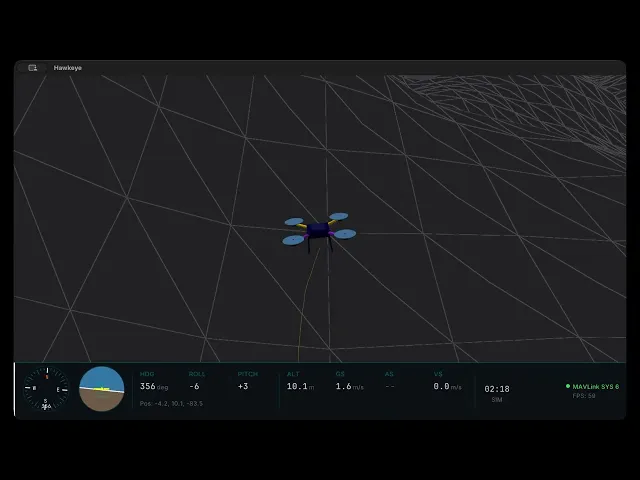
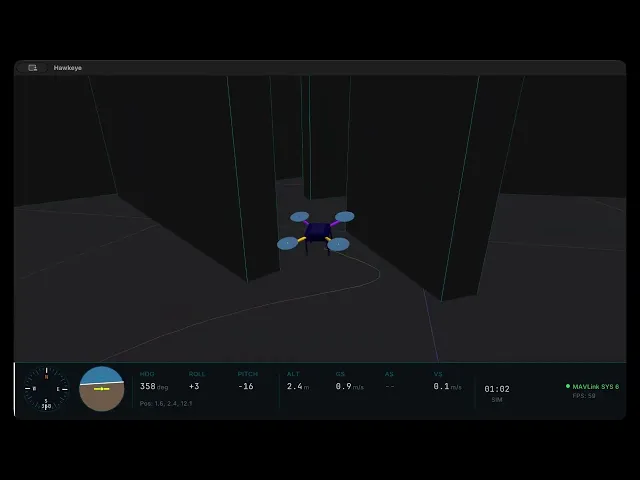
Everything above ships today. One more thing is on the horizon. There’s a proposal for procedural, seed-based terrain and walls generated inside SIH itself, with Hawkeye rendering the same surface from the matching seed. Pair it with PX4’s built-in collision prevention and you can watch a drone brake, hold, and reroute around obstacles, driven entirely by the autopilot. It is not released yet, so treat this as a preview of where lightweight simulation testing is headed.
Check out this quadcopter flying over procedurally generated terrain rendered from the SIH seed.
And wall detection too!
What’s Next
Four items are on the roadmap:
Guided demo. A self-running tour with
hawkeye --demo.Full Android. Telemetry and replay on mobile, with radial selectors. The current build compiles from source in Android Studio.
Drag-and-drop ULog. Drop a file onto the window or the browser build.
Flight Review integration. Flights beside stats and plots, with shared bookmarks, inside a modernized Flight Review.
Conclusion
Hawkeye fills the spot in the PX4 toolchain that has been empty since jMAVSim faded. It focues on instant visual feedback with zero ceremony. You now have the power to replay a ULog in one command, watch live SIH in two terminals, compare a 16-drone swarm with statistics you can read at a glance, and re-theme all of it to your taste, all in one tiny package. It will not replace Gazebo for physics or Flight Review for deep analysis, by design, but for the daily loop of fly, watch, compare, fix, nothing gets you from terminal to the review faster.
Additional Resources
Hawkeye on GitHub: https://github.com/PX4/Hawkeye
Hawkeye Wiki: https://px4.github.io/Hawkeye
Hawkeye in the PX4 User Guide: https://docs.px4.io/main/en/sim_hawkeye/index
PX4 Flight Review: https://review.px4.io
Dronecode Foundation: https://dronecode.org