
Three Voice Apps, One Connection Pattern
There are not many Realtime API examples on the internet, and the ones that exist get complicated quickly. The official samples reach for WebRTC and ship thousands of lines of connection handling before you write anything of your own, which is a lot to wade through when all you want is something to start from.
This tutorial walks you through three small applications that each do one useful thing: an audiobook reader that narrates a text file, a SIP phone system you can call from a real phone number, and a translation app that listens in one language and speaks in another. The focus throughout is minimal code to get you up and running. By the end, you will have all three working locally and you will recognize the same connect, send, and stream pattern underneath each one. As usual, you can follow along with the written tutorial below or the video from the livestream.
Everything here is Python over WebSockets rather than WebRTC. WebRTC is used heavily for video and works well for tunneling images and video through web browsers, but the WebRTC version of the translation app runs to roughly 5,100 lines, while the WebSocket version below is about 200.
As usual you can follow along with the video or read it in article form below:
Realtime API Recap
The arrangement is simpler than “realtime voice” makes it sound. Your Python code is the server, it opens a WebSocket to the OpenAI API, and it authenticates with the same API token you already use everywhere else. There is no signalling service and no media server in between.
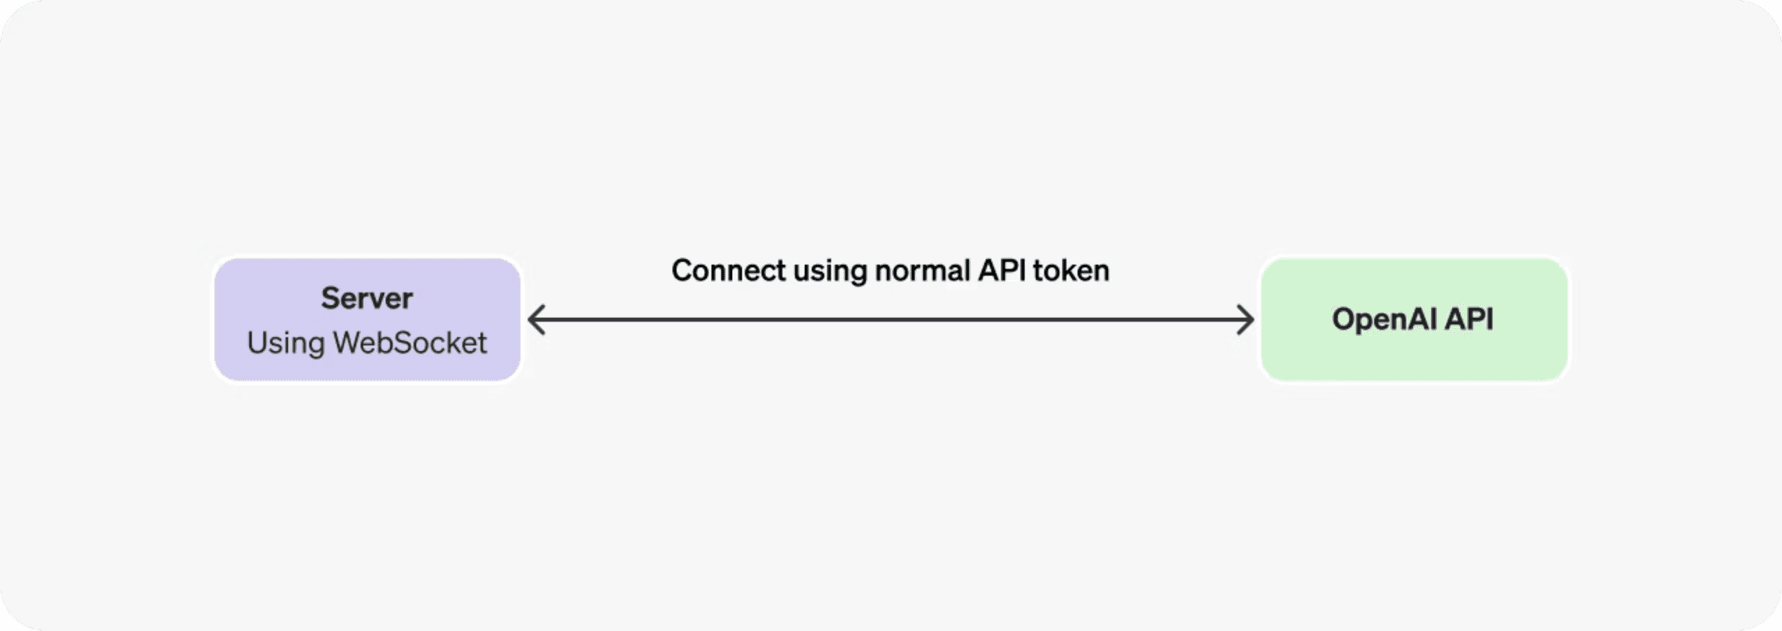
hello-world/minimal_realtime.py is the whole idea in one file, with no voice involved, just text in and text out. It imports the standard JSON, filesystem, and argument libraries along with a local config module holding the API key, then opens the connection with the model named in the query string and the bearer token in the header.
Once the socket is open you stop thinking in requests and start thinking in events. Two of them send a prompt: conversation.item.create defines a new user message carrying the prompt as input_text, and response.create asks for a response with text output only.
The reply comes back as events too. The loop reads incoming events and checks the type of each one: response.output_text.delta carries an incremental piece of text, which prints immediately, and response.done means the answer is finished, so the loop prints a newline and exits. Streaming the response as it arrives instead of waiting for a finished payload is the reason these models feel fast, and all three applications depend on it.
Run it and the text arrives a fragment at a time: “Hello there! So nice to meet you.” One detail worth remembering for your own projects is that conversation items are not limited to text. The same mechanism accepts text, voice, and images.
Project Setup
The example projects live in the godfreynolan/realtime-api2 repository, one folder per application:
hello-world/is the minimal client above, inminimal_realtime.py.audiobook/holdsaudiobook_reader.pyalong with the Dracula text used as sample input.sip/holds the Flask webhook server for a VoIP application,app.py.translation/holds the live translator,hotel_translator.py.
Each folder is self-contained with its own requirements.txt, so create a virtual environment per project and install from there.
Every folder also has a config.py, which is where the scripts read your key as config.OPENAI_API_KEY. The SIP project needs a second value, config.OPENAI_WEBHOOK_SECRET, which you generate later when you create the webhook.
The Audiobook Reader
Podcasts and audiobooks are easy to love and expensive to subscribe to, and the Realtime API gives you the chance to make your own. The first app downloads a book from Project Gutenberg, in this case Dracula, and turns it into something you can listen to.

The application is only the orchestrator. gpt-realtime-2 performs the speech synthesis, and the text moves through seven stages on its way to the speakers:
Text file. The source document is loaded for processing.
Read and chunk. The text is read and divided into manageable chunks.
Python application. The core logic coordinates the pipeline.
WebSocket Realtime API. A persistent connection streams data in real time.
gpt-realtime-2 speech generation. The model turns text into natural-sounding audio.
Audio streaming events. Audio comes back as playback events rather than a file.
Speaker playback. The audio is rendered to your output device.
The difference from a traditional text-to-speech API is where the waiting happens. A conventional service generates the entire audio file before playback can begin, so a long passage means a long silence up front. The Realtime API starts sending audio almost immediately.
Establishing the Realtime Session
A single persistent session is created for the entire audiobook rather than one per chunk. During setup the application specifies the voice, the instructions, and the output modalities, and keeping that one connection alive dramatically reduces latency because each chapter or chunk does not require a new HTTP request.
SAMPLE_RATE is 24000, and wait_for_event blocks until the API confirms the session with a session.updated event, so nothing is sent before the configuration has taken effect.
The instructions field is what converts a conversational model into a narrator. Handed a passage of Dracula, gpt-realtime-2 will otherwise treat it as something to reply to.
Streaming Audio Generation
Each text chunk is submitted as a conversation item and a response is requested. The prompt wraps the passage with a reminder not to announce chunk numbers, and "conversation": "none" keeps chunks independent so the model reads each one as fresh text rather than as a reply to the last.
The Realtime API returns a stream of audio delta events instead of a completed audio file. Each delta is decoded into PCM samples and immediately played, which lets the next chunk be generated while the current one is still being spoken.
Note that response.done is not treated as automatic success. The handler checks the response status and raises with the status details if the model stopped for any reason other than completing, which is what stops a truncated chapter from being written silently into your WAV file.
Event Loop and Production Considerations
The application follows a simple asynchronous event loop, waiting for each chunk’s response to complete before advancing to the next. The architecture is event-driven and scales well to very large books, because memory usage stays nearly constant no matter how long the text is.
Before you press play, one detail matters for Gutenberg books. The download opens with pages of licensing text and notes about where the book was originally published, none of which you want narrated, so the script strips the Gutenberg header and footer by default. From there the flags cover the usual cases:
python audiobook_reader.pynarrates the first chunk and savesout/dracula.wavpython audiobook_reader.py --playplays the audio live while saving itpython audiobook_reader.py --max-chunks 0 --output out/dracula-full.wavnarrates the whole bookpython audiobook_reader.py --voice cedar --max-chunks 3samples a different voicepython audiobook_reader.py --dry-runshows the chunking without calling the API-max-chunksdefaults to 1 so you can check the voice and the chunking cheaply before committing to a novel. Narrating all of Dracula cost about four dollars and ran to the end without failing.
For a production version, the obvious additions are checkpointing so an interrupted run can resume, reconnect logic, cached audio for repeated passages, multiple narrator voices, chapter metadata, and subtitle generation.
The one real disappointment is the delivery. Clarity and latency are both good, but the voices are a bit monotonous, and across a whole book that flatness wears on you. ElevenLabs has intonation that can sound like someone performing the book, and the realtime voices will get there, but they are not there yet.
The SIP Phone
SIP is a protocol used to make phone calls over the internet, and with SIP and the Realtime API you can direct incoming phone calls straight to the API. The end goal for this app is being able to call ChatGPT while on a long drive and ask it questions, though the same setup underpins a customer service line or anything else you would put behind a phone number.
There is a much more complicated WebRTC version of this that has been used in the past. SIP is a lot simpler. Five pieces sit between the caller and the model:
Someone dials the phone number you bought from your provider
The provider’s SIP trunk sends the call to the OpenAI SIP endpoint for your project
OpenAI triggers your webhook with a
realtime.call.incomingeventThe Flask app verifies the webhook, extracts the
call_id, and accepts the callA gpt-realtime-2 session is configured to answer it
The key idea is that the audio path is handled by SIP and OpenAI, while your Python app controls the session and its behavior. You do need a SIP provider, and the default in the US is typically Twilio. Because OpenAI calls into your server rather than the other way around, config.py holds two secrets: the API key and a webhook secret.
Webhook Entry Point
This is the security-sensitive part of the app, because the webhook endpoint should not trust arbitrary HTTP requests. client.webhooks.unwrap verifies the signature against the configured webhook secret and the handler returns HTTP 400 when it is invalid. Anything that is not realtime.call.incoming is ignored.
Once a valid incoming call event arrives, event.data.call_id becomes the identifier used by the Realtime call-control endpoints. The accept POST is the bridge from telephone signalling into a live realtime session, and raise_for_status fails fast rather than leaving a caller listening to silence. The daemon thread matters because the Flask webhook must return quickly while the realtime call continues independently.
Accepting the Call
The configuration sent with the accept is where the assistant’s phone persona is defined. This sample sets the type, the model, and one concise instruction.
In a production assistant, this is where you would add a voice, tools, a call-transfer policy, business context, and safety rules before the caller is connected to the model.
Monitoring and Controlling the Live Call
Once the call is accepted, the app opens a WebSocket to wss://api.openai.com/v1/realtime?call_id=..., which attaches it to the live call session. It immediately sends FIRST_RESPONSE, telling the assistant to greet the caller and ask how it can help, then prints every server event.
In production this monitoring loop is where you would respond to tool calls, log transcripts, detect escalation conditions, transfer the call to a human, or hang up. Every caller also gets a distinct call_id, so several calls can run at once without interfering with each other.
Configuring ngrok, OpenAI, and Twilio
The code is a little over fifty lines, but the configuration may take you a while. There are three services to connect.
Tunnel your localhost with ngrok
The Flask server runs on your laptop, so the outside world needs a tunnel to reach it. If you do not have ngrok, download it from the Windows App Store.
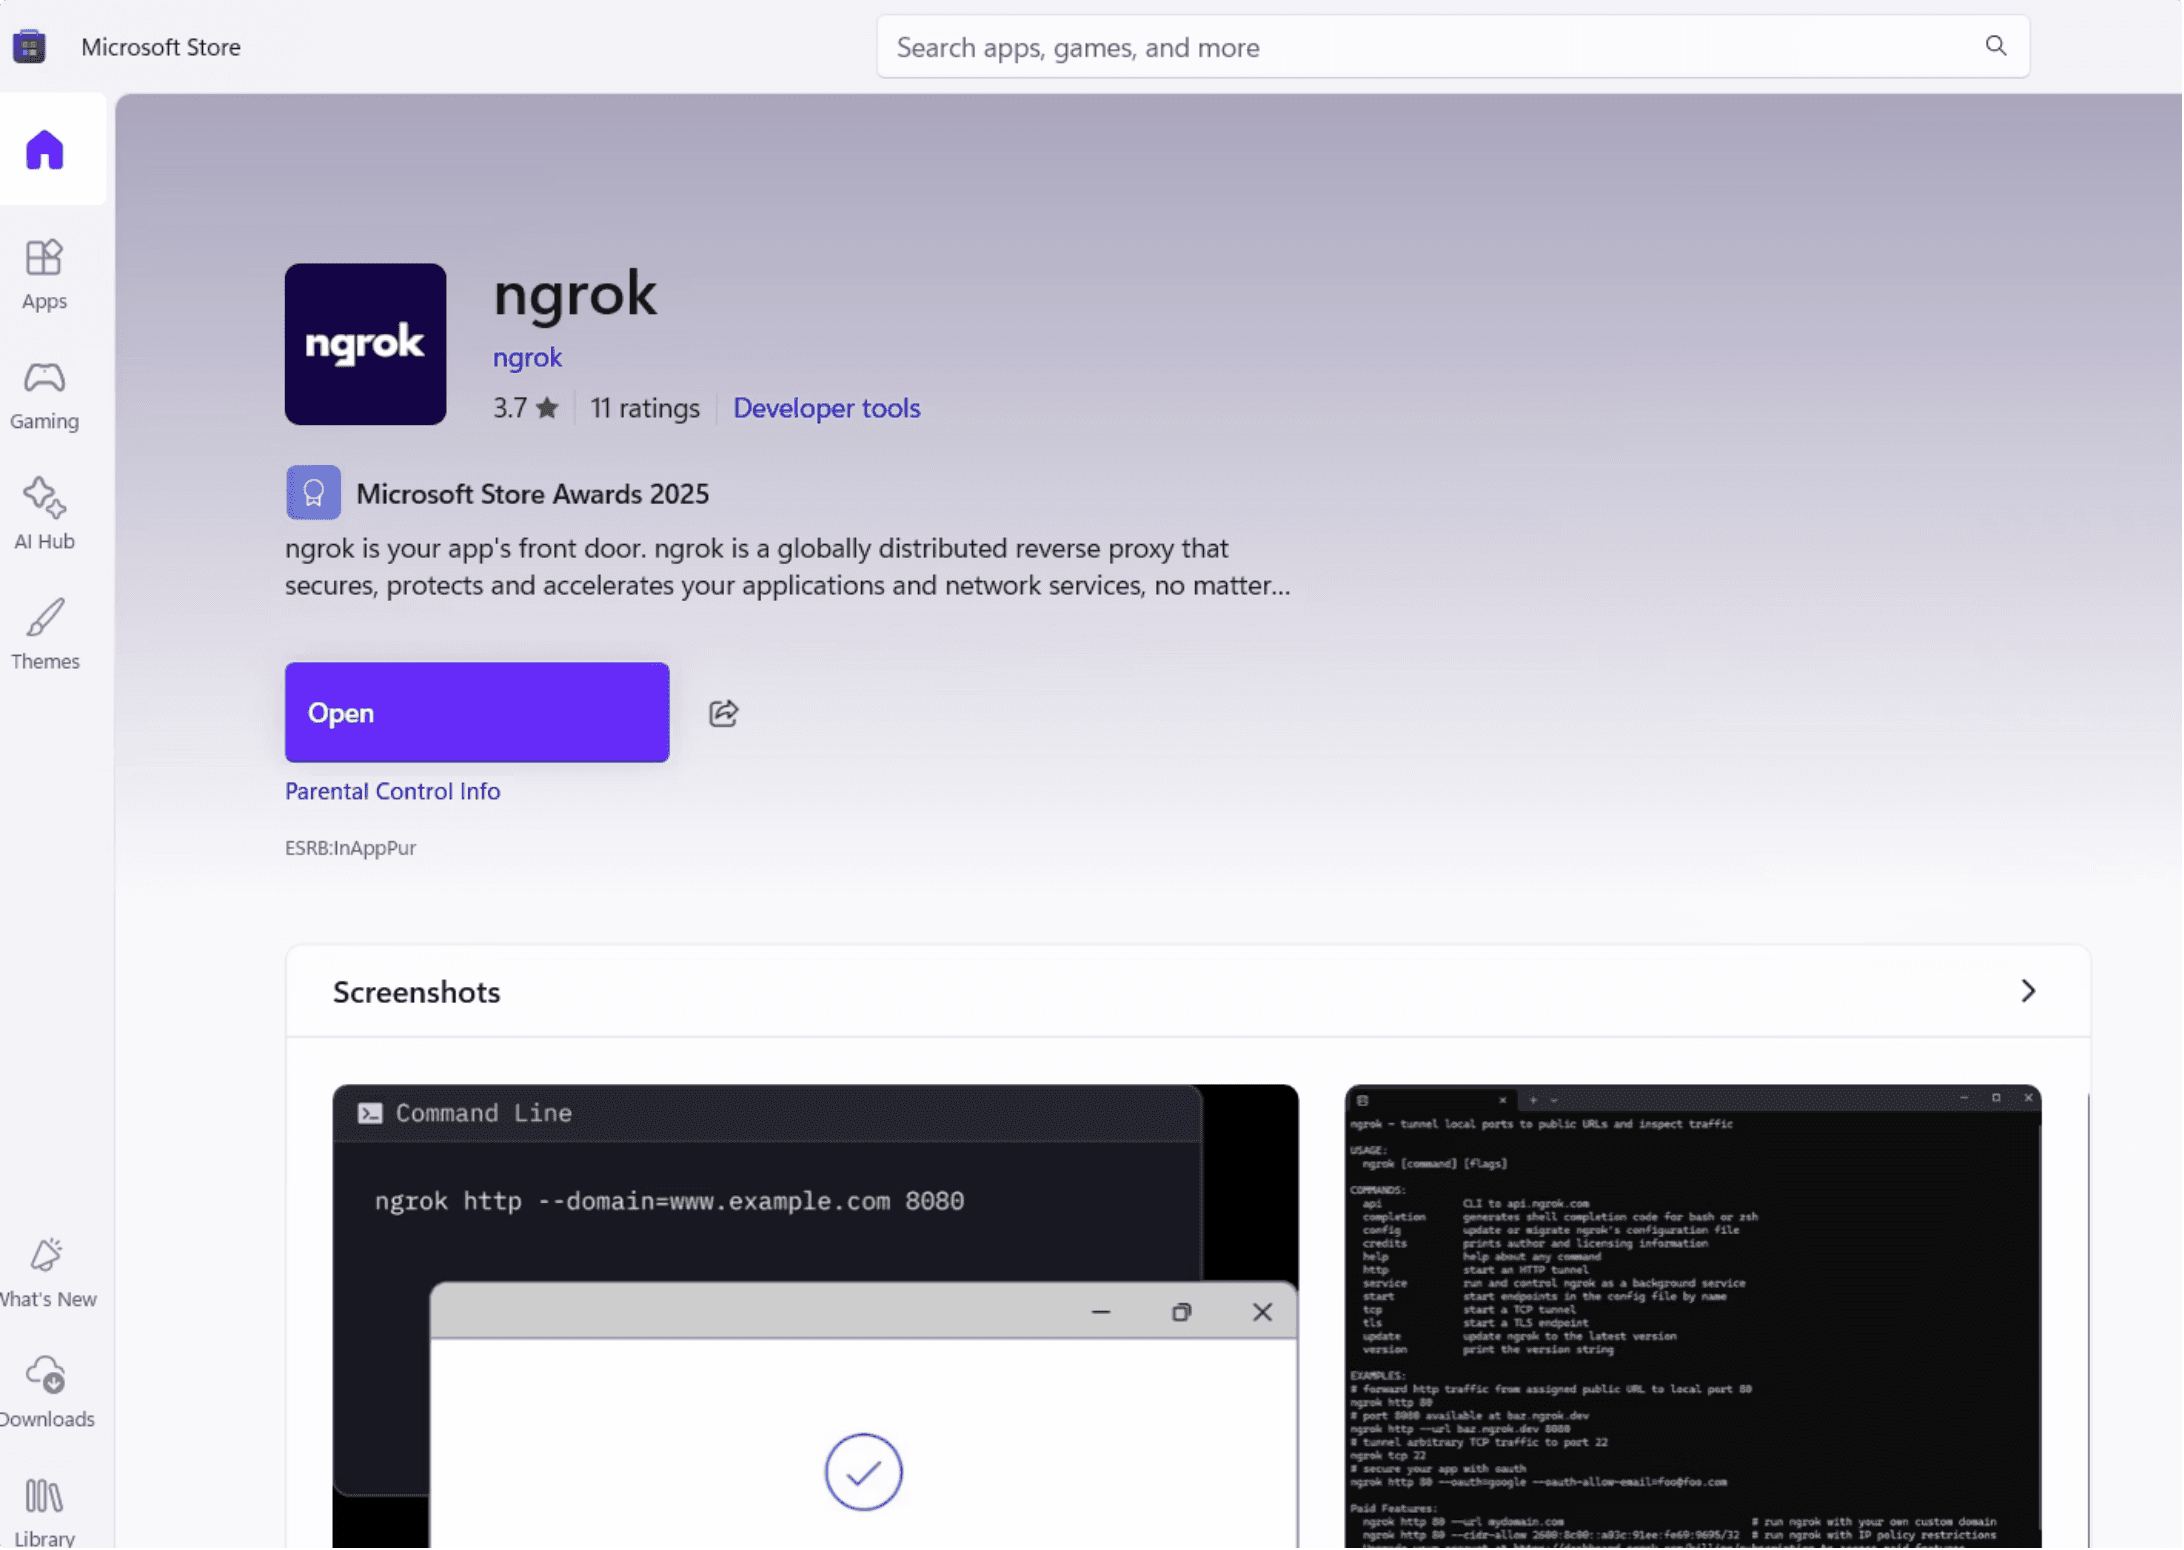
Run ngrok http 8000 to create a real domain connected to your localhost.
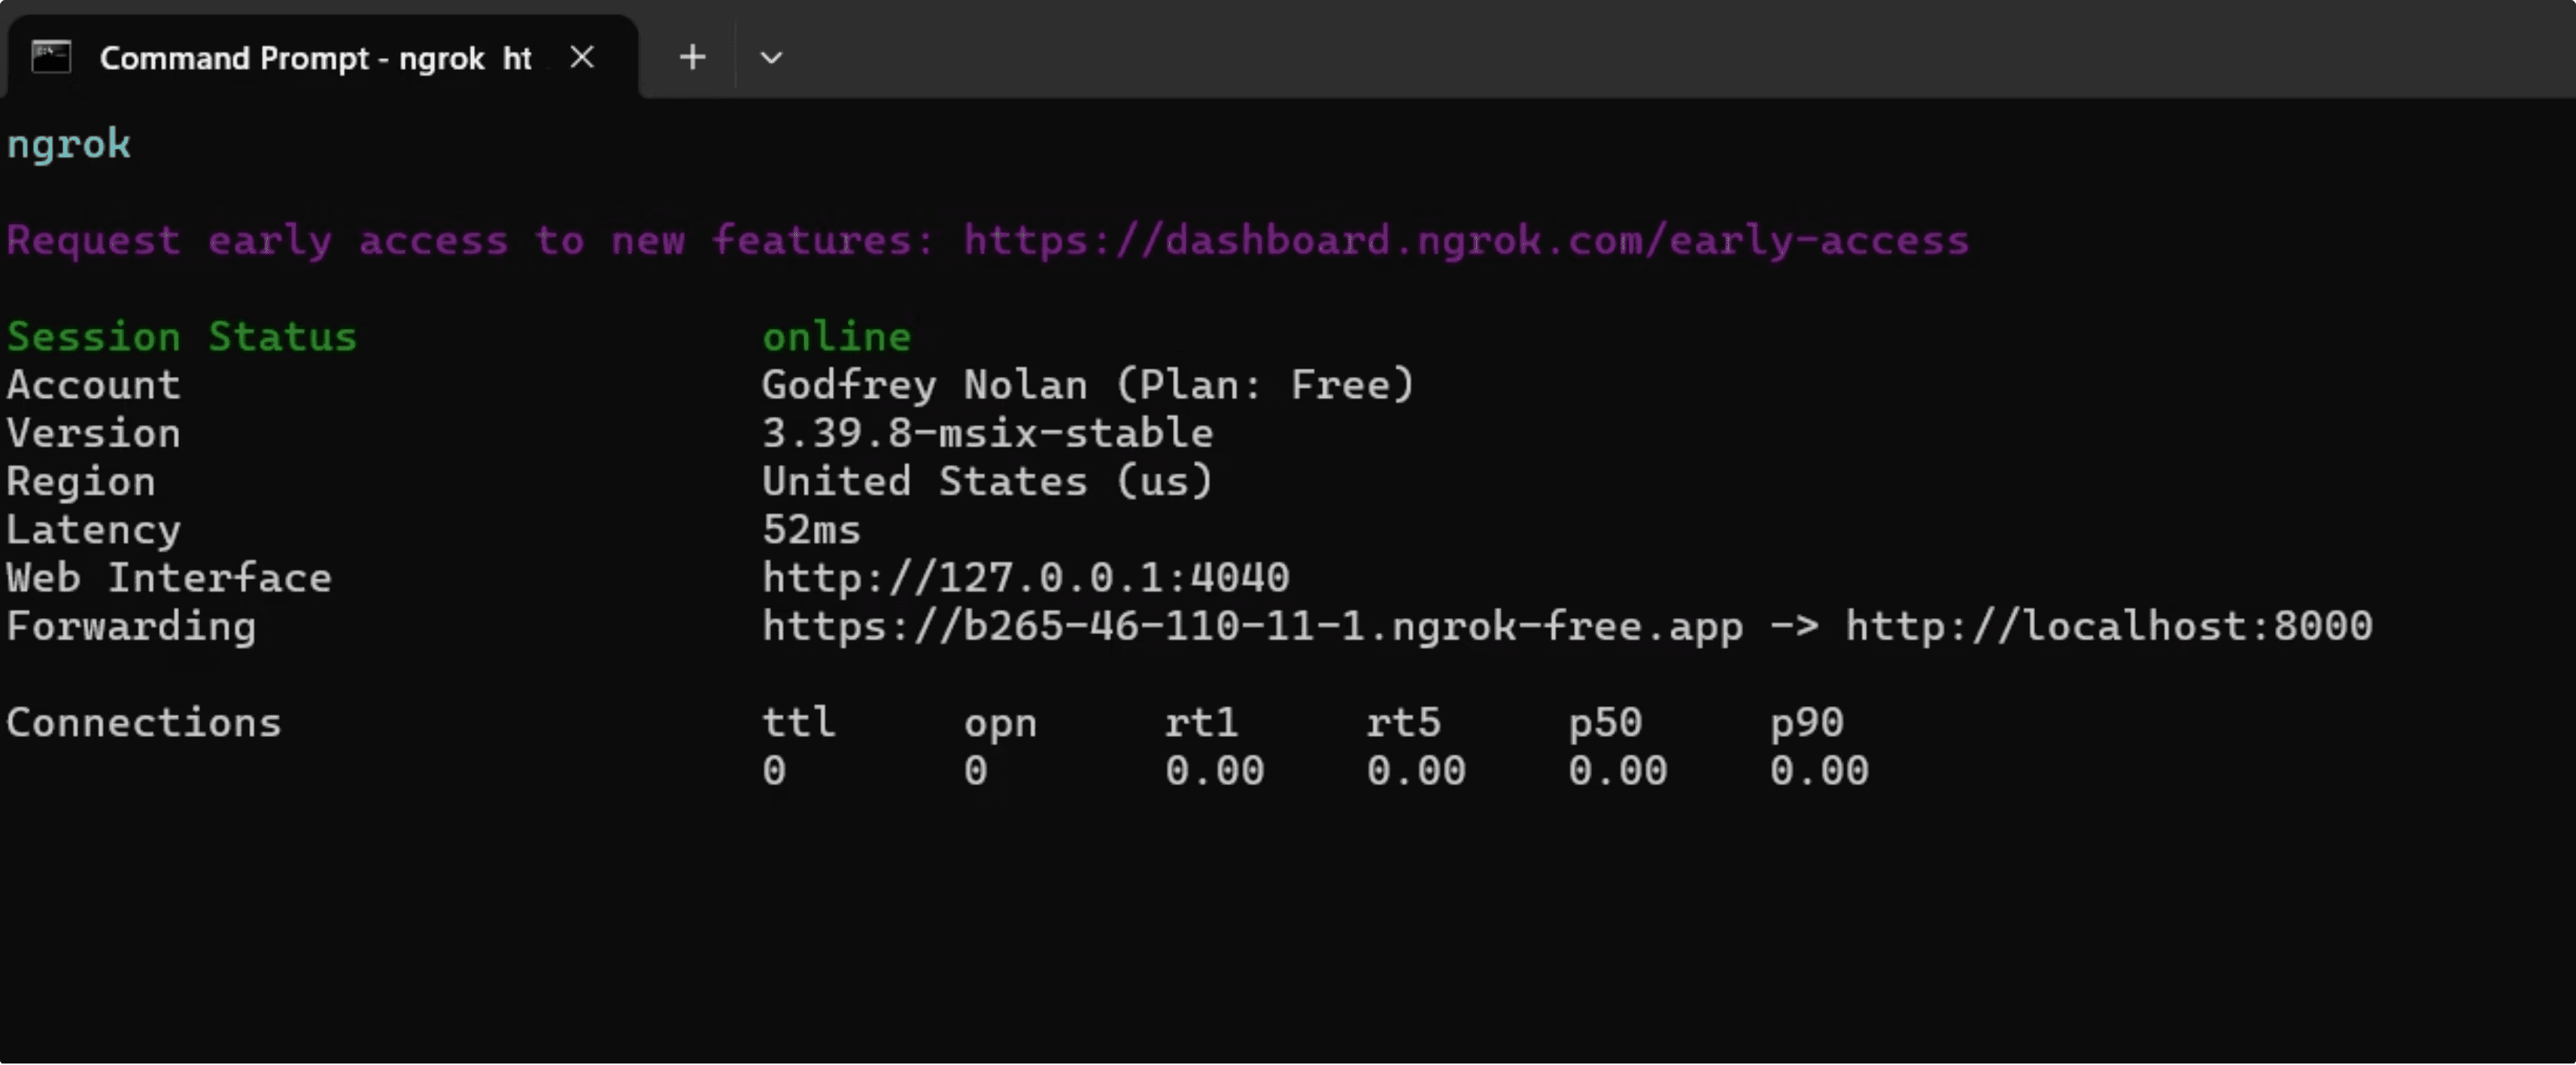
One caveat to plan around: the free domain changes each time, so you have to pay for an ngrok subscription if you want the domain it provides to be permanent.
Create the OpenAI webhook
In the OpenAI playground, go to organization settings, then projects, then webhooks. Enter the name and the URL from ngrok, change the event type to realtime.call.incoming, and click create.
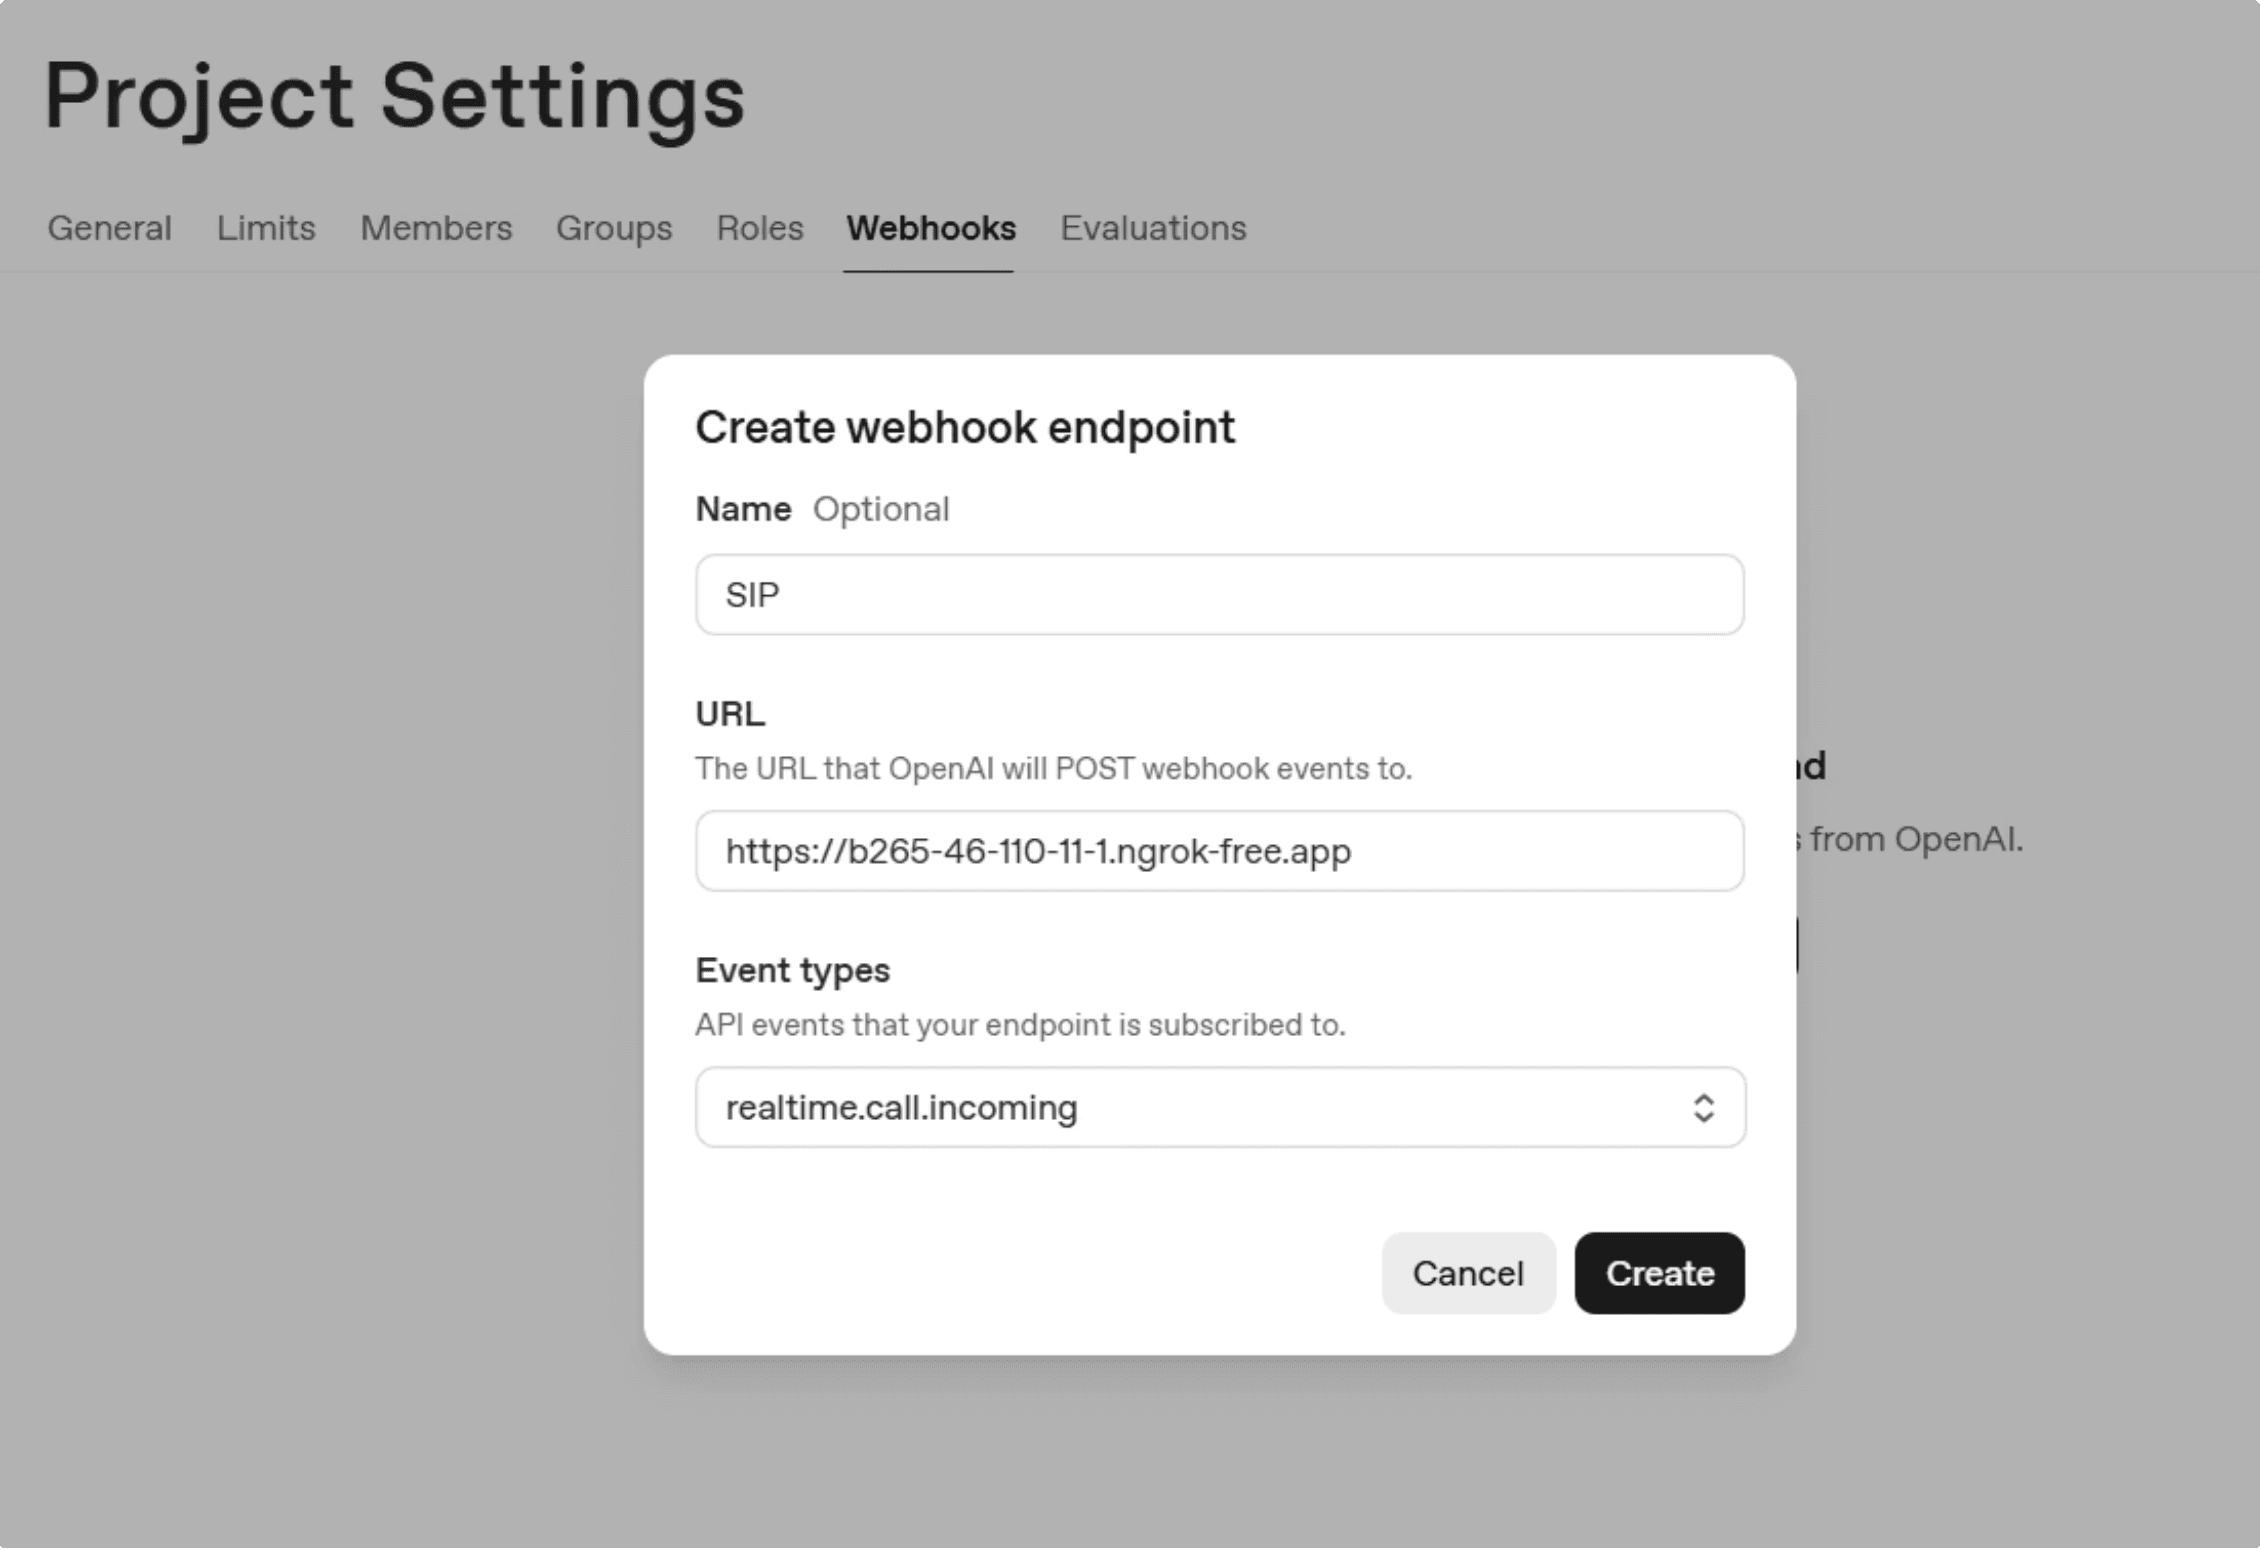
This gives you a webhook secret for your config file. While you are in project settings, click the general tab to get the project ID, which Twilio needs next.
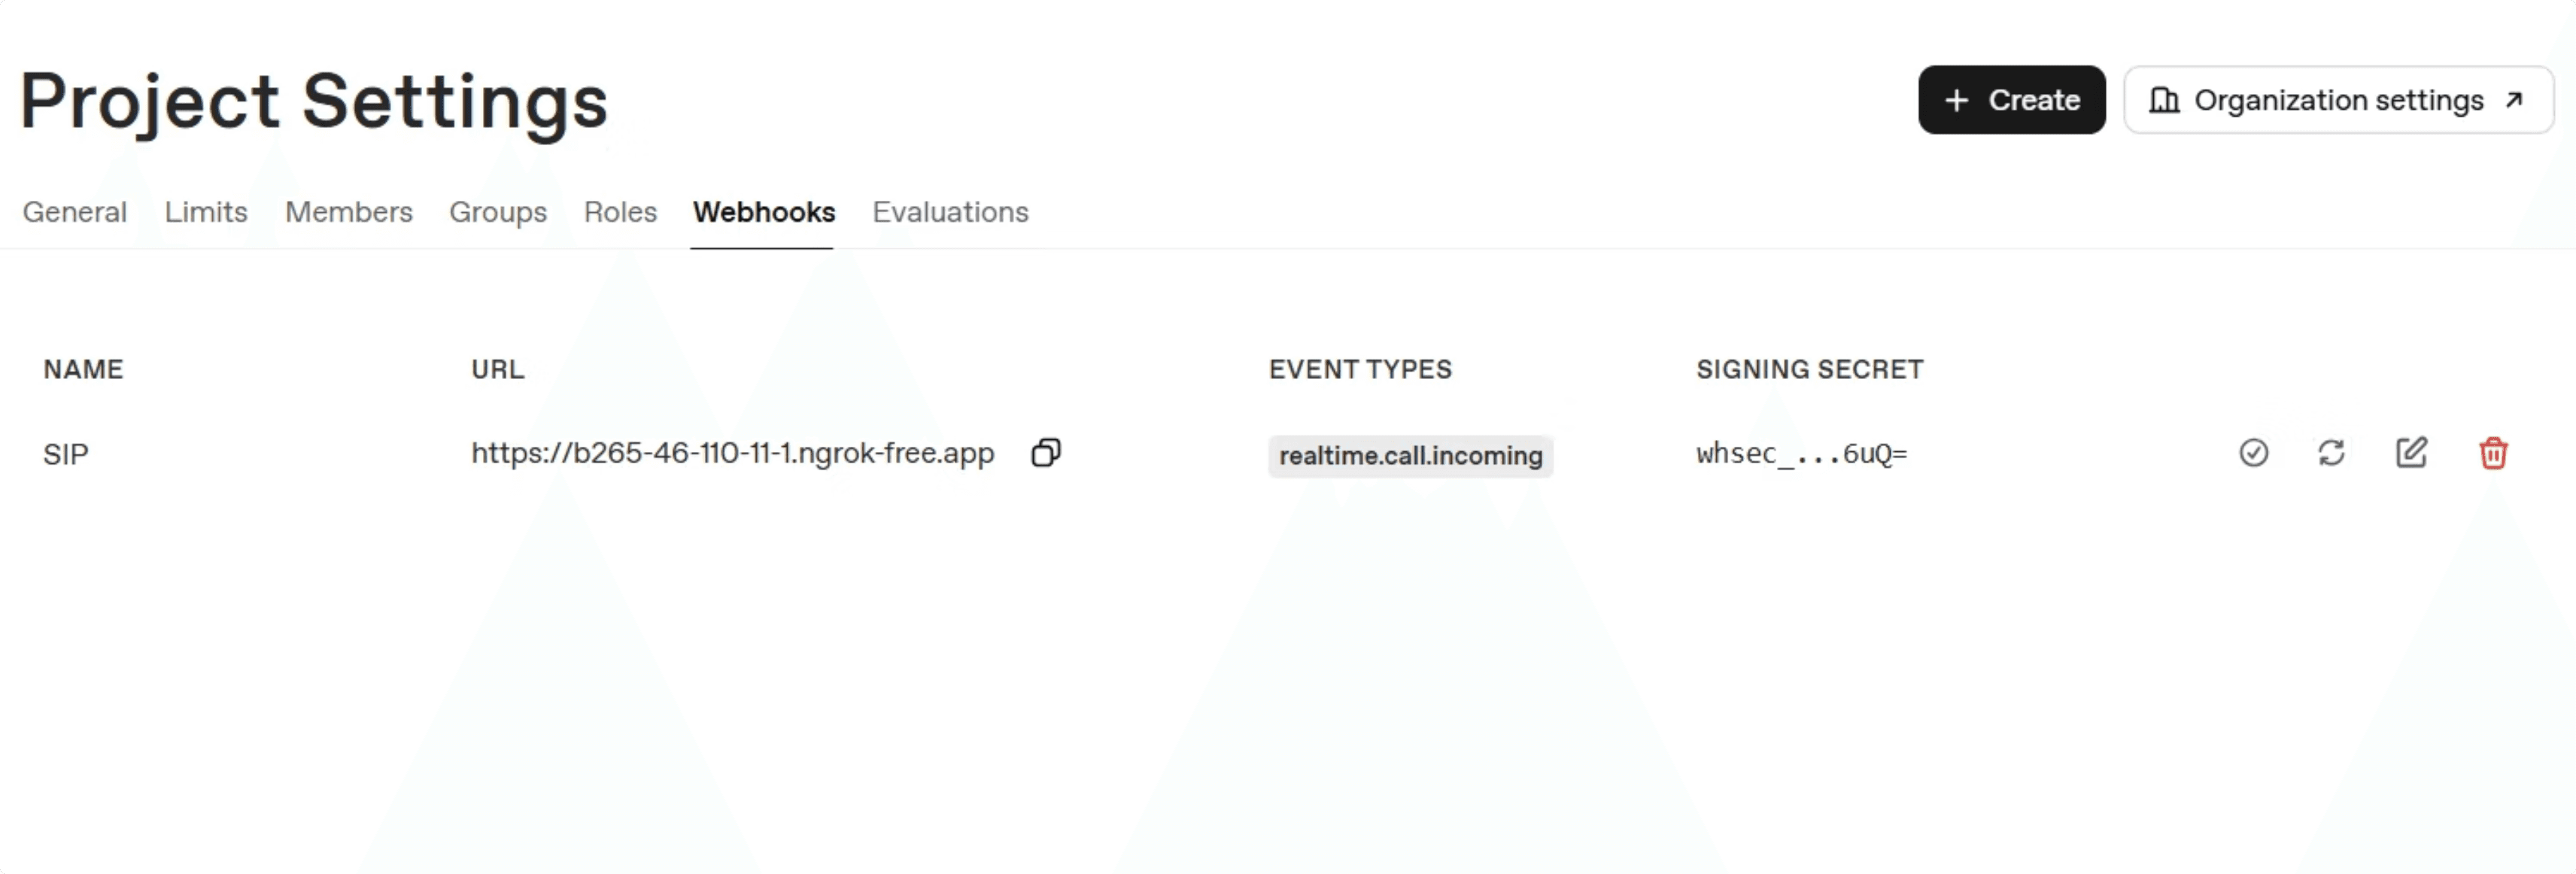
Point Twilio at your project
Sign up for a Twilio account and pay for a single voice phone line, which is around $1.50 per month. Search for TwiML Bin, enter your project ID, and save.
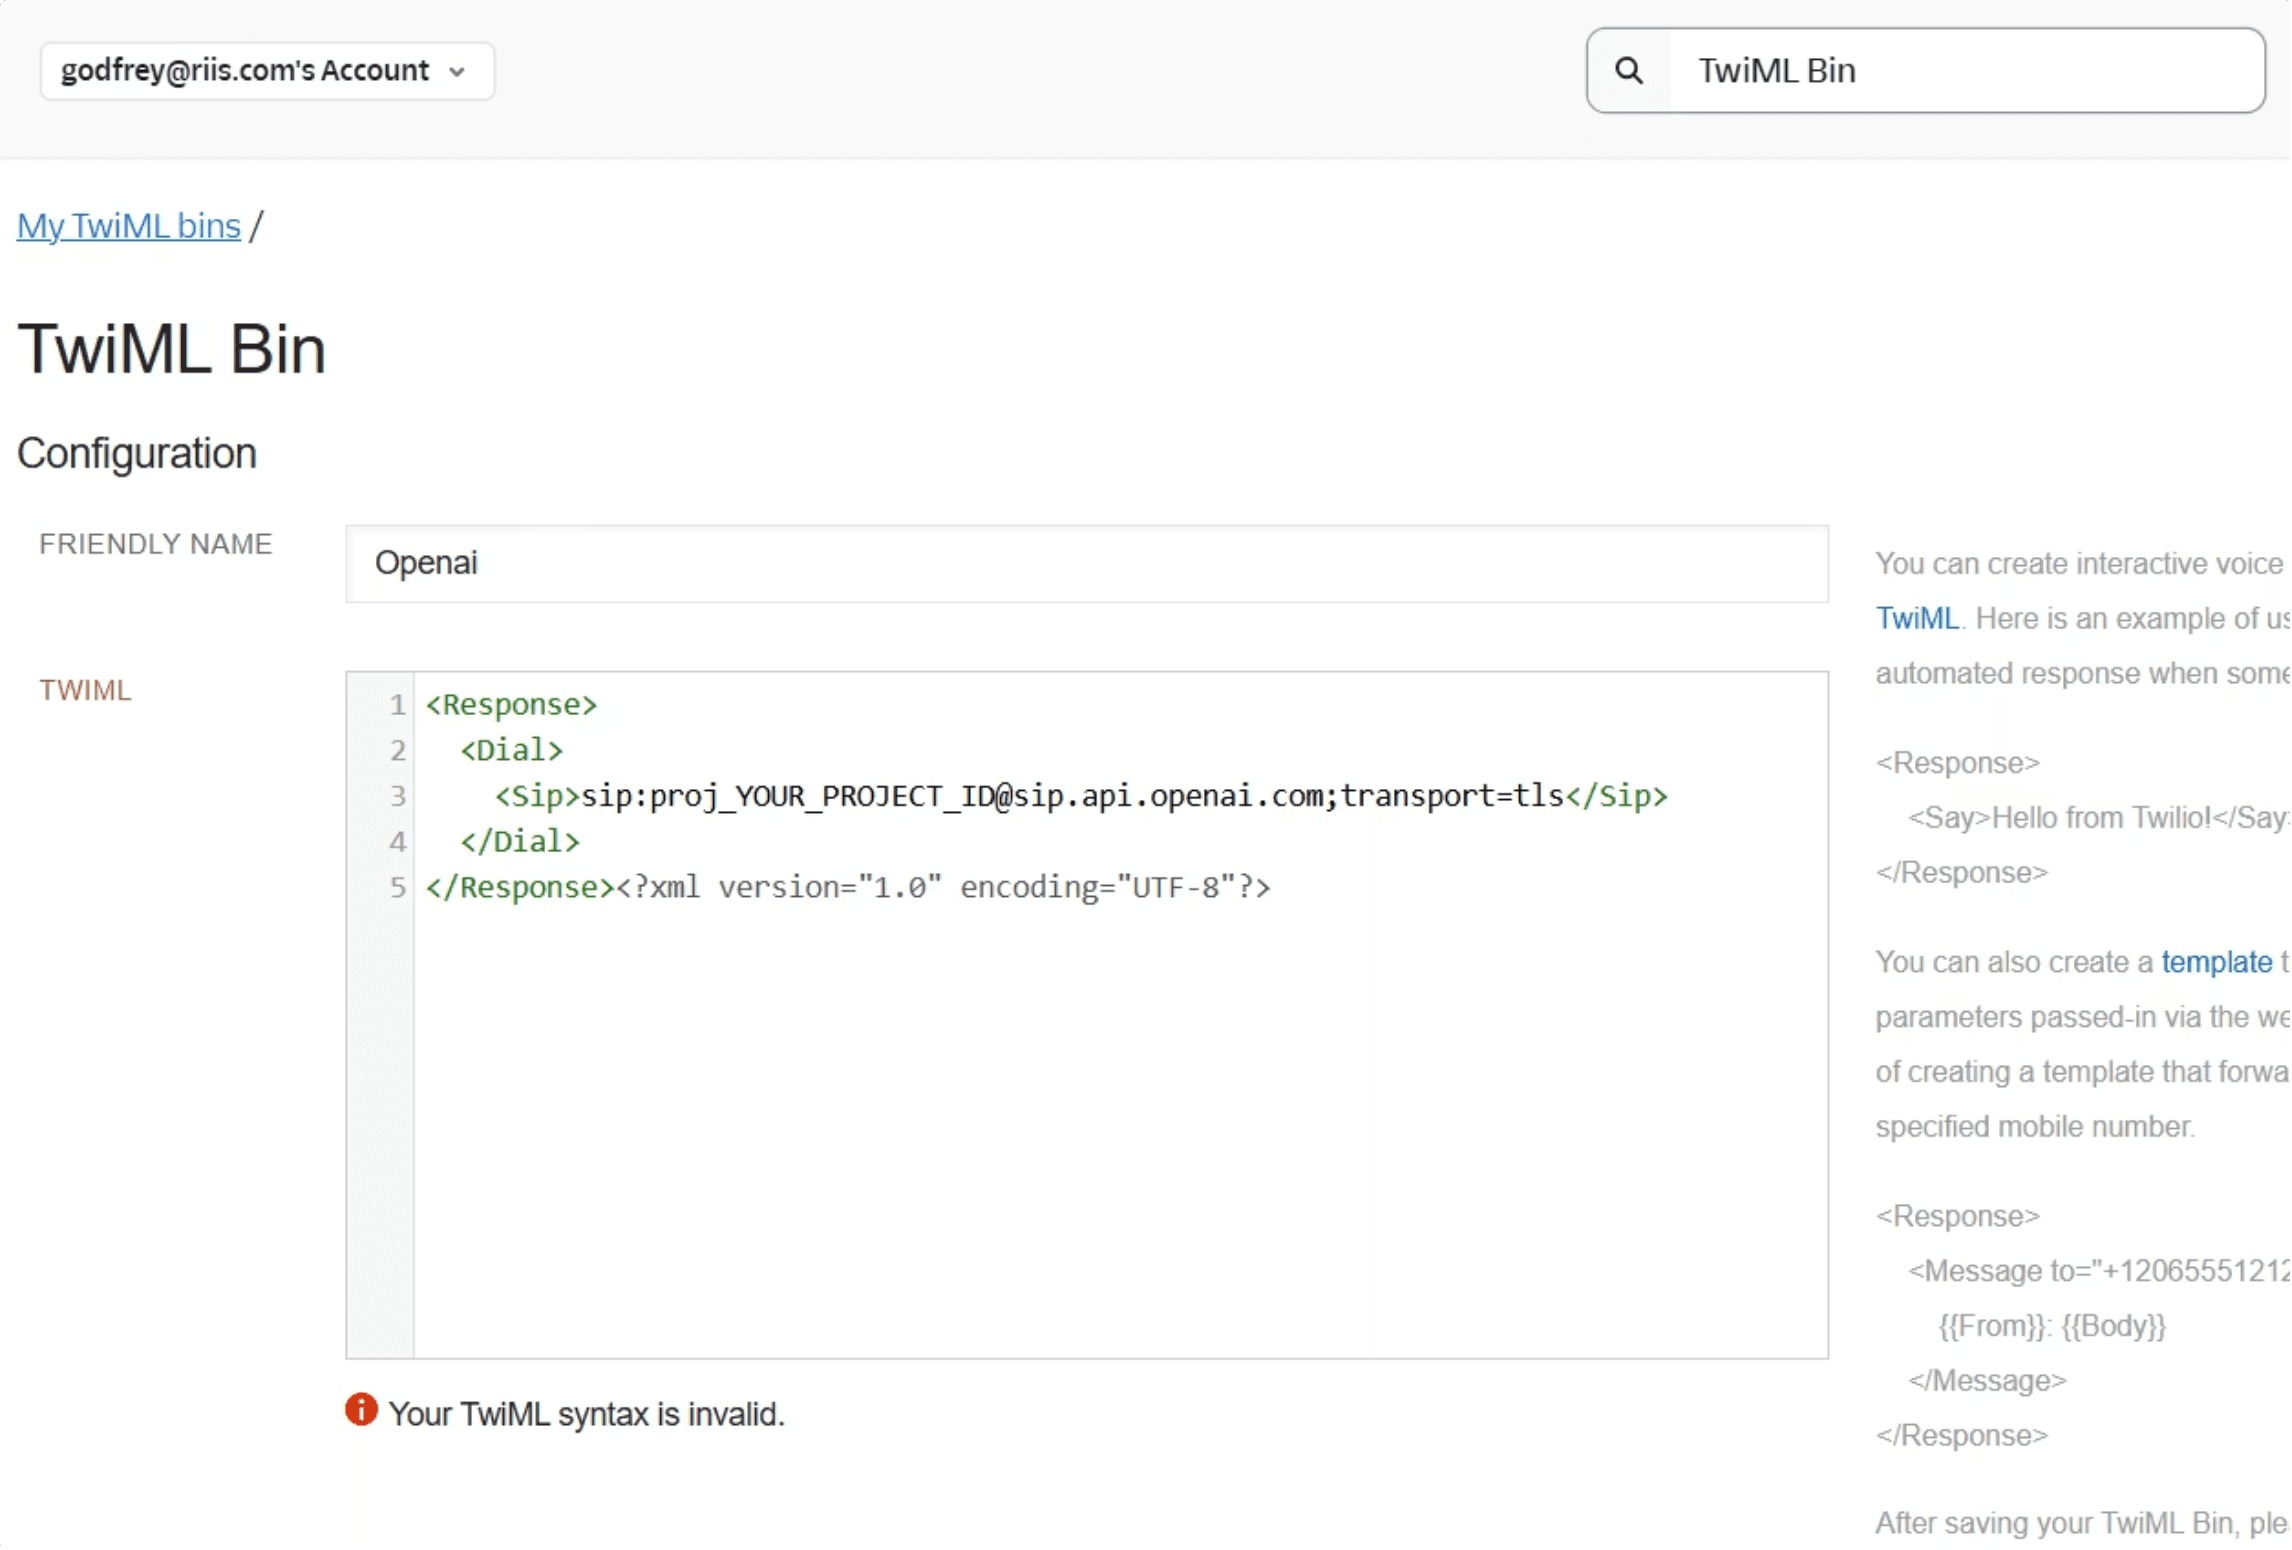
If Twilio reports that the TwiML syntax is invalid, look for a stray XML declaration after the closing tag and delete it. Then go back to the Twilio admin dashboard and change the setting for “a call comes in” to the TwiML Bin you just created.
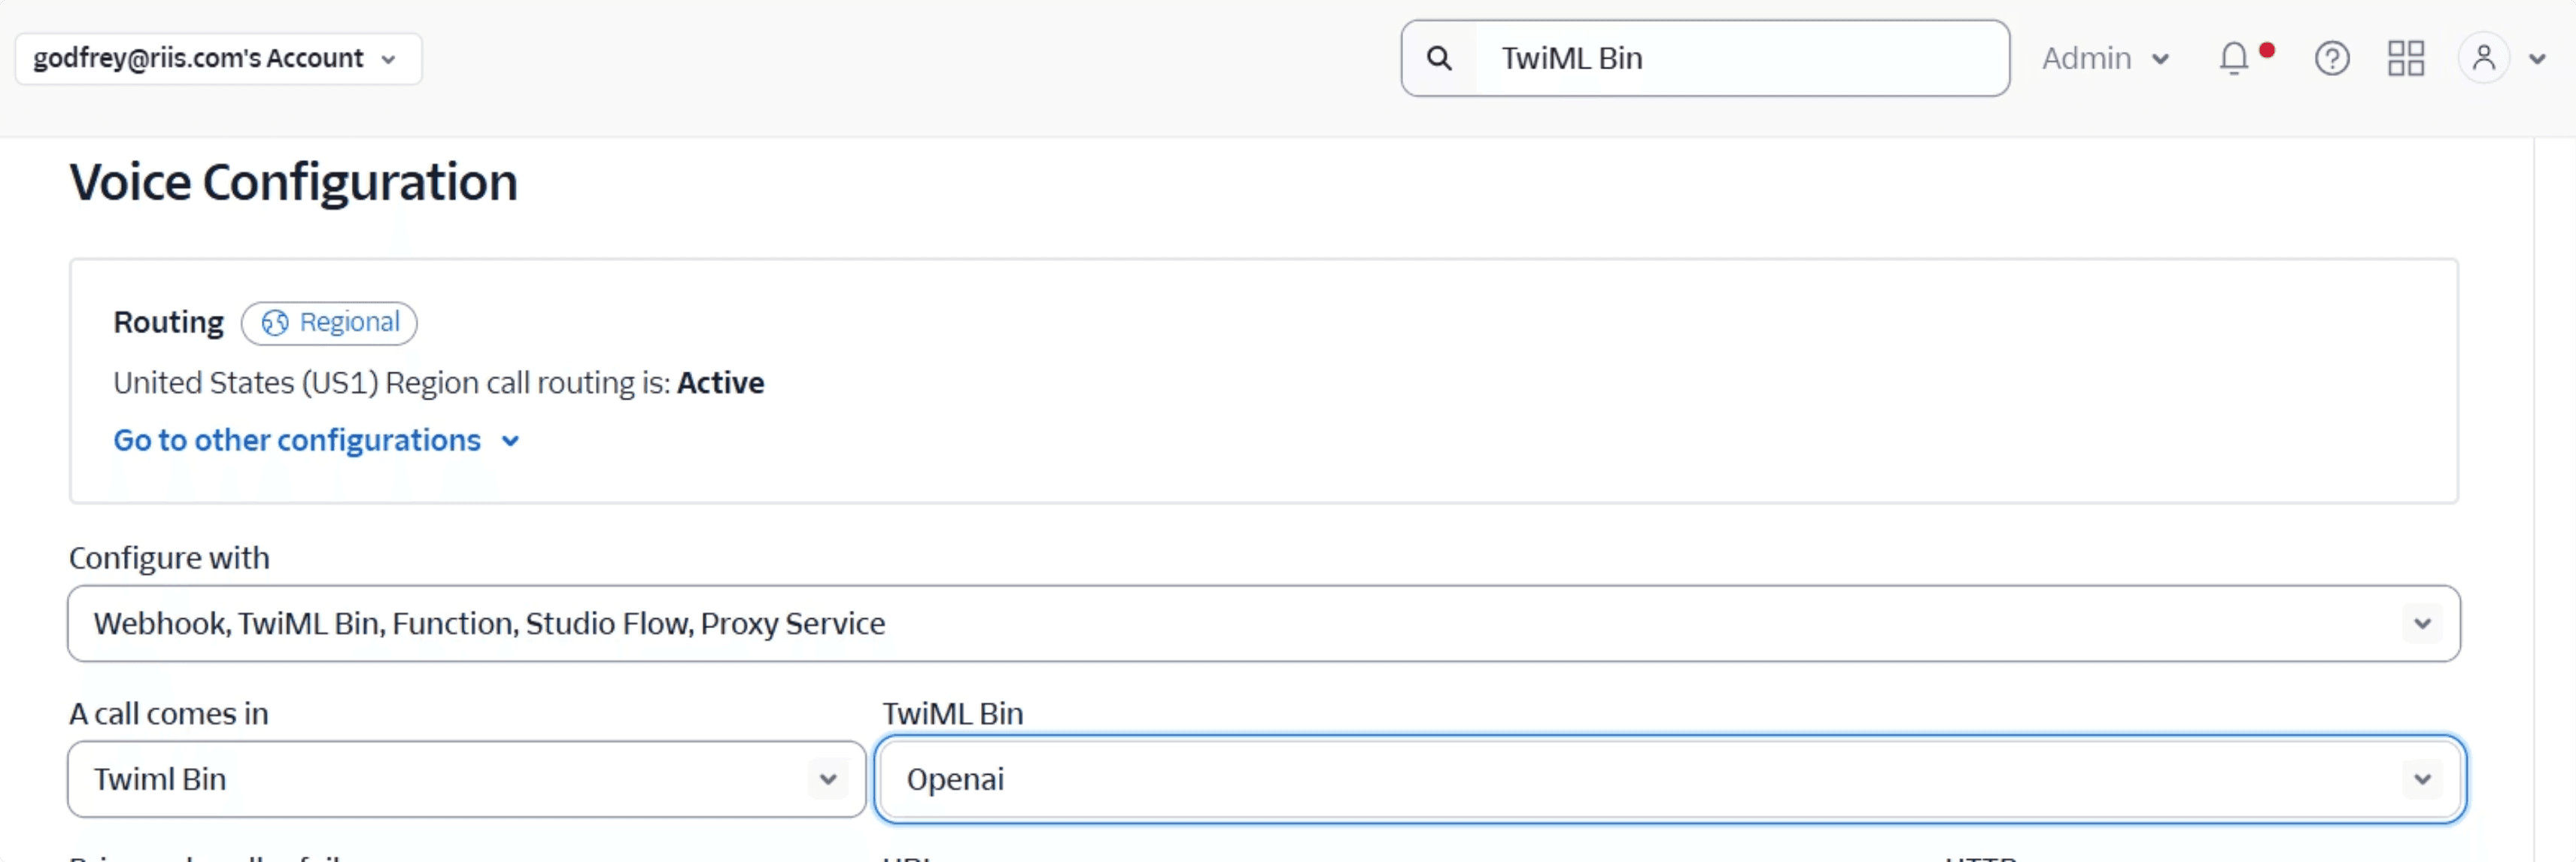
Now you are good to go and can call ChatGPT on your phone number. Ask it the capital of Ireland and it answers Dublin.
You can see the whole flow in action in this video:
The Hotel Translator
The final app uses gpt-realtime-translate to turn your voice into another language, so a bit of basic French or Spanish is enough to get by: it tells you what to say. The guest speaks into the mic, Python captures raw audio, and that audio is streamed to the Realtime Translations WebSocket. The model returns translated speech as audio deltas, which the app writes directly to the speaker.
The important distinction from a batch translation app is that nothing waits for a completed recording. The app streams short chunks continuously and plays translated output as soon as it arrives. Audio runs in both directions over one WebSocket: raw 16-bit PCM mic chunks at 24 kHz going out, translated audio deltas and transcript deltas coming back.
Session Setup: Model, Endpoint, Language
The session setup is minimal. The application sets a 24 kHz audio rate, chooses the gpt-realtime-translate model, and connects to the translations WebSocket endpoint.
At the CLI level the target language defaults to Spanish and can be changed to French, Japanese, or another supported language code.
After connecting, the app sends a session.update message telling the API which output language to produce. Run it with --to es and English speech comes back as Spanish audio for the clerk.
Microphone Streaming: Callback, Queue, WebSocket
The audio input side is split into two responsibilities. The sounddevice callback is time-sensitive, so it should not perform network I/O. It copies the incoming PCM bytes, calculates a level for the status meter, and puts the chunk into a bounded queue.
The queue is deliberately bounded at 30 chunks so the app can drop audio under pressure instead of consuming unlimited memory, and the dropped counter tells you when that is happening.
A separate sender thread drains the queue, base64-encodes the audio, and sends session.input_audio_buffer.append events over the WebSocket. It uses a short timeout on get so it can keep checking the stop flag rather than blocking forever on an empty queue.
One practical note on the audio library. Codex kept pushing PyAudio, which is insanely, annoyingly difficult to set up on a PC. sounddevice installs cleanly and works.
Receiving Translations
The receive loop is the mirror image of the send loop. It blocks on WebSocket receive, parses each event, and switches on the event type. Audio deltas are base64-decoded and written directly to the RawOutputStream, and transcript deltas are printed so you can see both what was heard and what was translated. The loop also listens for errors and session.closed so it can exit cleanly.
An error prints and the loop keeps going, while session.closed is the only event that ends it, so a recoverable hiccup does not tear down a working session.
Four threads share the work while it runs. The sender moves microphone audio to the socket, the receiver moves translations to the speaker and transcript, a status thread shows the mic level with sent and dropped counts, and the main thread waits for the receiver to finish or for Ctrl+C. Start it with a target language code:
Use earbuds or keep the speaker away from the mic to avoid audio looping. If the laptop insists on listening to a connected HDMI display instead of your microphone, --list-devices prints every audio device and --test-mic shows a live level meter for ten seconds.
For a production hotel scenario, the biggest additions would be echo control, push-to-talk or turn-taking, stronger reconnect handling, a simple clerk-facing UI, and consent-aware transcript logging.
This video demonstrates how the script runs (note it’s missing the response audio because it’s a livestream):
Conclusion
You now have three working applications on one API: an audiobook reader that narrated an entire novel for about four dollars by holding a single session open and playing deltas as they arrived, a phone assistant reachable on a real Twilio number through SIP with a little over fifty lines of Flask and a verified webhook, and a live translator built from a thin microphone callback, a bounded queue, and four cooperating threads. The plumbing barely changes between them, so once one is running the next is mostly a different model and a different session config. The voices are still more monotonous than a dedicated engine like ElevenLabs, which is the one place these apps show their age, but for latency, simplicity, and getting something real on the phone today the WebSocket path is hard to beat. The introduction to the Realtime API covers the model family and turn detection in more depth, and Fly a Drone with a Phone Call shows how far the phone integration can be pushed. We can’t wait to see what you build!
Additional Resources
https://developers.openai.com/api/docs/guides/realtime-websocket
https://developers.openai.com/api/docs/guides/realtime-conversations
https://developers.openai.com/api/docs/guides/realtime-translation
GitHub Repository: https://github.com/godfreynolan/realtime-api2